background image

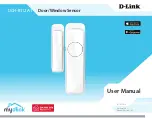
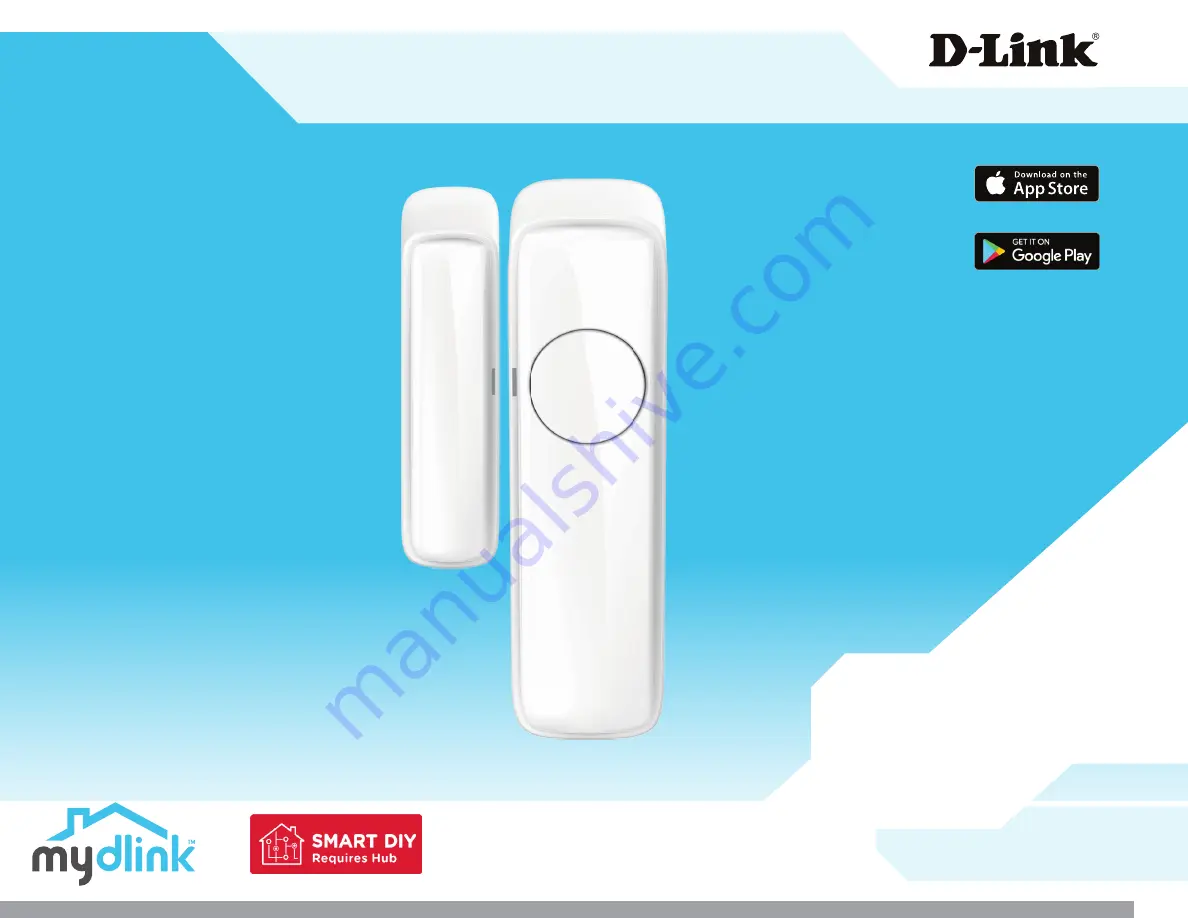
DCH-B112A1

User Manual

Door/Window Sensor

Hardware: A1

Manual Version: 1.00

07/17/2019

Summary of Contents for DCH-B112A1

Page 1: ...DCH B112A1 User Manual Door Window Sensor Hardware A1 Manual Version 1 00 07 17 2019 ...

Page 2: ...nformation Manual Overview Trademarks D Link and the D Link logo are trademarks or registered trademarks of D Link Corporation or its subsidiaries in the United States or other countries All other company or product names mentioned herein are trademarks or registered trademarks of their respective companies Copyright 2019 by D Link Corporation Inc All rights reserved This publication may not be re...

Page 3: ...System Requirements 2 Hardware Overview 3 Main Sensor Unit 3 Magnetic Trigger 3 Installation 4 Safety 4 Before you Begin 4 Wireless Installation Considerations 5 mydlink App Device Setup 6 Using the mydlink App 10 Controlling Your Device 10 Device 11 Troubleshooting 13 Technical Specifications 14 Regulatory Information 16 ...

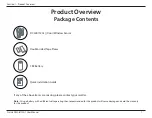
Page 4: ...ny of the above items are missing please contact your reseller Note Using a battery with a different voltage rating than recommended for this product will cause damage and void the warranty for this product Double sided Tape Pieces DCH B112A1 Door Window Sensor CR2 Battery Quick Installation Guide ...

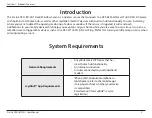
Page 5: ...cations to your mobile device which helps you keep tabs on your home while you are away You can also set it up an au tomation rule to trigger other devices such as the DCS W118 Wi Fi Smart Plug Perfect for turning on off a lamp or more when entering exiting a room Network Requirements A mydlink Smart DIY device that has smart home hub functionality An Internet connection A router connected to your...

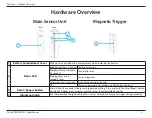
Page 6: ... second 3 times Sensor triggered Solid green for 10 seconds Successfully paired to the hub Off Power saving mode On standby waiting to be triggered 3 Reset Bypass button Press this button to bypass the sensor triggering anything Press and hold the Reset Bypass button until the LED blinks red in order to reset the sensor to factory default settings 4 Alignment notch Use these notches to align both ...

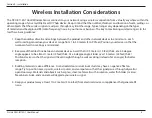
Page 7: ...e the device in liquid or attempt to clean it with liquids or solvents To clean the device disconnect from the power outlet and use a damp towel This device should only be used indoors Before you Begin Plan the location of your devices Verify that your device is within wireless range of a mydlink Smart DIY hub device Mount both the Main Sensor Unit and the Magnetic Trigger with the alignment notch...

Page 8: ...from 1 to 30 meters 3 to 90 feet Position your devices so that the number of walls or ceilings is minimized 2 Be aware of the direct line between network devices A wall that is 0 5 meters 1 5 feet thick at a 45 degree angle appears to be almost 1 meter 3 feet thick At a 2 degree angle it looks over 14 meters 42 feet thick Position devices so that the signal will travel straight through a wall or c...

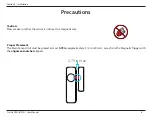
Page 9: ...Precautions Caution Please make sure that the sensor is not next to a magnetic area Proper Placement The Main Sensor Unit must be placed at most 0 79 in approximately 3 4 in 20 mm away from the Magnetic Trigger with the alignment notches aligned 0 79 in max ...

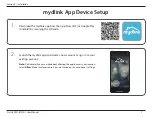
Page 10: ...ate a new account or sign in to your existing account Note On Android if you are asked about allowing the app to access your location select Allow Make sure location services are turned on in your phone s settings 2 Download the mydlink app from the App Store iOS or Google Play Android by scanning the QR code 1 ...

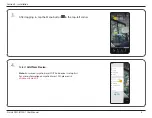
Page 11: ...on 2 Installation After logging in tap the Menu button in the top left corner 3 Select Add New Device Note Ensure your mydlink smart DIY hub device is setup first For more information on mydlink Smart DIY please visit dlink com SmartDIY 4 ...

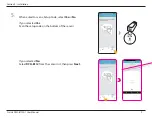
Page 12: ... Manual 9 Section 2 Installation When asked to scan a Setup Code select Yes or No If you selected Yes Scan the setup code on the bottom of the sensor 5 If you selected No Select DCH B112 from the sensor list then press Next ...

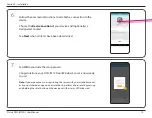
Page 13: ...d Contact Tap Next when all items have been determined 6 Tap OK to conclude the setup process Congratulations your DCH B112 Door Window Sensor is now ready to use Note If you experience issues registering this sensor with your mydlink account or if you purchased an open box or resold unit perform a hard reset by pressing and holding the reset button on the device until the status LED blinks red 7 ...

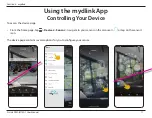
Page 14: ... To access the device page From the home page tap Devices Sensor navigate to your sensor on the carousel or tap on the sensor s icon The device page contains several options for you to configure your sensor Using the mydlink App Controlling Your Device ...

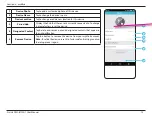
Page 15: ... device 4 Paired Hub Displays the hub that the sensor is currently connected to To change it please factory reset the device 5 Designated Contact Tap here to add remove or edit designated contacts that appear in the rich notification 6 Remove Device Tap this button to remove this device from your mydlink account Note To relink the device reset it to factory default settings and run the setup proce...

Page 16: ...the Internet using the mydlink app you must register your device with a mydlink account You can do this using the free mydlink app Please go to Using the mydlink App on page 10 for more information 2 Why is my sensor not being triggered The Main Sensor Unit must be placed at most 0 79 in approximately 3 4 in 20 mm away from the Magnetic Trigger with the alignment notches aligned ...

Page 17: ...T Automation Tamper detection Device Management mydlinkTM app Physical Dimensions Main Sensor Unit 2 64 x 0 79 x 0 79 in MagneticTrigger 1 82 x 2 68 x 0 79 in Weight Main Sensor Unit 0 49 oz not including battery MagneticTrigger 0 30 oz Power CR2 800 mAh Lithium battery x 1 Battery Life 3 years 15 triggers per day DC 3V Temperature Operating 32 to 104 F Storage 4 to 149 F Humidity Operating 10 to ...

Page 18: ...D Link DCH B112A1 User Manual 15 Appendix A Technical Specifications Certifications FCC IC cUL RoHS Compliance Order Information PartNumber Description DCH B112A1 Smart Door Window Sensor ...

Page 19: ...tion between the equipment and receiver Connect the equipment into an outlet on a circuit different from that to which the receiver is connected Consult the dealer or an experienced radio TV technician for help Non modifications Statement Any changes or modifications not expressly approved by the party responsible for compliance could void the user s authority to operate this equipment Caution Thi...

Page 20: ... autorisée aux deux conditions suivantes 1 l appareil ne doit pas produire de brouillage et 2 l utilisateur de l appareil doit accepter tout brouillage radioélectrique subi même si le brouillage est susceptible d en compromettre le fonctionnement Radiation Exposure Statement This equipment complies with ISED radiation exposure limits set forth for an uncontrolled environment This equipment should ...

Page 21: ... 經發現有干擾現象時 應立即停用 並改善至 無干擾時方得繼續使用 前項合法通信 指依電信法規定作業之無線電通信 低功率射頻電機須忍受合法通信或工 業 科學及醫療用電波輻射性電機設備之干擾 電磁波曝露量MPE標準值 MPE 1 mW cm2 送測產品實值為 mW cm2 mW cm2 Frequency Band s Frequenzband Fréquence bande s Bandas de Frecuencia Frequenza e Frequentie s Max Output Power EIRP Max Output Power Consommation d énergie max Potencia máxima de Salida Potenza max Output Max Output Power 2 4 G 2 4 2 4835 GHz 100 mW ...

Page 22: ...uct accessories and software are in compliance with directive 2014 53 EU The full text of the EU Declaration of Conformity and product firmware are available for download from the product page at www dlink com Español Spanish Por la presente D Link Corporation declara que este producto accesorios y software cumplen con las directivas 2014 53 UE El texto completo de la declaración de conformidad de...

Page 23: ...e a termék oldaláról tölthető le a www dlink com címen Polski Polish D Link Corporation niniejszym oświadcza że ten produkt akcesoria oraz oprogramowanie są zgodne z dyrektywami 2014 53 EU Pełen tekst deklaracji zgodności UE oraz oprogramowanie sprzętowe do produktu można pobrać na stronie produktu w witrynie www dlink com Português Portuguese Desta forma a D Link Corporation declara que este prod...

Page 24: ...inguna í heild sinni og fastbúnað vörunnar af vefsíðu vörunnar á www dlink com Norsk Norwegian Herved erklærer D Link Corporation at dette produktet tilbehøret og programvaren er i samsvar med direktivet 2014 53 EU Den fullstendige teksten i EU erklæring om samsvar og produktets fastvare er tilgjengelig for nedlasting fra produktsiden på www dlink com Warning Statement The power outlet should be n...

Page 25: ...er your product uses 2 4 GHz and or 5 GHz wireless HINWEIS ZUR VERWENDUNG VON DRAHTLOS NETZWERK WLAN IN DER EUROPÄISCHEN GEMEINSCHAFT NUR FÜR EIN DRAHTLOSES PRODUKT Der Betrieb dieses Geräts in der Europäischen Gemeinschaft bei Nutzung von Kanälen im 5 15 5 35 GHz Frequenzband ist ausschließlich auf Innenräume beschränkt um das Interferenzpotential zu reduzieren Bei diesem Gerät handelt es sich um...

Page 26: ...de 5 GHz au sein de l UE Merci de vous référer au guide d utilisation ou de la fiche technique afin de vérifier si votre produit utilise 2 4 GHz et ou 5 GHz sans fil AVISO DE USO DE LA LAN DE RADIO INALÁMBRICA EN LA COMUNIDAD EUROPEA SOLO PARA EL PRODUCTO INALÁMBRICO El uso de este dispositivo está restringido a interiores cuando funciona en la Comunidad Europea utilizando canales en la banda de 5...

Page 27: ...rol richieste per operare a 5 Ghz nell Unione europea Ti invitiamo a fare riferimento al manuale del prodotto o alla scheda tecnica per verificare se il tuo prodotto utilizza le frequenze 2 4 GHz e o 5 GHz KENNISGEVING VAN DRAADLOOS RADIO LAN GEBRUIK IN DE EUROPESE GEMEENSCHAP ALLEEN VOOR DRAADLOOS PRODUCT Dit toestel is beperkt tot gebruik binnenshuis wanneer het wordt gebruikt in de Europese Gem...

Page 28: ...n Sicherheitsvorschriften dienen als Hilfe zur Gewährleistung Ihrer eigenen Sicherheit und zum Schutz Ihres Produkts Weitere Details finden Sie in den Benutzeranleitungen zum Produkt Statische Elektrizität kann elektronischen Komponenten schaden Um Schäden durch statische Aufladung zu vermeiden leiten Sie elektrostatische Ladungen von Ihrem Körper ab z B durch Berühren eines geerdeten blanken Meta...

Page 29: ... Débranchez toujours le produit de l alimentation avant de le nettoyer et utilisez uniquement un chiffon sec non pelucheux INSTRUCCIONES DE SEGURIDAD Las siguientes directrices de seguridad general se facilitan para ayudarle a garantizar su propia seguridad personal y para proteger el producto frente a posibles daños No olvide consultar las instrucciones del usuario del producto para obtener más i...

Page 30: ...egare sempre il prodotto dalla presa elettrica prima di pulirlo e usare solo un panno asciutto che non lasci filacce VEILIGHEIDSINFORMATIE De volgende algemene veiligheidsinformatie werd verstrekt om uw eigen persoonlijke veiligheid te waarborgen en uw product te beschermen tegen mogelijke schade Denk eraan om de gebruikersinstructies van het product te raadplegen voor meer informatie Statische el...

Page 31: ...es Symbol auf dem Produkt oder der Verpackung weist darauf hin dass dieses Produkt gemäß bestehender örtlicher Gesetze undVorschriftennichtüberdennormalenHausmüllentsorgtwerdensollte sonderneinerWiederverwertungzuzuführenist Bringen Sie es bitte zu einer von Ihrer Kommunalbehörde entsprechend amtlich ausgewiesenen Sammelstelle sobald das Produkt das Ende seiner Nutzungsdauer erreicht hat Für die A...

Page 32: ...r en savoir plus sur les produits et emballages respectueux de l environnement veuillez consulter le www dlinkgreen com ESPAÑOL ES Este símbolo en el producto o el embalaje significa que de acuerdo con la legislación y la normativa local este producto no se debe desechar en la basura doméstica sino que se debe reciclar Llévelo a un punto de recogida designado por las autoridades locales una vez qu...

Page 33: ...e energia e a ridurre le emissioni di anidride carbonica Per ulteriori informazioni sui prodotti e sugli imballaggi D Link a ridotto impatto ambientale visitate il sito all indirizzo www dlinkgreen com NEDERLANDS NL Ditsymboolophetproductofdeverpakkingbetekentdatditproductvolgensdeplaatselijkewetgevingnietmagwordenweggegooid met het huishoudelijk afval maar voor recyclage moeten worden ingeleverd ...

Page 34: ...padku samych produktów jak i opakowań Firma D Link zaleca aby Państwo zawsze prawidłowo wyłączali z użytku swoje produkty D Link gdy nie są one wykorzystywane Postępując w ten sposób pozwalają Państwo oszczędzać energię i zmniejszać emisje CO2 Aby dowiedzieć się więcej na temat produktów i opakowań mających wpływ na środowisko prosimy zapoznać się ze stroną Internetową www dlinkgreen com ČESKY CZ ...

Page 35: ...karításában és a széndioxid kibocsátásának csökkentésében Környezetbarát termékeinkről és csomagolásainkról további információkat a www dlinkgreen com weboldalon tudhat meg NORSK NO Dette symbolet på produktet eller forpakningen betyr at dette produktet ifølge lokale lover og forskrifter ikke skal kastes sammen med husholdningsavfall men leveres inn til gjenvinning Vennligst ta det til et innsamli...

Page 36: ...udledningerne Du kan finde flere oplysninger om vores miljømæssigt ansvarlige produkter og emballage på www dlinkgreen com SUOMI FI Tämä symboli tuotteen pakkauksessa tarkoittaa että paikallisten lakien ja säännösten mukaisesti tätä tuotetta ei pidä hävittää yleisen kotitalousjätteen seassa vaan se tulee toimittaa kierrätettäväksi Kun tuote on elinkaarensa päässä toimita se lähimpään viranomaisten...

Page 37: ...id För mer information om våra miljöansvariga produkter och förpackningar www dlinkgreen com PORTUGUÊS PT Este símbolo no produto ou embalagem significa que de acordo com as leis e regulamentações locais este produto não deverá ser eliminado juntamente com o lixo doméstico mas enviado para a reciclagem Transporte o para um ponto de recolha designado pelas suas autoridades locais quando este tiver ...

Reviews: