background image


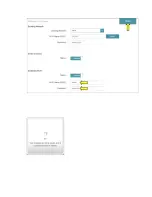
- Input your main router Wireless password and click 

OK


Summary of Contents for DAP-1620

Page 1: ...stall my WiFi range extender 1 A 2 NOTE This example shows setup process of DAP 1620 The steps will be similar with our other range extenders Step 1 Plug in the range extender Note The light should tu...

Page 2: ...wireless computer device scan for available networks and connect to the pre defined SSID Located on the Configuration note supplied with the range extender and on the bottom of the range extender exam...

Page 3: ...iguration page and the Install Wizard will appear Note If you cannot access it using http dlinkap local try http 192 168 0 50 IMPORTANT YOU MUST BE CONNECTED TO THE RANGE EXTENDER WIFI SIGNAL TO ACCES...

Page 4: ...Step 4 Select the option Extend an Existing Wireless Network or Wi Fi...

Page 5: ......

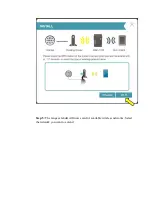
Page 6: ...Step 5 The range extender will now scan for available wireless networks Select the network you want to extend...

Page 7: ......

Page 8: ...at wireless network name your range extender will broadcast Enter a new network name in the 2 4Ghz Wi Fi Network Name field and 5Ghz Wi Fi Network Name field then enter a new wireless password in the...

Page 9: ...ct enabled by default With this enabled the DAP 1860 will broadcast a single SSID The DAP 1860 will automatically determines whether to connect your device to 2 4Ghz or 5Ghz Step 8 Create a password f...

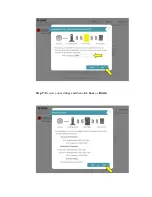
Page 10: ...Step 9 Review your settings and then click Save or Finish...

Page 11: ...The range extender will then reboot and should now be extending your wireless network You should notice the LED on the front of the range extender is solid Green...

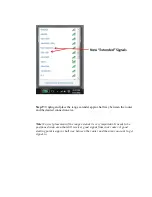
Page 12: ...te If you specified a different wireless network name in Step 7 you will be disconnected from the range extender Please Scan again for wireless signals and connect to your NEW Extended Wireless Networ...

Page 13: ...nd the desired connection area Note Correct placement of the range extender is very important It needs to be positioned in an area that still receives good signal from your router A good starting poin...

Page 14: ...Step is Complete 2 I changed my router how do I reconfigure my range extender 1 A 2 Select the desired configuration method Push Button WPS Configuration Manual Configuration...

Page 15: ...uter access point Step 1 Press the WPS button on your router AP usually for about 5 7 seconds Step 2 Press and hold the WPS button on the Extender for 5 7 seconds The LED should start to blink green O...

Page 16: ...ireless computer device scan for available networks and connect to the pre defined SSID or to the SSID you configured for the Extender Note The pre defined SSID is on the configuration card supplied w...

Page 17: ...cted to the Extender login page By default there is no login password If you created an admin password on the initial setup you would need to use that password Note If you do not get the login page fo...

Page 18: ...Step 3 Click on Settings Extender Step 4 Click Scan...

Page 19: ...Select your main router Wireless Network name SSID and click Select...

Page 20: ...Input your main router Wireless password and click OK...

Page 21: ...Step 5 Click Save Click OK...

Page 22: ...you have already tried the WPS button setup and the LED on the range extender does not turn green then try the WPS setup again by following the steps below Step 1 Wait for the LED on the DAP to blink...

Page 23: ...at this FAQ How do I setup my range extender using the QRS Mobile app 2 How do I enable Smart Mesh Roaming on my range extender 1 A 2 NOTE The following range extenders support Smart Mesh Roaming with...

Page 24: ...Most newer devices iPhones iPads Android phones etc support 802 11K V To change the Wireless network name and password of your extender Step 1 Log into the extender How do I log into my Wifi range ext...

Page 25: ...Click on Settings Extender Step 3 Under Extended Wi Fi Change the Wi Fi name SSID and password for the Extended Wi Fi to the same Wi Fi name SSID and password as your home Wi Fi network Step 4 Click o...

Page 26: ......

Reviews: