


41
1. How do I check to see that the drivers for the WUA-2340 are
installed properly?
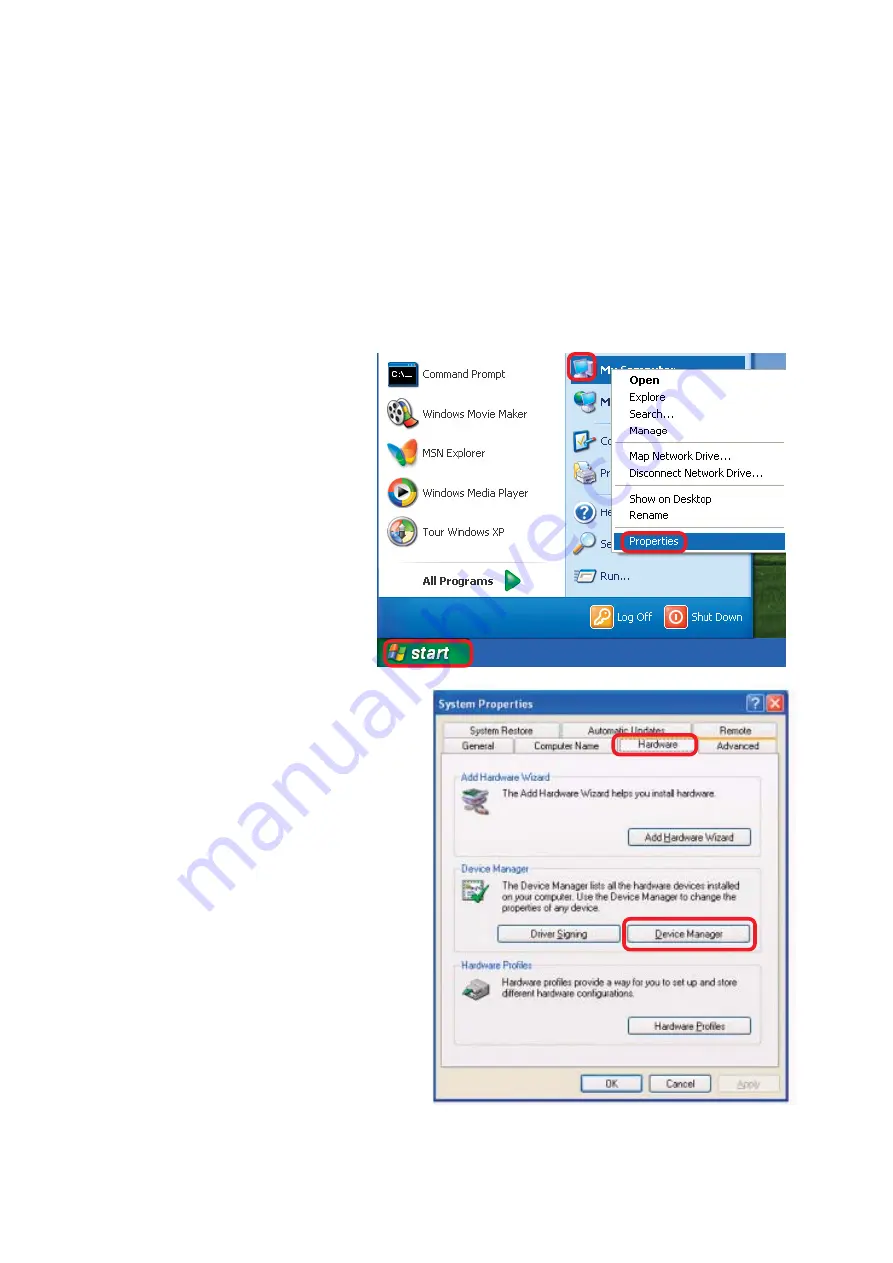
Click
Device
Manager
.
Select the
Hardware
Tab
.
Troubleshooting
Go to
Start
>
My
Computer
>
Properties
.
This chapter provides solutions to problems that can occur during the
installation and operation of the WUA-2340. Read the following descriptions if
you are having problems. (The examples below are illustrated in Windows XP. If
you have another operating system, these solutions will still apply although the
appearance on your computer screen may differ.)