background image

2.4GHz Wireless

PCI Adapter

DWL-520

©2002 D-Link Systems, Inc. All rights reserved. Trademarks or registered trademarks are the property of their respective holders. Software and

specifications subject to change without notice. DWL-520C1 12202002

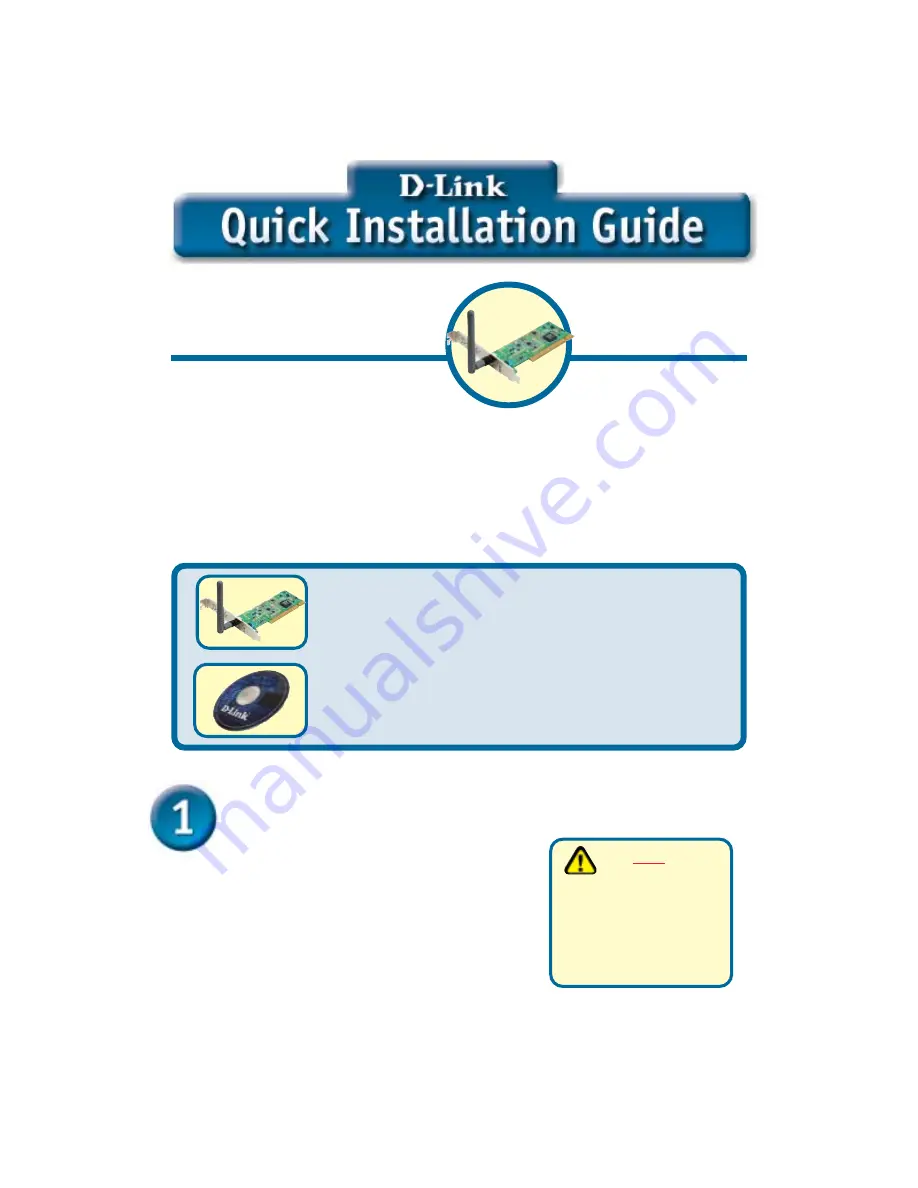
If any of the above items are missing, please contact your reseller.

CD-ROM (containing Drivers, Manual and Warranty)

This product works with the following operating
system software: 

Windows XP, Windows

2000, Windows Me, Windows 98se

Before You Begin

DWL-520 2.4GHz Wireless PCI Adapter

Check Your Package Contents

These are the items included with your DWL-520 purchase:

Turn on the computer 

and

Insert 

the 

D- Link 

Air

 DWL-520 Driver

CD 

in the CD-ROM drive.

The step-by-step instructions that follow are shown
in 

Windows XP

. The steps and screens are similar

for the other Windows operating systems

Insert the D-Link CD-ROM Into Your
Computer

           Do 

NOT 

install

           the DWL-520
Cardbus Adapter into
your computer before
installing the driver
software on the D-Link
CD!

You must have at least the following:

A desktop computer with an available 32-bit PCI slot

At least a 300 MHz processor and 32 MB of memory

An 802.11b Access Point (for Infrastructure Mode) or another 802.11b wireless
adapter (for Ad-Hoc; Peer-to-Peer networking mode.)

Summary of Contents for Air DWL-520

Page 1: ... Your Package Contents These are the items included with your DWL 520 purchase Turn on the computer and Insert the D Link Air DWL 520 Driver CD in the CD ROM drive The step by step instructions that follow are shown in Windows XP The steps and screens are similar for the other Windows operating systems Insert the D Link CD ROM Into Your Computer Do NOT install the DWL 520 Cardbus Adapter into your...

Page 2: ...y start on your computer type D Setup exe If it does start proceed to the next screen The letter D represents the letter of the CD ROM drive Your CD ROM drive may be a different drive letter Type D Setup exe Click OK Click Next Continued Click Next Click Install Driver PC Utility ...

Page 3: ...rd Remove the back cover of the computer B Install the DWL 520 carefully and firmly seat it into an available PCI slot which is usually white or cream colored C Secure the DWL 520 back panel shield with a screw D Replace the computer s cover E Place the computer back in its normal position F Attach the DWL 520 s antenna to the socket on the back panel shield ...

Page 4: ...1b networks Back Panel Shield Once properly installed this panel should be at the back of your computer Screw Mount The screw to secure the PCI Adapter to the back of your computer will fit in this slot 32 bit connector This is the connector that fits into the PCI slot on your computer s motherboard Link Activity LED Indicates that the DWL 650 is properly installed when the computer is on and blin...

Page 5: ...r this device is undergoing Windows Logo testing Microsoft certification is pending Click Yes to finalize the installation For Windows XP This Hardware Installation alert screen may appear after the desktop computer restarts Click Continue Anyway to finalize the installation Click Finish to finalize the installation Continued ...

Page 6: ... GREEN then you have successfully installed the DWL 520 are connected to a wireless network and are ready to communicate Double click the utility icon to use the configuration utility By default in Windows XP you can use the Wireless Zero Configuration to change the wireless settings on your DWL 520 If you want to use the AirPlus utility instead of the Wireless Zero Configuration built in to Windo...

Page 7: ... by the DWL 520 depending on the distance from the access point E Link Quality Signal Strength Displays the Link Quality for the DWL 520 wireless connection to the access point The Signal Strength represents the wireless signal between the access point and the DWL 520 The percentage coincides with the graphical bar D Channel Displays the channel information By default the channel is set to 6 and s...

Page 8: ...To change the channel settings the Wireless Mode must be set to Ad hoc J TxRate You can adjust the transmis sion rate to get the best signal possible depending on your usage and your environment K Preamble By default D Link Air Products are set to Auto Preamble The Preamble defines the length of the CRC block Cyclic Redundancy Check is a common technique for detecting data transmission errors for ...

Page 9: ...he Wireless Router or Access Point Static IP address setup Click OK IP address 192 168 0 52 Subnet mask 255 255 255 0 Click OK Click Internet Protocol TCP IP Click Properties Select Obtain an IP address automatically if the Wireless Router or Access Point has DHCP server enabled Select Obtain DNS server address automatically Dynamic IP address setup Used when a DHCP server is available on the loca...

Page 10: ... static IP address in the same range as the Wireless Router or Access Point Click Properties Click OK IP address 192 168 0 52 Subnet mask 255 255 255 0 Click OK Click Internet Protocol TCP IP Select Obtain an IP address automatically if the Wireless Router or Access Point has DHCP server enabled Select Obtain DNS server address automatically Select Use the following IP address Dynamic IP address s...

Page 11: ...lect Obtain an IP address automatically if the Wireless Router or Access Point has DHCP server enabled Select Detect connection to network media Click OK IP address 192 168 0 52 Subnet mask 255 255 255 0 Select Use the following IP address Click Internet Protocol TCP IP Click OK Input a static IP address in the same range as the Wireless Router or Access Point Dynamic IP address setup Static IP ad...

Page 12: ...omers within the United States for the duration of the warranty period on this product U S customers can contact D Link technical support through our web site or by phone D Link Technical Support over the Telephone 877 453 5465 24 hours a day seven days a week D Link Technical Support over the Internet http support dlink com email support dlink com ...

Reviews: