


3
2
6. OPERATION CONTROLS AND FUNCTIONS
6.1 Front Panel
R
L
AUDIO IN
OPTICAL
DC 5V
POWER
O.V.P
2
1
3
4 5
1
AUDIO IN L/R:
Connect from audio source equipment with L/R
cables.
2
AUDIO IN OPTICAL:
Connect from audio source equipment with
optical cable.
3
POWER:
Plug the 5V DC power supply into the unit and connect
the adaptor to an AC outlet.
4
POWER:
This LED will illuminate when the device is connected with
power supply.
5
O.V.P.(Over Voltage Protection):
This LED will illuminate when the
input power supply exceed from 5V to 28V and the device will be
terminated.
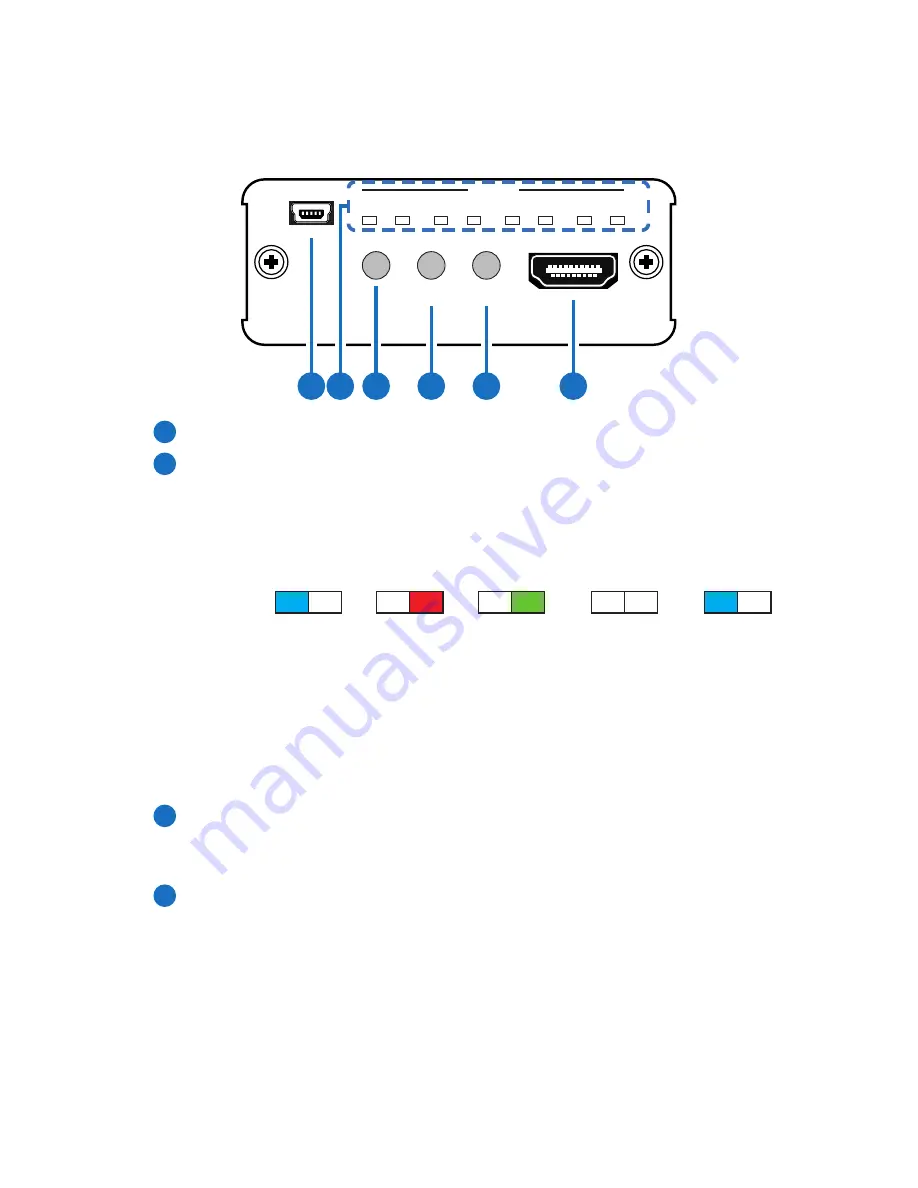
3
6.2 Rear Panel
HDCP
PATTERN
TIMING
SERVICE
HDMI OUT
EXIT
ENTER
SELECT
SELECT
TIMING
PATTERN
AUDIO
25/50
1
3
4
5
6
2
1
SERVICE:
This slot is reserved for factory use only.
2
SELECT LED:
These LEDs will illuminate according to the selection.
Each selection with 2 LEDs of 3 colors, left LED is blue and right LED
are red or green. Each LED color represent a pattern/timing as
below:
Blue
Red
Green
None
25/50
HDCP LED
HDCP2.2
HDCP1.4*
OFF
PATTERN LED Blue Scale Red Scale Green Scale Gray Scale *
TIMING LED
4K2K60
4K2K30
1080P60
720P60*
4K2K50
4K2K25
1080P50
720P50
˅
AUDIO LED
Optical
LR*
*are default setting.
3
SELECT Button:
Press this button to enter into selection mode and
both LEDs will be fl ashing in blue and green. Press again to enter
into another selection.
4
ENTER/PATTERN Button:
Press this button to enter into the selection
then press the SELECT button to select and the LED will illuminate
in sequence from the default setting, press ENTER again to confi rm
the selection. When exit selection mode press this button to select
pattern directly.
For example, to select HDCP 2.2 with blue scale and 4K2K60 timing
from the default setting, press SELECT (to enter into selection)→