Page 3
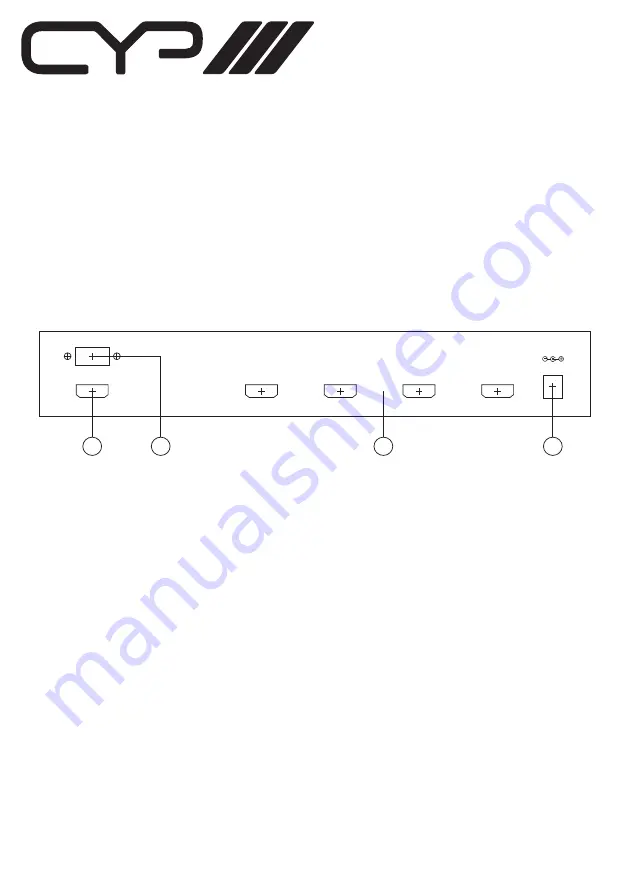
4.1 Rear Panel
1. HDMI OUT: This is the slot where you connect the HDMI output of the switcher to
the HDMI input of your display using a HDMI cable.
2. RS-232 input: When doing firmware upgrade and/or PC remote system control,
connect a D-sub 9 pin cable from this RS232 slot to your computer.
3. HDMI IN 5~8: These slots connect to the HDMI/DVI output ports of your source
equipments. ie, set- up-box, DVD or Blue Ray.
4. DC 5V: Connect the 5V DC power adaptor into this slot and plug the adaptor to an
AC wall outlet.
1
3
4
2
HDMI IN
HDMI OUT
8
7
6
5
DC 5V
RS-232
1. POWER indicator: When power is connected to the device, the device
automatically turns on and the power LED will turn red. Note: To turn ON or
switch the device to standby mode, please press the “POWER” button on the
remote control unit. Note: To turn ON or switch the device to standby mode,
please press the “POWER” button on the remote control unit.
Summary of Contents for EL-C81C
Page 1: ...OPERATION MANUAL EL C81C v1 3 HDMI 8 Way Switcher with CEC ...
Page 10: ...Notes ...
Page 11: ...www cypeurope com ...


