RELEASE DATE:
BY:
REVISION DATE:
REV
PRODUCT NAME:
PRODUCT NUMBER:
ASSEMBLY INSTRUCTIONS
31-Aug-10
Pocket Shelter
17450
GM
A
Step 2:
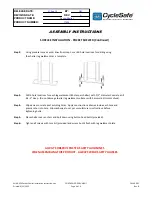
Using predetermined center lines from step 1, mark 8-hole locations for drilling using
the shelter leg weldments as a template.
Step 3:
Drill 4-hole locations for each leg weldment (8 holes per shelter) with 1/2" diameter Concrete drill
bit - 2" deep. (Do not damage shelter leg weldment surfaces with hammer drill motor chuck).
Step 4:
Wipe away concrete dust avoiding holes. Apply construction adhesive inside each hole and
press anchor into hole. Allow adhesive to set per munufacturers instructions before
tightening bolts.
Step 5:
Place shelter over anchors and bolt down using button head bolts (provided).
Step 6:
Tighten all screws with torx bit (provided) and wrench until flush with leg weldment plate.
SURFACE INSTALLATION - POCKET SHELTER (Continued)
WHEN ASSEMBLING THIS PRODUCT. ALWAYS WEAR SAFETY GLASSES
ALWAYS OBSERVE POSTED SAFETY GUIDELINES
WI4.9.036 Pocket Shelter Installation Instruction.xlsx
Printed: 6/21/2022
CONTROLLED DOCUMENT
Page 4 of 4
FM4.5.002
Rev -B


