background image

v2.4c 


03.04.12 

CybTouch6_Shear_Usermanual_v2.4c_TK 

page 16 of 18 

I

NFORMATION


Touching 

Information

 displays all information regarding: 


Hardware 


Boot version  


RF link (Radio Frequency link) 


HMI (Human 

–Machine Interface) 


Real Time 

Touching the 

Advanced

 button 

 displays more detailed information. 


M

ACHINE 

S

TATUS


Choose 

Yes

 or 

No

 to make the machine status screen accessible or not while 

working. This allows the operator to display the inputs and outputs while the machine 
is working. This can be requested by a technician to help determine a problem in the 
working process. 

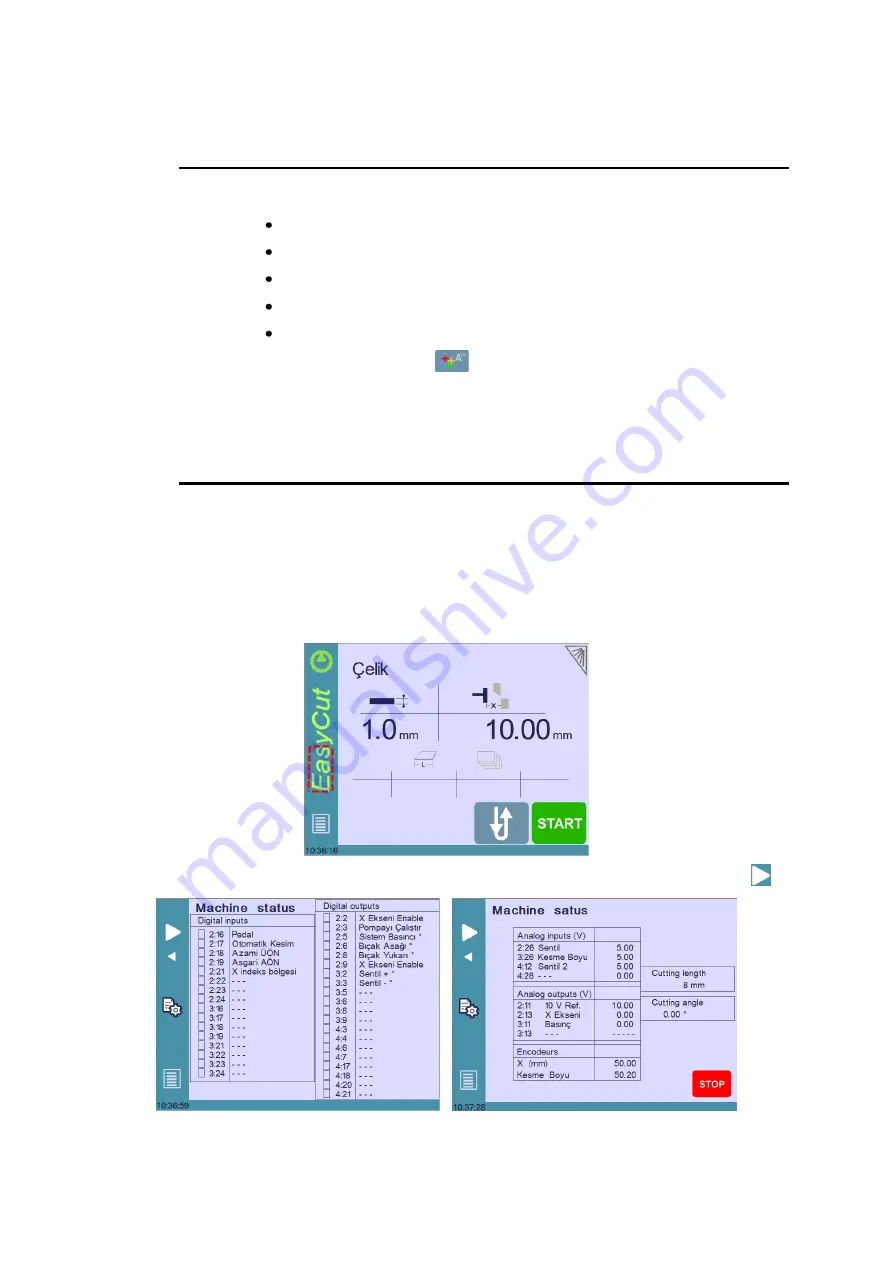
Once the machine status is set to 

Yes

. The operator can access the Machine status 

page by touching the area in red showed below in the screen, from any page in the 
CybTouch. 


The two machine status pages are now available and can be viewed by touching 


Summary of Contents for CybTouch 6 G

Page 1: ...CybTouch 6 W G Swing Shears Adjustable Rake Angle Shears User Manual V2 4c ...

Page 2: ...erties for the program 7 Page 2 of program Sequence 1 properties for first cut of the program 7 Page 3 of program Sequence 2 properties for second cut of program 8 Extra Cutting Features 9 Using Current Program 11 Calling a Saved Program 11 Other Menus 12 Manual Movement 12 User Preference 12 Language 13 Event Viewer 13 Touchscreen Calibration 13 Set Clock 13 Time Calibration Hata Yer işareti tanı...

Page 3: ...at your gloves do not have metal particles incrusted in the finger tips as they may also damage the screen Take a few minutes to practice pressing gently on the screen you will find that the screen is very reactive and it is pleasant to use Screen Cleaning To clean the screen while the CybTiouch is on touch the button Use only a damp and soft cloth with soap or a neutral detergent NEVER use solven...

Page 4: ...nce the motor is running the button becomes red If the Pump motor button is not available on the screen start the main pump motor using the adequate button on the machine Menu AutoCut deactivated here Start Stop cut Pump On Off off here Interactive message line Material used Time Back gauge position value Material thickness value Clean Screen Back gauge position icon Material thickness icon Length...

Page 5: ...ack gauge When the machine is ready the START button displays OK The machine will not cut until OK is displayed 7 Press the foot pedal to make the cut 3 Enter the material thickness 4 Validate 5 Touch the Back gauge position value and enter the value using the keyboard 2 Touch the Material thickness value 1 Touch the Material field to chose the material type used ...

Page 6: ...be deleted once it becomes obsolete A program can be executed without the need to store it if this program will be executed only once A program can contain up to 24 sequences The material setting page of a program the initial page of the program is commonly called Sequence 0 New program choice clears the previous program currently in the working memory and jumps directly to the sequence 0 ready fo...

Page 7: ...ogram with two sequences PAGE 1 OF PROGRAM SEQUENCE 0 BASIC PROPERTIES FOR THE PROGRAM PAGE 2 OF PROGRAM SEQUENCE 1 PROPERTIES FOR FIRST CUT OF THE PROGRAM 1 Choose the material and its thickness like in the EasyCut page 2 Touch the Next page button and validate to create a new step 3 Touch the Back gauge position value and enter the value using the keyboard 4 Touch the Next page button ...

Page 8: ...n use it again later 5 Touch the Back gauge position value and enter the value using the keyboard 6 Go back to the first sequence created by touching the Previous page button 7 Turn on the pump by touching the Pump On Off button for 2 seconds or using the button directly on the machine 8 Touch the START button or briefly press the foot pedal to position the back gauge When the machine is ready the...

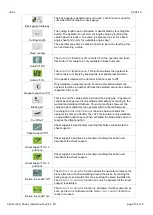
Page 9: ...hing the Menu button in EasyCut page opens the program menu Touching the Menu button in the program page allows the operator to access the EasyCut page and the other menu pages Material thickness Touching the Material thickness button or icon allows the user to enter the thickness of the material Next page The operator can use this button to go to the next page in a program or menu Previous page T...

Page 10: ... value below represent the blade gap In general it cannot be changed and is calculated automatically according to the material and material thickness On some machines however the value can be modified by the operator within a limited tolerance Cut offset Touching the Cut offset icon or the value below it allows the operator to enter an offset for the cut This function is only available on adjustab...

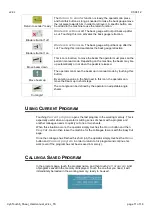
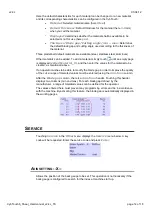
Page 11: ...in manual mode by touching this button By entering a value in the field next to this icon the operator can move the beam up in short steps Cut angle The cut angle can be defined by the operator on adjustable angle shears USING CURRENT PROGRAM Touching Current program opens the last program in the working memory This is especially useful when an operator is cutting series of sheets with a program a...

Page 12: ...menu This icon remains inactive The beam moves down as long as the foot pedal is pressed down Depending on the machine the beam may rise up automatically or not when the pedal is released Touch this icon to move the beam up Enter a value to create short steps for the programmed duration If programmed to 0 0s the movement is active as long as the up button is touched or the foot pedal is pressed Se...

Page 13: ...ime and date on the CybTouch AutoCut TDC Time Waiting time max 2 seconds at top dead center between 2 cuts in AutoCut mode Used to give enough time to the operator to position the sheet against the back gauge before the blade comes down again Brightness xx Eco xx Screen brightness adjustments for normal and Eco mode Length units Chose between mm and inches Materials To access the Materials page fr...

Page 14: ...led Material_X and then enter the values for the material to be created as mentioned above If an operator wishes to be able to modify the blade gap in order to improve the quality of the cut a range of tolerated values must be entered using the min max column After the Blade gap column there is a min max header Touching this header displays two columns min and max For each blade gap defined by the...

Page 15: ...rameters and axis parameters Usually only performed by a service technician when the machine is finished being setup and is ready to operate Restoring machine parameters and axis parameters In case of accidental machine parameters modification this operation allows the machine owner to retrieve the original machine set up Simply touch internal backup and select the action you need to perform you w...

Page 16: ...oose Yes or No to make the machine status screen accessible or not while working This allows the operator to display the inputs and outputs while the machine is working This can be requested by a technician to help determine a problem in the working process Once the machine status is set to Yes The operator can access the Machine status page by touching the area in red showed below in the screen f...

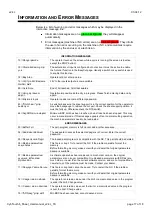
Page 17: ...a ulaşıldı Minimum BDC limit has been reached down stroke has been stopped This may occur in manual mode If this message appears often In normal cutting operation the machine parameters need to be readjusted ERROR MESSAGES 03 Buffer Full The part program memory is full cannot add another sequence 04 Kod Kabul Edilmedi The password to access the selected page is not correct Enter the correct passwo...

Page 18: ...ry is almost full 35 Endless loop on process task Process Error Please restart the NC and inform your dealer 39 Pedal girişi reddedildi Pressing the pedal is not accepted in this page situation 41 Açı asg açı The calculated cutting angle is smaller than the maximum machine limits Check the Material page none of the angle values must be under over the machine parameter limits 42 Açı azm açı The cal...

Reviews: