background image

This  Digital  LCP  TV  includes  the  following 

6

  modes.

1.  TV/DTV  :ANALOG  TV  MODE;DIGITAL  TV  MODE
2.  VIDEO 

1

/VIDEO 

2

:AUDIO/VIDEO  INPUT  MODE

3

.S-VIDEO:  S-VIDEO  SIGNAL  INPUT  MODE

4.Component  1/Component  2  :Y  Pb  Pr  /AUDIO(L/R) 
    INPUT  MODE
5.  PC:PC  INPUT  MODE
6.HDMI  1/HDMI  2/HDMI  3  :HDMI  SIGNAL  INPUT  MODE

Press  the 

SOURCE

  button  to  display  the  menu  ,  use  the

and            button  to  select  the  required    mode,  press  the 
OK  Button
Selected  mode.

1.    TV/DTV    MODE
Press  the  MENU  button  to  enter  the  main  menu.
Press  the          and          button  to  select  the.
“VIDEO/AUDIO/CHANNEL/FUNCTION/LOCK  ”control
functions,  press  the          and          button  to  adjust  the  needed  item.
NOTE:  the  MENU  and    EXIT  button  can  be  used  as  the  EXIT  function  when  want  to
leave  the  menu.

    1

.

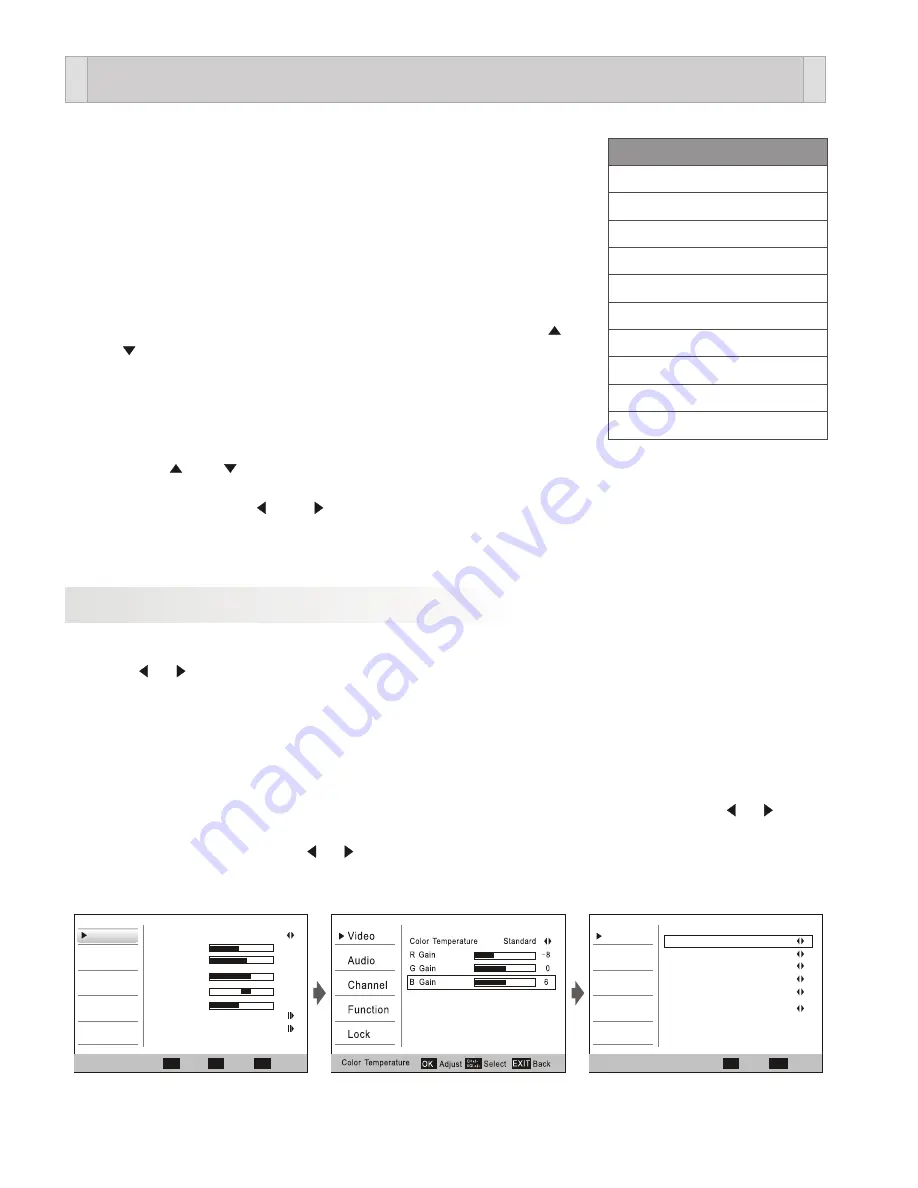
OSD  of  the  VIDEO  function

MENU  INTRODUCTION
Press


or


button


to


reach


the


required


setting

.

1.  Picture  mode:  STANDARD/VIVID/CUSTOM/MILD
2.  Adjust  the  brightness  of  the  display

.

3.  Adjust  the  contrast  of  the  display

.

4.  Adjust  the  color  of  the  display

.

5.Adjust  the  tint  of  the  display

.

6.Adjust  the  sharpness  the  display

.

7.Picture  color  temperature  adjust

,Press"OK"to  enter    the  submenu.  Press        or       

      button  to  select  the  mode  :Standard→  Warm→Custom→Cool.

8.  Advanced  Video

.Press        or        button  to  select  the  DNR  :Off→  Weak→Medium

      →Strong→Auto.

OSD


MENU

Select


Source

TV
Video


1

Video


2

S

-

Video

Component


1

Component


2

PC
HDMI


1

HDMI


2

HDMI


3

9

Video

Audio

Channel

Function

Lock

Video

Select


Exit

CH

+/-

VOL

+/-

EXIT


Mode


Stan dard

Brightne ss


33

Contrast


53

Color


60

Tint


0

Sharpn ess


40

Color


Temperatu re


Advanced


Video


OK

Enter

Video

Audio

Channel

Function

Lock

DNR


Weak

Black


Level


Exte nder


off

White


peak


Limiter


off

CTI


off

Flesh


Tone


off

Adaptive


Luma


Control


off

Select


Back

CH

+/-

VOL

+/-

EXIT


Advanced


Video

Summary of Contents for LCP4210

Page 1: ...ATTENTION This unit can receive America ATSC HD DIGITAL SIGNAL BROADCASTING CHANNELS IN USA ONLY...

Page 2: ...ecommeded surrounding of using apparatus 5 It shall not be exposed to dripping or flashing and that no objects with liquids such as vases shall be placed on the apparatus 6 Do not place apparatus in c...

Page 3: ......

Page 4: ...1 INTRODUCTION This TV power supply is AC 100 240V 50 60Hz on remote controller...

Page 5: ......

Page 6: ......

Page 7: ......

Page 8: ...he closed caption mode 11 Mute on off 12 Change input source 13 To access the previously viewed 14 Program number increase decrease 15 Confirms selection 16 To display TV menu or to return to the prev...

Page 9: ...Warning that batteries battery pack or batteries installed shall not be exposed to excessive heat such as sunshine fire or the like...

Page 10: ...POWER 7 SOURCE...

Page 11: ...9 PC IN Connect with computer signal input terminal 11 HDMI 2 HDMI 2 video input terminal 10 HDMI 1 HDMI 1 video input terminal 1 Power supply 8 3 COAX Audio output to 2nd amplifier coaxial input 7 2...

Page 12: ...ODUCTION Press or button to reach the required setting 1 Picture mode STANDARD VIVID CUSTOM MILD 2 Adjust the brightness of the display 3 Adjust the contrast of the display 4 Adjust the color of the d...

Page 13: ...ress or button to reach the required setting 1 Left Right track balance adjust Press or to adjust the audio output between left and right speakers 2 Bass adjust Press or to increase or decrease the le...

Page 14: ...r...

Page 15: ...You can enter the main menu then enter the sub menu use the or or to meet the key requirements of the relevant settings...

Page 16: ...13 TROUBLESHOOTING...

Page 17: ...14 TROUBLESHOOTING...

Page 18: ......

Reviews: