background image

Name | model 

Curly’s Ag –

 Agricultural Innovations | www.curlysag.com | [email protected] 


Hand-E | 2022 MODEL


P a g e  | 

9


 Step 4 - Wheel Installation 


There are 3 different ways you can have your wheels set up on your Incinerator 
Multi. Using two wheels will reduce the manoeuvrability of the Incinerator multi, 
however it will increase stability. You may want to use one set up or the other at 
different times or in different situations.  


1.


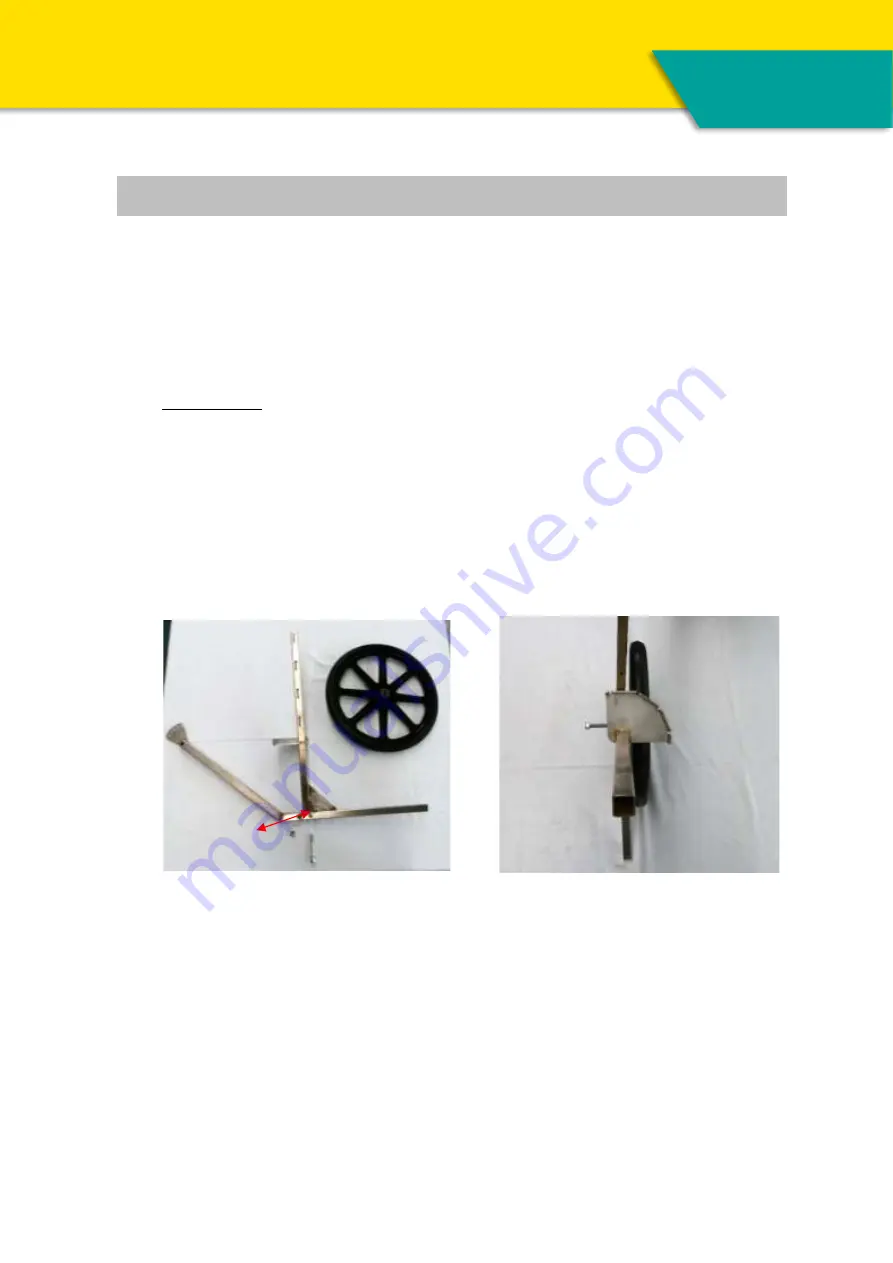
ONE WHEEL


 Insert the Axle bolt 

(J)

 though the hole in the middle of one 

of the wheels 

(E)

, then slide wheel and Axle bolt through the hole on the 

Main frame / Gas Bottle Attachment. Make sure the wheel is on the side 
where the Gas bottle holder is. 

Do up the nut, ensure that you don’t over tighten the nut and bolt as this 

will cause unnecessary drag and wear the bearings.  

Spin the wheel to check that it spins freely but there is no free play.


You 

will have more of Axle bolt 

(J)

 sticking out, this is for if you were to install 

the second wheel.  


Hole for 

Axle Bolt 


Summary of Contents for INCINERATOR MULTI

Page 1: ...OPERATOR MANUAL www curlysag com info curlysag com INCINERATOR MULTI...

Page 2: ...in Frame 6 Step 2 Handle Installation 7 Step 3 Flame Head Installation 8 Step 4 Wheel Installation 9 Step 5 Gas Bottle Installation 12 Step 6 Gas Hose Installation 14 Completed Assembly 16 Operating I...

Page 3: ...eal risk of burning Users of the Incinerator Multi release and indemnify Curly s Ag from any claim loss damages and injury from their use of the Incinerator Multi including from any reliance on this p...

Page 4: ...tor Multi if you are not capable of safely operating this type of equipment 6 Do not operate any equipment if you are subject to seizures loss of consciousness or fainting 7 Do not use if you are affe...

Page 5: ...th you for safety precautions and to monitor for re risks 19 Always have re extinguishing equipment easily accessible and ready to be used when operating the Incinerator Multi It is recommended to kno...

Page 6: ...tions To assemble the Incinerator Multi follow the instructions of this manual Contents of box A Main Frame Gas Bottle Attachment G Flint Lighter B Main Frame Attachment H Gas Bottle Holder Strap C Ha...

Page 7: ...e angled end into the Main Frame Gas Bottle Attachment A The holes will line up when inserted correctly Insert the Axle Bolt J through the hole red arrow when lined up Ensure that the end of the bolt...

Page 8: ...ain Frame Attachment with the nut and bolt onto the Main Frame Attachment B using the predrilled hole under the Cam adjuster The locking pin will fit into one of the cam adjustment holes Make sure the...

Page 9: ...ounter act each other s weight to give stability to your Incinerator Multi Undo and remove the nut and washer from the bolt on the Flame Head near the adjuster Insert the Flame Head D into the predril...

Page 10: ...es or in different situations 1 ONE WHEEL Insert the Axle bolt J though the hole in the middle of one of the wheels E then slide wheel and Axle bolt through the hole on the Main frame Gas Bottle Attac...

Page 11: ...rings Spin the wheel to check that spins freely but there is no free play E 3 TWO WHEELS with longer axle Insert the Axle bolt J though the hole in the middle of one of the wheels E then slide wheel a...

Page 12: ...Name model Curly s Ag Agricultural Innovations www curlysag com info curlysag com Hand E 2022 MODEL P a g e 11 See page 16 for completed picutres J K A E A J K A E A J K Hole for Axle Bolt...

Page 13: ...into the groves on the gas bottle holder A the extra slots are for adjustment for bigger gas bottles or if the gas bottle is too full empty Take the Gas Bottle Holder Strap H and secure it around the...

Page 14: ...e Head D back in towards the gas bottle as per the arrow to find the right balance and stabilise the machine so that it will stand by itself You might need to re adjust this repeatedly as the gas bott...

Page 15: ...rely I I I I D D D D D D D D F Male end Male end Male end Male end Male end Male end Male end Male end Female end Female end Female end Female end Female end Female end Female end Female end Should lo...

Page 16: ...equipment Make sure all connections are tight and repeat above steps If leak continues contact a registered gas tter F Completed connection should look like this Completed connection Should look like...

Page 17: ...and E 2022 MODEL P a g e 16 Completed Assembly Completed assembly of the Incinerator Multi showing different wheel set ups 1 One Wheel Setup Recommended for better manoeuvrability 2 Two Wheel side by...

Page 18: ...lking path fence line or full garden bed This is important because once the Incinerator Multi is in use it would be incredibly hot to touch or adjust You won t be able to adjust the Flame Head again u...

Page 19: ...from the Flame Head D Reach over carefully and light the Flame Head D Once lit you can lift the handle up from the ground and you can adjust the flame by opening the gas more When initially opening th...

Page 20: ...nsity walk along the path of weeds you wish to burn To decrease the flame turn down the gas using the gas valve on the bottle On the Go adjustments can be made if you wish to change the horizontal ang...

Page 21: ...s not designed to be left out in the elements we recommend that the Incinerator Multi is protected from the harsh environment such as rain storms and prolonged sunlight as the elements could damage it...

Page 22: ...2 months No warranty shall however apply if the Hand E has not been used according to the instruction given in this manual even if it is within the warranty period Contact Us We value your opinion ple...

Reviews: