26
4. ADVICE FROM THE CHEFS
• To preserve the non-stick qualities of the cooking plates, avoid
heating them too long with nothing on them and cleaning them
with anything abrasive.
• After use, blot dry the excess grease on the plates using kitchen
paper. You will clean the plates more quickly this way when they
have cooled.
• It’s best to use wood or silicone utensils for turning foods and to
avoid cutting on the plates.
• Cut your food into pieces of identical size to ensure even cooking.
• With practice, you will become familiar with cooking times and
the necessary adjustment to cook the food to your taste.
• For best results, lightly grease your foods using a brush before
placing them on the grill. The grease will transfer the heat more
successfully.
• Prepare spice- or condiment-based marinades for meats or fi sh,
grilled food will be tasty and food cooked on the barbecue more
tender.
• If you have grilled fi sh and shellfi sh on the plates, rub the plates
with a cloth soaked in lemon juice.
5. CLEANING AND STORAGE
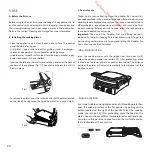
• When you have fi nished cooking, turn the button to the “O” position
and unplug the appliance. Allow the grill to cool completely (at least
30 minutes) before cleaning.
• Use the cleaning/scraping tool to remove any food residue that
remains on the cooking plates.
• Empty the drip try after use.
• Press the plate release buttons to remove the plates from the
appliance.
• The cleaning/scraping tool, the drip tray and the plates can be
washed in hot soapy water or in the dishwasher.
• Do not use metal objects like knives or forks or abrasive sponges
and products as these could damage the coating.
• Use a damp cloth and a little soft detergent to clean the body of
the appliance, the lid and the handle. Never use abrasive sponges
or products.
• Regularly cleaning the appliance prevents build-up. Your grill will
remain easy to clean and will continue to perform optimally.
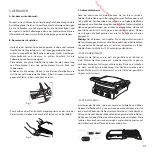
• Before storing your grill, put the plates and the drip tray back
in position, close the lid then lock it by turning the hatch on the
fl oating hinge to the “lock” position. Then wind the cable around the
hooks intended for this purpose.
Downloaded from www.vandenborre.be

