Cubix Corporation
2800 Lockheed Way
Carson City, NV 89706-0713 ● Page 7
Sales 800.829.0550
http://www.cubix.com
xprm8g3-1625urp-20170801
Install Xpander in a Cabinet
For this procedure, use a Philips #2
screwdriver, a flat-blade screwdriver and a 3/8”
wrench or socket and drive. When lifting the
Xpander into place, ask for assistance. Mount it
close enough to the host computer so that the
external PCIe cable will reach. Mount Xpander
either immediately above or immediately below
the host computer(s) in the cabinet.
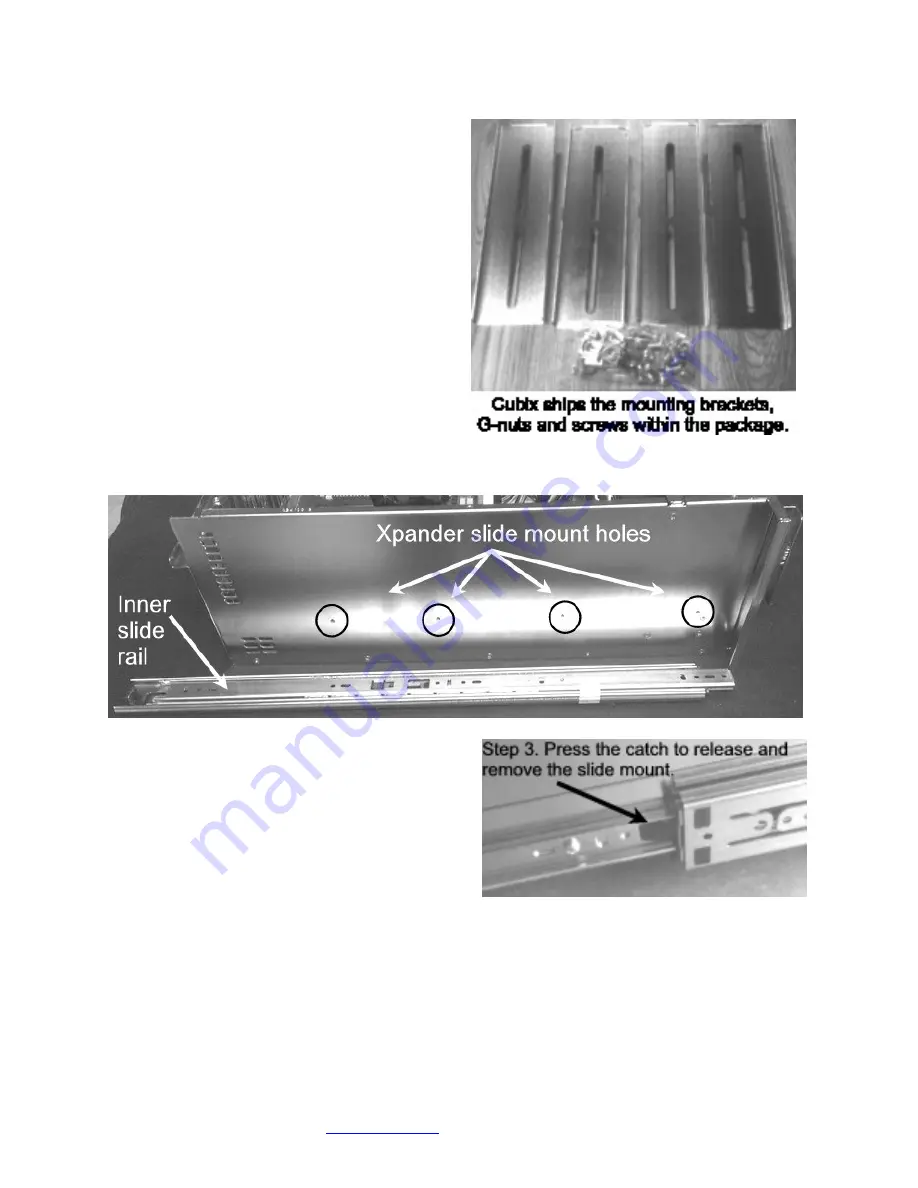
Within packaging, you will find four brackets
that mount within the four corners of your rack
mount cabinet, screws, nuts and G-nuts for use
in mounting Xpander within a cabinet. See the
image on the previous page.
1. Shut down the host and Xpander normally
and disconnect all data and power cables
connected to Xpander.
2. Find in packaging the rackmount slide rails with a bag of 8 x mounting screws taped to one
of the rails.
3. Remove the inner slide rail, or slide mount,
from the outer rail and mount it to Xpander
using the Xpander slide mounting holes. To
release each outer slide mount, slide it
toward the rear of the enclosure until it stops.
Press the catch to release and remove the
outer slide mount as you can see in the
image at the right.
4. Determine where to mount the Xpander slide
mounts in your cabinet.
5. Mount the front and rear mounting brackets (Part # S32760A) to each slider assembly with
the bolts and nuts provided in the packaging.
6. Repeat the process for the other front and two rear mounting brackets and slider assembly.
7. Tightly secure the screws holding the sliders to the front and two rear mounting brackets on
each side of the cabinet.
8. Check the two rails on each side and check from front to rear to make sure that you have
mounted the rails so that they are level within the cabinet.


