32
DANGER
BATTERIES CONTAIN SULFURIC ACID AND
MAY EMIT EXPLOSIVE GASES. USE
EXTREME CAUTION WHEN HANDLING
BATTERIES.
KEEP BATTERIES OUT OF THE REACH OF
CHILDREN.
MAINTENANCE OF BATTERY
The tractor is shipped with a wet battery — the battery
acid has already been added and the battery sealed.
Although the battery is maintenance free, the following
care should be taken when handling the battery and to
assure its proper life cycle.
1.
Spray the terminals and exposed wire with a
battery terminal sealer, or coat the terminals with a
thin coat of grease or petroleum jelly, to protect
against corrosion.
2.
The battery should be kept clean. Any deposits of
acid should be neutralized with baking soda and
water. Be careful not to get this solution in the
cells.
3.
Avoid tipping the battery. Even a “sealed” battery
will leak electrolyte when tipped.
STORAGE OF THE BATTERY
1.
When storing the tractor for extended periods,
disconnect the battery cables. Removing the
battery from the unit is recommended.
2.
All batteries discharge during storage. Keep the
exterior of the battery clean, especially the top. A
dirty battery will discharge itself more rapidly.
3.
The battery must be stored with a full charge. A
discharged battery will freeze at a higher
temperature.
Specific Gravity
Freezing Point
1.265
–71°F
1.250
–62°F
1.200
–16°F
1.150
5°F
1.100
16°F
COMMON CAUSES FOR BATTERY FAILURE
1.
Overcharging
2.
Undercharging
3.
Loose and/or corroded connections
4.
Excessive loads
5.
Freezing of electrolyte
* These causes do not constitute warranty in
the event of a battery failure.
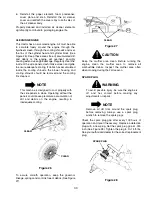
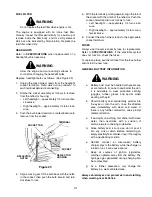
BATTERY REMOVAL OR INSTALLATION
WARNING
When removing the battery, disconnect the
battery cables in the following order to avoid
arcing and the resulting sparks:
Battery Removal:
1.
Disconnect the Negative cable.
2.
Disconnect the Positive cable.
Battery Installation:
1.
Connect the Positive cable.
2.
Connect the Negative cable.
To replace the battery, proceed as follows:
1.
Remove the negative cable from the negative
terminal of the battery, then remove the positive
cable from the positive terminal.
2.
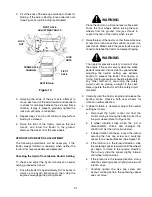
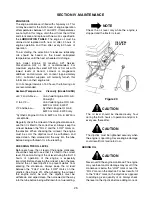
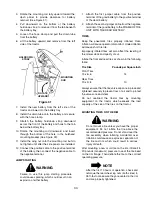
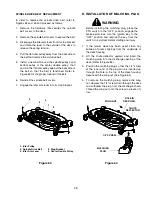
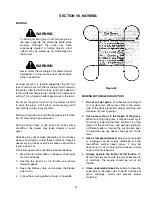
Remove the wing nut securing the left mounting
rod to the bulkhead mounting bracket (Refer to
Figure 30) and pull the rod downward from the
bulkhead bracket.
Figure 30
WING NUT
MOUNTING ROD

