


English
8988
♦♦♦
9
English
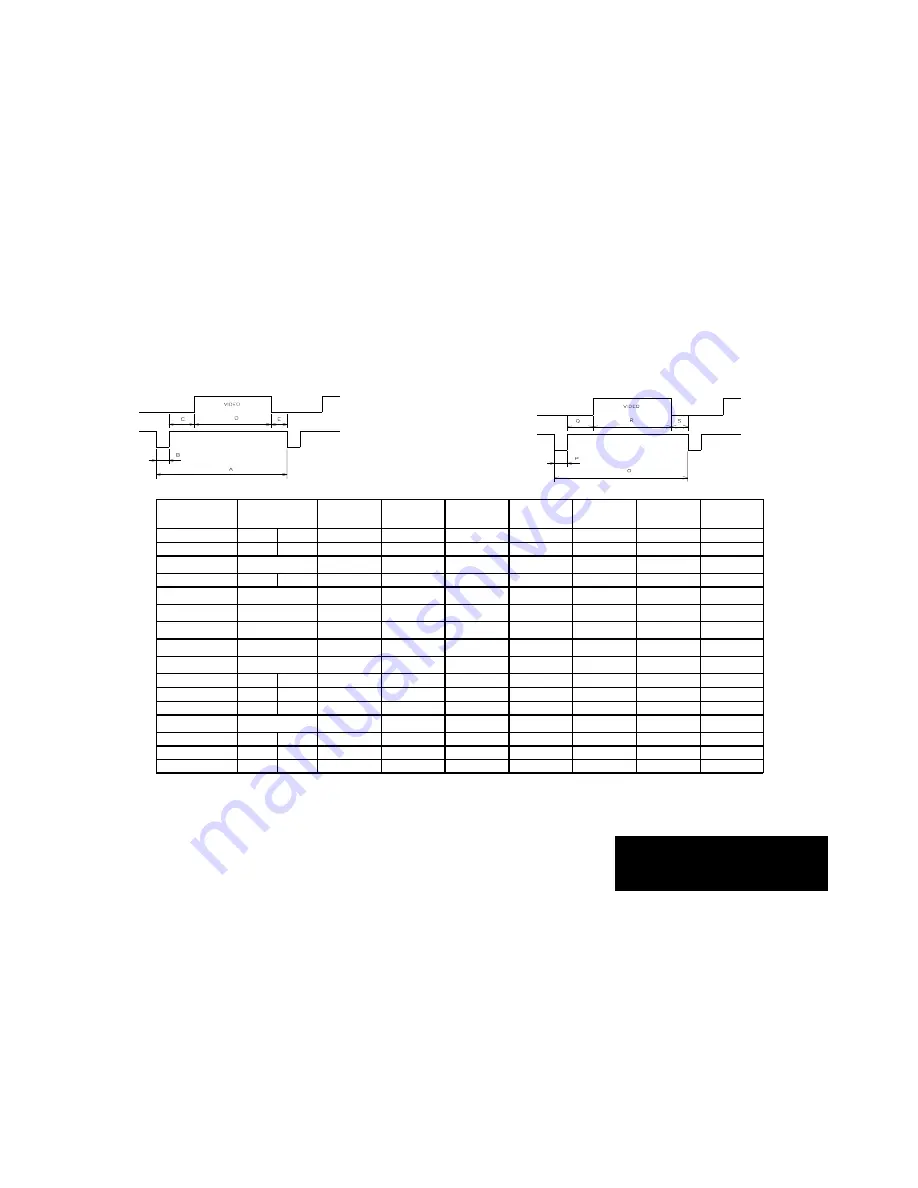
HORIZONTAL
VERTICAL
2.2 Preset Timing Chart
Note:This monitor is equipped with a micro-processor which allows user to
set his own preferred mode(s) beyond those listed below
.
* Bµs (Pulse Width) should be more than 0.5 µs.
To reduce visual tiredness and eye strain, choice of the higher refreshed mode is prefered.
Display Format
VGA
MAC II
VESA
640x480
at 85 Hz
640x480
at 120 Hz
VESA
800x600
at 85 Hz
800x600
at 100 Hz
VESA
1024x768
at 85 Hz
VESA
1280x1024
at 60 Hz
Hotizontal Dots
640
720
640
640
640
800
800
1024
1280
Vertical Lines
480
400
480
480
480
600
600
768
1024
H. Frequency(kHz)
31.500
35.000
43.269
63.500
53.674
63.800
68.677
63.679
H. Sync. Polarity
–
–
–
–
–
+
+
+
+
A
µ s
(Period)
31.780
28.571
23.111
15.74
18.631
15.660
14.561
15.700
*B
µ s
(Pulse Width)
3.810
2.116
1.333
1.742
1.138
1.118
1.016
1.333
C
µ s
(Back Porch)
1.910
3.175
3.111
1.738
2.702
2.006
2.201
2.222
D
µ s
(Active Area)
25.420
21.164
17.778
11.660
14.222
11.870
10.836
11.852
E
µ s
(Front Porch)
0.640
0.000
0.889
0.600
0.569
0.596
0.508
0.293
V. Frequency(Hz)
60.000
70.000
66.667
85.000
119.830
85.062
99.973
84.997
60.018
V. Sync. Polarity
–
+
+
–
–
+
+
+
+
Oms (Period)
16.680
14.270
15.000
11.763
8.342
11.756
10.006
11.765
16.700
Pms (Pulse Width)
0.060
0.086
0.069
0.094
0.056
0.063
0.044
0.047
Qms (Back Porch)
1.050
1.110
1.114
0.578
0.057
0.503
0.501
0.524
0.534
Rms (Active Area)
15.250
12.710
13.714
11.093
7.555
11.179
9.396
11.183
16.081
Sms (Front Porch)
0.320
0.380
0.000
0.023
0.538
0.041
0.046
0.015
0.038
Summary of Contents for 1569UA
Page 14: ... 14 English ...


