background image

Brand New Equipment: 


Once a host location partner has been approved                         

and the internet connection is confirmed, your touch 

screen order will be placed by the Ettractions team.                                                                         
Screens are shipped from Chicago. Expect to receive  

your new stand 

2-3 days 

after the order is placed.                                                                                            

Avoid delays in processing your order by providing all the                          
necessary signed paperwork, and have all host location profile                           
materials ready to go. Even if equipment has been received                     
we cannot complete the set-up process without the host profile.  


Using Existing Equipment: 


In some cases, you may be using existing                                        

equipment. Your designated screen may already                            

be in your warehouse, or may need to be transferred                    

to you from another division’s warehouse.  
Just like any “open box” equipment, make sure                         

that you have all the necessary tools and parts                        

available to assemble the ExploreBoard properly.   


Using an NEC Screen:  


Look for the display cable (VGA, DVI or HDMI)                               

plus the power cable and the touch cable.  
On NEC screens, the touch cable is native                                                 

to the screen. 


Using an ELO Screen:  


On ELO screens, the touch cable is detachable.                                 

If the 

touch 

cable is missing, a replacement                                          

will need to be ordered from ELO.  
If the 

display 

or 

power 

cable is missing,                                              

replacements may be purchased locally.          


Do You Need a Remote Control?


NEC screens and older ELO screens will                                               

need a remote control (with working batteries.) 
Newer ELO screens (4202 and 3202) do                                   

not need a remote control.   


ExploreBoard Screen Sizes: 

- 19”                                                                                                                  

- 32”                                                                                                          

- 42” 

Screen Models: 

NEC  V421,    V422, and V423                                                                                                 

32” ELO (BlueStar 3202L)                                                                 

42” ELO (BlueStar 4202L) 
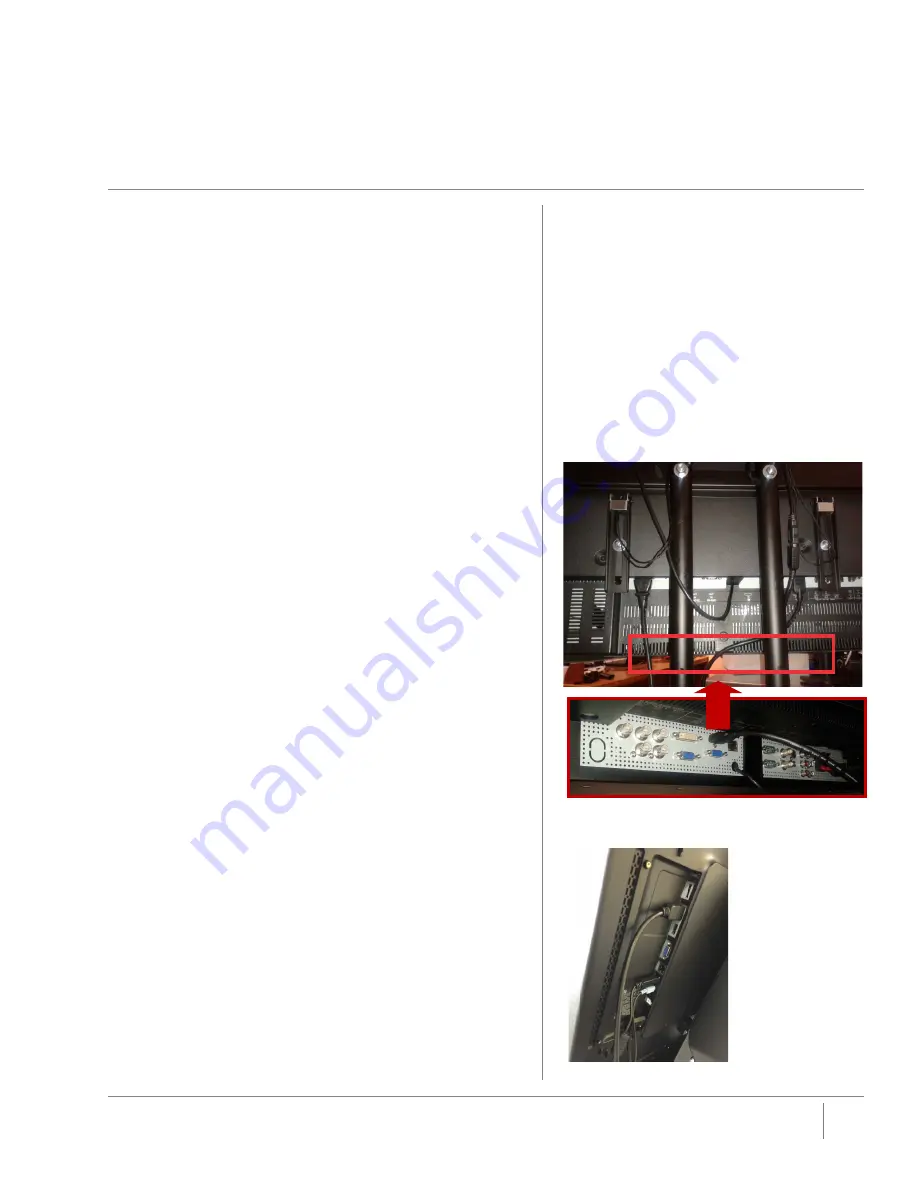
 

Installation 

Equipment: ExploreBoard Touch Screens 

The cable and power source connections to the NEC                    

screens are accessible underneath the screen 

Newer ELO screen 

models will have                     

their cable and power 

source connections                 

vertically 

accessible               

on the back side of               

the screen. 

Summary of Contents for Visitor Fun ExploreBoard Series

Page 1: ...eady for use Version 8 19 16 1 The Importance of a Successful Installation 2 Equipment Stands Screens Players Tablets Routers 3G Sticks 3 In Office Advance Assembly Testing 4 Transporting Equipment 5...

Page 2: ...find ExploreBoards welcoming and inviting excited to interact with high quality and relevant local information To achieve valuable and trackable usage reports and deliver a high return on each client...

Page 3: ...elay your colleague s installation schedules StandColors Black Silver Brown Rust White StandOptionsfor19 Screens Old Stand Sleek Original StandOptionsfor 32 Screens IronGiant Discontinued donotre use...

Page 4: ...tools and parts available to assemble the ExploreBoard properly UsinganNECScreen Look for the display cable VGA DVI or HDMI plus the power cable and the touch cable On NEC screens the touch cable is...

Page 5: ...of the Pillar style or housed in the storage area of the Sleek stands They work only with DVI or HDMI cables UsingRP930SeriesMediaPlayers These players will fit in all stands and work with all display...

Page 6: ...be transferred to you from another division s warehouse VERYIMPORTANT Your tablet will need to be connected to the internet to delete the previous content and upload the latest files for your new hos...

Page 7: ...tick with an activated inserted SIM Card 2 The TP LINK Router with its Power Adapter 3 An Ethernet Cable 4 A Laptop with a USB port 5 Set up Guidance Sheets for Your Equipment ETHERNET CABLE ETHERNET...

Page 8: ...any damage scratches dark spots etc and the touch should be working properly 2 ConfirmanActiveEthernetPort You will need to confirm that you have downloaded the latest content files prior to install 3...

Page 9: ...ly remove the 4 nuts from the screws located inside the player area and lean screen plate against the wall ScreenbracketsaredifferentforPillarStands dependingonifyouareusinganNECscreen Sincethisisolde...

Page 10: ...e screen closer to the frame with a screw No spacers Please ensure you have plenty of spacers in your office and contact Ettractions for more You may need additional spacers when attaching plate to th...

Page 11: ...get scratched up SleekStandAssembly 1 FLAT SCREEN PLATE IS ATTACHED TO VESA PATTERN ON BACK OF SCREEN a ELO SCREENS SCREEN PLATE WILL MOUNT DIRECTLY TO BACK OF DISPLAY b FOR NEC SCREENS SCREEN PLATE...

Page 12: ...liedby Peerlessandcanbehousedinthe storageareaofthestandwith thecablerunningunderthebase boardtoconnecttothewalloutlet SleekStands setthemediaplayer onthetopbracketandthepower strip onthebottombracket...

Page 13: ...on the top and screen power media player power audio Ethernet USB touch and HDMI will connect on the bottom right above your power strip WhenusingPillarStands runyourcables downthehollowpole fromtopto...

Page 14: ...llen wrench 4 screws from step 2 13 TestConnectivity Temporarily place player in storage area and power on pushing the button in the front Confirm all content loads and looks OK Check maps on the EB a...

Page 15: ...hat this is set up correctly prior to install 15 Affixthe VisitorInformation Decal Clean the front of the stand Slowly remove back paper from decal to reveal the sticky part of the decal Please go ver...

Page 16: ...can add it to our remote monitoring system 3 AssembletheStand LocatingtheSerialNumber StandAssembly Installation In OfficeAssembly Testing Tablets Screw back VESA Mount into tablet screen using the Ph...

Page 17: ...cables and tools for install Put the storage area cover back on the stand Leave frame OFF while transporting TransportingEquipment Don t forget your toolbox Put the stand on a dolly and bring all the...

Page 18: ...ols cords or packing materials out in the open Use zip ties or electric tape to secure cables together and organize the storage area Place the player inside the storage area Confirm all connections ar...

Page 19: ...se back storage area Contact Ettractions to confirm that we can see the EB on our end We will need to see that your EB is connected through our monitoring software to provide remote support to the hos...

Page 20: ...know the benefits features of the ExploreBoard how to turn the board tablet on off and how to handle basic maintenance and who to contact for support Confirmation Photo Take a few nice photos of your...

Page 21: ...ell http www homedepot com p Workforce Household Tool Kit 42 Piece 007 46 202279687 Keyboard with USB connection http www amazon com AmazonBasics KU 0833 Wired Keyboard dp B005EOWBHC ref sr_1_4 s pc i...

Page 22: ...tude longitudecoordinates WecanaddsitemapPDFstoaprofile but we arenot currentlyproviding orsupporting wayfinding technologyinsideabuilding Howdoprofiletranslationswork ExploreBoardsuseGoogleTranslate...

Reviews: