System Setup
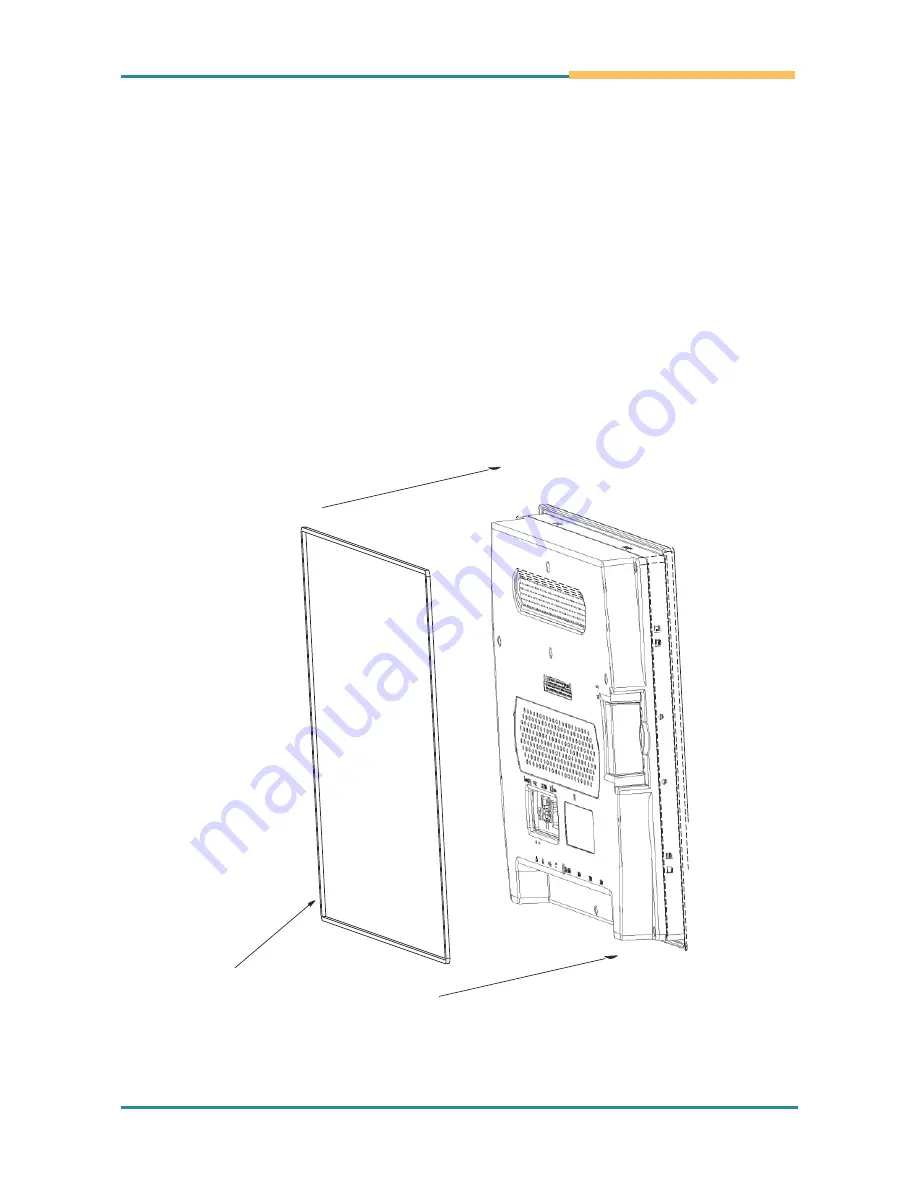
2.2.3 Panel Mounting
Step 1
: There is an adhesive waterproof gasket on the front bezel. Make
sure the waterproof gasket is in position before installing the 2500-
VP15 on the panel opening. (Figure 2.8)
Step 2
: Install the 2500-VP15 on the panel opening. (Figure 2.9)
Step 3
: Find the eight clampers and eight long screws in the accessory
pack. Hook these clampers to the holes around the four sides of the
bezel. Insert the screws into every clamper and fasten them. These
screws will then push the mounting panel and fix the unit.
(Figure 2.10)
Note
:
The panel opening thickness is suggested to be less than 5mm
(0.197 inches).
Waterproof Sponge
Figure 2.8: Panel Mounting_1
- 11 -
Summary of Contents for 2500-VP15
Page 2: ...P N 4017156100110P 2013 12...
Page 3: ...This page is intentionally left blank 2...
Page 8: ...Chapter 1 General Informa tion General Information Chapter1 1 General Information 1...
Page 14: ...Chapter 2 System Setup System Setup Chapter2 2 System Setup 7...
Page 20: ...System Setup 2 2 4 VESA Mounting Optional VESA bracket VESA 100 VESA 75 13...
Page 21: ...This page is intentionally left blank 14...
Page 22: ...Chapter 3 System Engine System Engine Chapter3 3 System Engine 15...
Page 29: ...This page is intentionally left blank 22...
Page 41: ...This page is intentionally left blank 34...
Page 42: ...Language Setup Chapter5 5 Language Setup 35...
Page 46: ...Chapter 6 System Tuning System Tuning Chapter6 6 System Tuning 39...
Page 51: ...This page is intentionally left blank...
Page 52: ...Chapter 7 Maintenance Maintenance Chapter7 7 Maintenance 45...


