Crystal Vision
Installation
Crystal Vision
Installation
Inserting and removing power supplies
In multi-supply frames one of the power supplies at a time can be inserted
and removed while the system is powered without damage. However, this
must be done quickly as there will be no forced convection air, as the PSU
fan assembly has to be removed.
To gain access to the Indigo PSUs proceed as follows:
•
If possible, power down the frame
•
Pull down the front panel using the black knobs or handles at either
side of the panel
•
Release the two captive screws to the left of the PSU fan
•
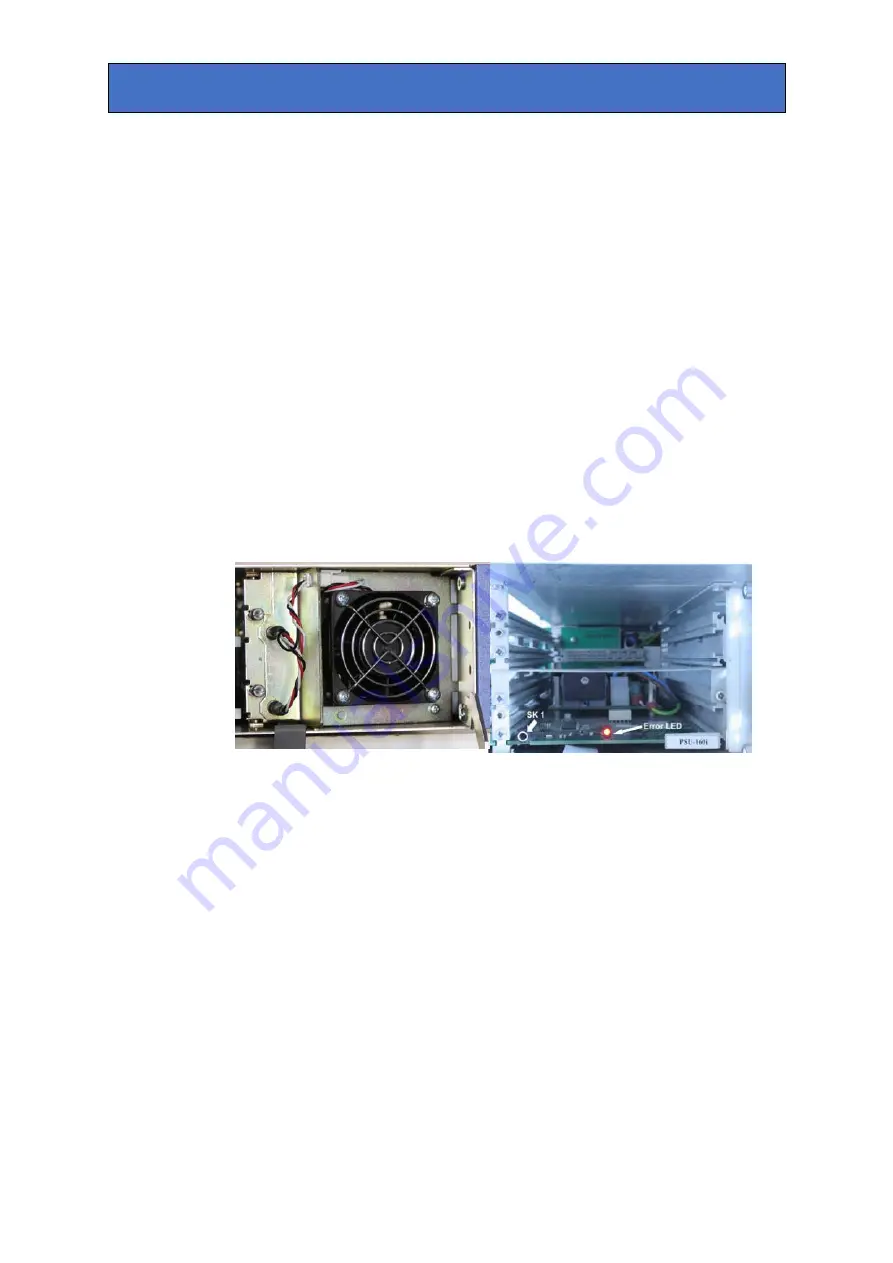
Remove the fan assembly by applying sideways pressure on the fan
assembly outwards and towards the right hand frame side
Note:
Take care not to damage the panel ribbon cable when removing the fan assembly.
Once the fan assembly has been pulled backwards to free the fan connector
plugs, the PSU fan will stop and the front panel PSU FAN LED will change
from green to red.
Removing the PSU fan assembly
Lower PSU-160i – front view
In addition to the PSU and fan LEDs on the front control panel, there is also a
red error LED on the PSU. This LED will flash slowly if there is no fan speed
signal present on the fan connector SK1 when the PSU fan assembly is
removed or if the PSU fan stops.
The error LED will light up continuously if power rail levels are outside
operational limits. When the fan speed signal is present and power rails are
normal the error LED is unlit.
Removing a PSU
To remove a PSU proceed as follows:
•
Apply sideways pressure on the PSU handle towards the right and
remove the PSU by pulling it forward
•
Take care when removing the lower PSU not to damage the panel ribbon cable
Caution:
There are no user serviceable parts inside the power supply module covers. The safety
covers should not be removed even when the module is disconnected.
Indigo PSU Manual R1.2
24/05/2010
8


