background image

RTX220 QR - Manual

 1. Pre-Installation Steps

1.1 Box Contents

Check the accessories with your RAX unit. Please contact CRU if any parts 
are missing or damaged.  The box should contain the following items:

1.2 Identifying Parts

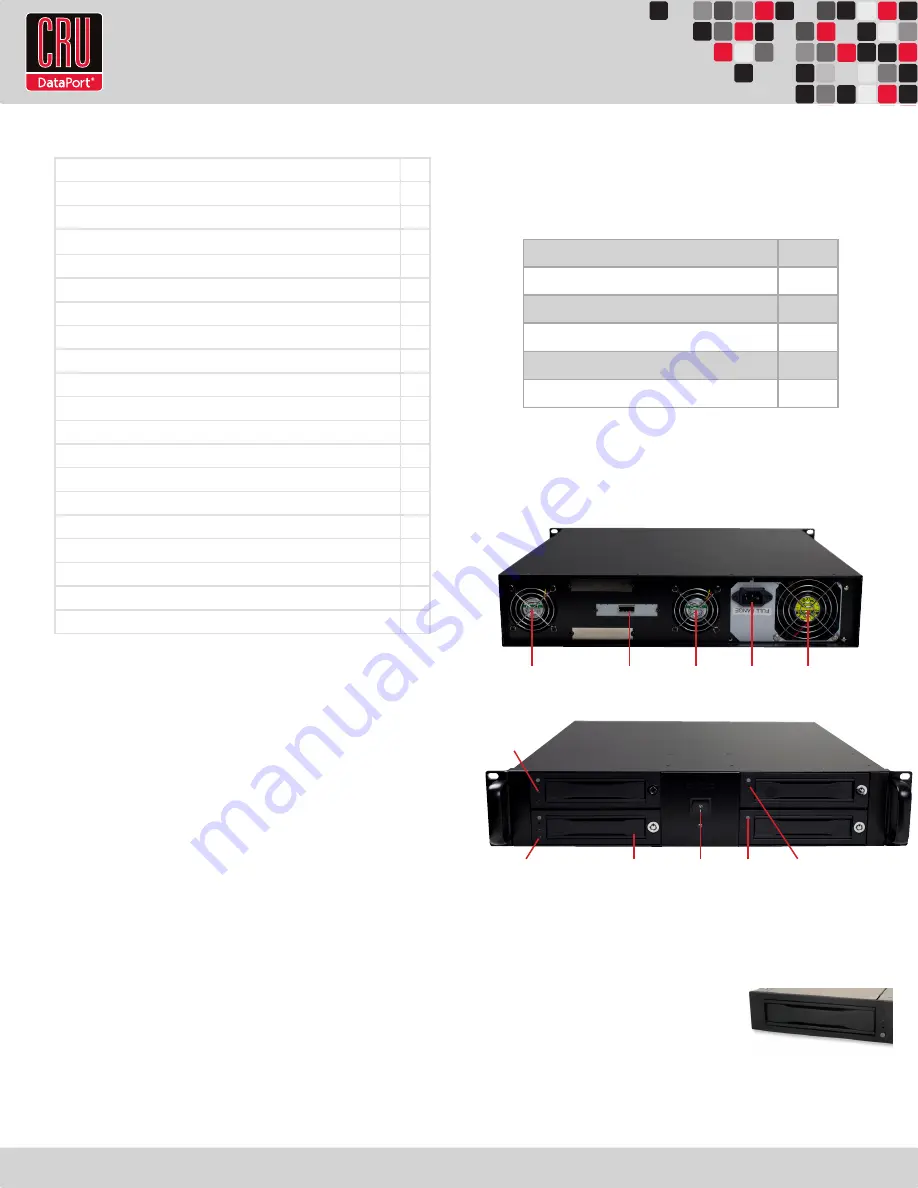
Take a moment to familiarize yourself with the parts of the RAX425DC-XJ.  
This will help you to better understand the remaining instructions. 

2. Installation Steps

2.1 Installing Hard Drives

a.   If the carrier is bundled with the unit, 

push in on the handle to pop it out, 
and then pull on the handle to remove 
the carrier from the frame.

b.   Use a Phillips-head screwdriver to remove the screws securing the 

drive cover on either side of the carrier, and then remove the cover.

Table of Contents


Accessories 

Quantity

RAX Unit

1

Power Cord

1

Key Set

1

Screw Kit

1

Quick Start Guide and Warranty Information

1

1. Pre-Installation Steps

1

1.1 Box Contents

1

1.2 Identifying Parts

1

2. Installation Steps

1

2.1 Installing Hard Drives

1

2.2 Rack Mounting Warnings

2

3. Operating RAX425DC-XJ

2

4. Usage with Mac and Windows Operating Systems

2

4.1 Usage with Macintosh Computers

2

4.1.1 Compatibility

2

4.1.2 Formatting a Drive

2

4.1.3 Mounting and Ejecting Volumes

2

4.1.4 Creating a Boot Drive

3

4.2 Usage with Windows Operating System

3

4.2.1 Compatibility

3

4.2.2 Formatting a Drive

3

4.2.3 Mounting and Ejecting Volumes

3

4.2.4 Creating a Boot Drive

3

5. Frequently Asked Questions

4

6. Technical Specifications

4

Page 1

60mm Bay Fan

Multi-Lane SAS/SATA 

Port (SFF-8088)

Power Supply 

Fan

Power 
Outlet

Power Switch

Power 

Button

Drive Activity LED

Fan Error LED 
Disable Button

Drive Ready/
Error LED

Carrier 

Handle

60mm Bay Fan

Summary of Contents for RAX 425DC-XJ

Page 1: ...ature allows the DX115 drive carriers automatically power up seconds after the carrier has been installed without having to push the on off button Drive activity fault LEDs for each drive bay Superior cooling with dual 60mm exhaust fans Durable light weight steel aluminum construction RAX TM Models Covered RAX425DC XJ ...

Page 2: ...ntity RAX Unit 1 Power Cord 1 Key Set 1 Screw Kit 1 Quick Start Guide and Warranty Information 1 1 Pre Installation Steps 1 1 1 Box Contents 1 1 2 Identifying Parts 1 2 Installation Steps 1 2 1 Installing Hard Drives 1 2 2 Rack Mounting Warnings 2 3 Operating RAX425DC XJ 2 4 Usage with Mac and Windows Operating Systems 2 4 1 Usage with Macintosh Computers 2 4 1 1 Compatibility 2 4 1 2 Formatting a...

Page 3: ...into the frame and the Auto Start feature will power up the drives automatically Your RAX is now ready to use If the hard drives are already formatted the RAX can be used right away If the hard drives are brand new or the formats are not compatible with your computer the drives will need to be formatted before being used See the following section Usage with Mac and Windows Operating Systems NOTE A...

Page 4: ...asilybyitsvolumename Ifit sunformatted theDrivePropertiesBoxwillsay Unallocated and you llneedtoinitializethediskbeforeformattingit Initializethediskby right clickingtheDevicePropertiesBoxandselectingInitializeDisk d To format the drive right click the Drive Properties Box and select Format e If you are prompted to select a partition type select MBR for volumes 2TB or smaller or GPT for volumes la...

Page 5: ...rved Limited Product Warranty CRU DataPort CRU warrants RAX to be free of significant defects in material and workmanship for a period of two years from the original date of purchase CRU s warranty is nontransferable and is limited to the original purchaser Limitation of Liability The warranties set forth in this agreement replace all other warranties CRU expressly disclaims all other warranties i...

Reviews: