background image

Installation

17

English

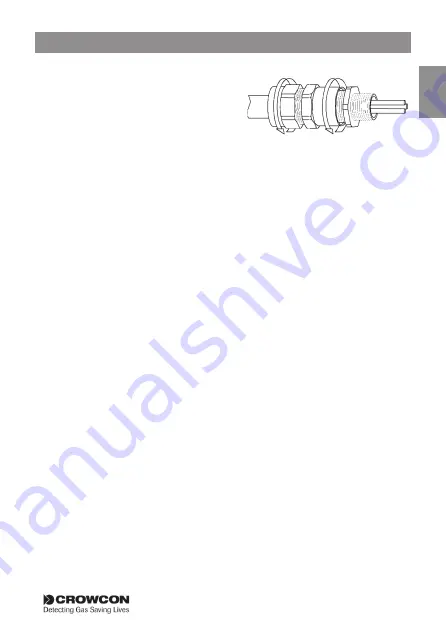
Clamping Ring. If armour/braid not 
clamped, repeat assembly.

6. 

Remove Entry and refi t Inner Seal, 
replace Entry and re-assemble Middle 
Nut onto the entry component. 
Tighten up the Middle Nut by hand 
then using a wrench/spanner a further 
1 to 4 turns until fully tight.

Notes:

1. These instructions are provided for general guidance only. It is essential 

that the instructions provided by the cable gland manufacturer are strictly 
adhered to.

2. Only cable glands ATEX and IECEx certifi ed Exd Flameproof may be used 

with 

Xgard Bright

.

3. Cable glands must have a minimum ingress protection rating of IP66.

Summary of Contents for Xgard Bright

Page 1: ...Installation Operation and Maintenance Instructions M070068 Issue 5 December 2020 Xgard Bright Gas Detectors with Display and Relays...

Page 2: ......

Page 3: ...quirement 8 2 5 Cabling Requirement 4 to 20 mA Current Loop 8 2 6 Cabling Requirement Multidrop MODBUS 9 2 6 1 Calculating acceptable cable length and detector quantities 10 2 7 Earthing requirements...

Page 4: ......

Page 5: ...ours in concentrations not exceeding the Lower Explosive Limit LEL of the target gas for which the detector is calibrated Xgard Bright is ATEX and IECEx Ex db IIC T6 Gb flameproof certified for use in...

Page 6: ...when replacing cells to ensure that the electrolyte does not come into contact with skin or eyes Maintenance and calibration operations must only be performed by qualified service personnel Only genui...

Page 7: ...Introduction 3 English 1 4 Certification labels Diagram 1 Xgard Bright Certi cation Labels ATEX and IECEx certification label Gas name and range label Warning label...

Page 8: ...Introduction 4 English 1 5 Product dimensions All dimensions in millimetres Diagram 2 Xgard Bright dimension view...

Page 9: ...Introduction 5 English 1 6 Exploded view Diagram 3 Xgard Bright exploded view...

Page 10: ...e g rain or flooding For detectors mounted outdoors Crowcon recommend the use of a Spray Deflector Part No C01052 Consider ease of access for functional testing and servicing Consider how the escaping...

Page 11: ...ces to the multi drop communications End user will only use certified cable gland for installation 2 3 Internal Electrical Connections Diagram 4 Xgard Bright internal electrical connections B A B A SI...

Page 12: ...nsumption cable resistance and panel voltage Current consumption should consider worst case e g when the accessories are powered Example Calculation 1 What is the longest cable for a bright to operate...

Page 13: ...ximum cable distances given typical cable parameters for this example calculation C S A Resistance Ohms per km Max Distance km mm2 Awg Cable Loop 1 0 17 18 1 36 2 2 2 1 5 15 12 1 24 2 3 3 2 5 13 7 4 1...

Page 14: ...r network In this instance it may be most practical to terminate the two cables within a junction box near to each detector and drop and single combined cable with smaller power conductors locally to...

Page 15: ...070A to the value for the aggregate current to get to 0 14A the minimum current running through the last but one hop of the bus Multiply this by the cable resistance for the last but one hop to get th...

Page 16: ...e segment has a there and back resistance of 12 1 x 2 x 20 1000 0 484 ohms So the cable volts drop to detector n 2 is Vc 0 070 x 0 484 0 03388V V n 2 V n 1 Vc 10 0338 V Now the voltage at detector n 3...

Page 17: ...34 0 77 0 37268 N 12 12 23608 0 84 0 40656 N 13 12 64264 0 91 0 44044 N 14 13 08308 0 98 0 47432 N 15 13 5574 1 05 0 5082 N 16 14 0656 1 12 0 54208 N 17 14 60768 1 19 0 57596 N 18 15 18364 1 26 0 6098...

Page 18: ...afety it is essential that the Xgard Bright enclosure is bonded to earth usually using the external earth lug if an earth cable is provided in the field cable the internal earth point can be used The...

Page 19: ...nd 1 Screw the gland Entry into the Xgard Bright M20 cable Entry Using two spanners or wrenches hold the gland Entry in position to prevent rotation and tighten the Middle Nut until resistance is felt...

Page 20: ...pigot until the end of the armour braid is up against the shoulder of the armour cone Position the Armour Clamping Ring 3 Remove the Inner seal from the Entry Place the Entry over the Armour Spigot Mo...

Page 21: ...ut by hand then using a wrench spanner a further 1 to 4 turns until fully tight Notes 1 These instructions are provided for general guidance only It is essential that the instructions provided by the...

Page 22: ...r product code C01052 For outdoor installations and sensor protection from water sprays Weatherproof cap product code C01442 For use offshore or very wet environments Flow adaptor product code C01339...

Page 23: ...s on a black background and can be viewed clearly even in bright sunlight Reversed white screen saver will be activated in normal detection condition while long time no operation Diagram 6 Xgard Brigh...

Page 24: ...n normal operation the gas level will be indicated on the display Use the supplied magnetic wand to select the Scroll key to move between the information screens shown below Diagram 8 Gas status scree...

Page 25: ...en 4 Set Alarm 1 to adjust the first alarm threshold 5 Set Alarm 2 to adjust the second alarm threshold Note When Alarm 2 threshold is set lower than the Alarm 1 threshold both alarms are falling e g...

Page 26: ...ill be displayed When zeroing is complete a pass or fail screen will be displayed Press OK to return to the Main menu Note Calibration of oxygen channels Zeroing is not required for an oxygen instrume...

Page 27: ...or when flammable gas may be present Ensure the associated control panel is inhibited so as to prevent false alarms Service and maintenance work should be carried out by Crowcon an approved service c...

Page 28: ...s and inhibitors Toxic and flammable gas sensor modules should be replaced when they fail to calibrate or show a very low response to test gas Oxygen sensors must be replaced every two years To replac...

Page 29: ...llector drive 24Vdc nominally 0 7A maximum load Operating temperature 40 C to 70 C 40 F to 158 F Note sensor operating temperatures vary Refer to the sensor module datasheet or contact Crowcon for spe...

Page 30: ...drogen Sulphide 0 25ppm H2S S015103 S XGB Spare Sensor Module Hydrogen Sulphide 0 50ppm H2S S015104 S XGB Spare Sensor Module Hydrogen Sulphide 0 100ppm H2S S015105 S XGB Spare Sensor Module Hydrogen...

Page 31: ...nsor Module Propane IR 0 100 LEL S015128 S XGB Spare Sensor Module Butane IR 0 100 LEL S015122 S XGB Spare Sensor Module Pentane IR 0 100 LEL S015129 S XGB Spare Sensor Module LPG IR 0 100 LEL S015135...

Page 32: ...lication It is the clients sole responsibility to carry out the necessary tests to evaluate the usefulness of the products and review all applicable regulations and standards to ensure their safety of...

Page 33: ...Warranty 29 English Our postal address is Crowcon Detection Instruments Ltd UK Head Office 172 Brook Drive Milton Park Oxfordshire OX14 4SD...

Page 34: ......

Page 35: ......

Page 36: ...truments Ltd Vlambloem 129 3068JG Rotterdam Netherlands Tel 31 10 421 1232 Fax 31 10 421 0542 Email eu crowcon com Website www crowcon com Singapore Office Crowcon Detection Instruments Ltd Block 194...

Reviews: