GLASS DRILL InStRuctIon MAnuAL
GLASS-cHEK PRo oPERAtInG MAnuAL
crlaurence.com
c.R. Laurence co., Inc.
•
2503 E. Vernon Ave., Los Angeles, cA 90058
•
1.800.421.6144
•
crlaurence.com
SEPtEMBER 2020
P. 3
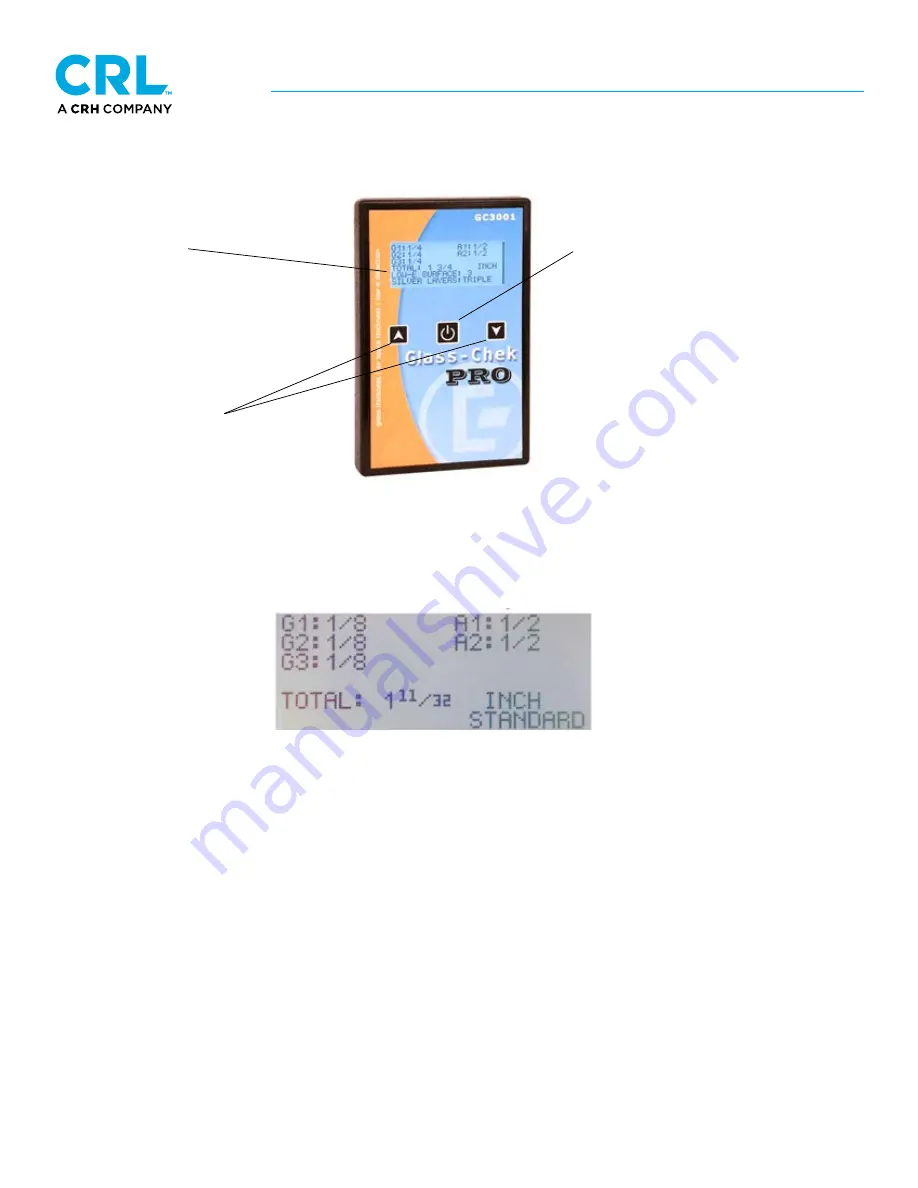
MeTeR laYoUT
ExPLANATION Of ThE REsuLTs sCREEN
MENu OPTIONs
There are various OPERATING MOdEs and user-selectable options that will make your experience with the Glass-Chek
PRO more convenient All of these options are available in the MENu system. To access the MENu system, turn the meter
on by pressing and releasing the POWER buTTON and wait for the WELCOME screen to complete its display. The
WELCOME screen will show you the version of software that is in your meter, as well as confirm the current OPERATING
MOdE that the meter is operating in. be sure you have selected the proper operating mode for your application. Choosing
the wrong mode can result In Incorrect measurement results, or no results at all. Remember If you change the operating
mode, It will stay In that mode for all future measurements, until you change It again by entering the MENu system.
Powering the meter Off will NOT reset the operating mode.
Results display: DATA
- digital measurement results of the
glass, air space, and overall IG thickness
- Also displays the type of Low E coating
In the window, and the surface location
The ARROW keys are used to:
- scroll between measurement result screens
(forward and backwards)
- Press & hold to enter the MENu system
- Move the cursor up and down in the MENu
- Toggle between options in the MENu
Glass thickness typically shown
in the left column
Air space thickness typically shown
in the right column
The POWER button is used to:
- Turn the power ON (Momentary press)
- Turn the power Off (Press & hold)
- Take a measurement (Momentary press)
- Make a selection in the MENu


