


Crestron
DTT-15V2
DualTouch™ Technology Touchpanel
Cleaning
Keep the pen and screen surface clean. Dust and dirt particles can stick to the pen
and cause wear to the screen surface. Regular cleaning will help to prolong the life of
your equipment.
•
To clean the outer casing, stand, and pen, use a soft cloth and a mild
detergent (such as dishwashing liquid) diluted in water. Do not use paint
thinner, benzene, alcohol or other solvents.
•
To clean the surface of the display screen, use an anti-static cloth or very
slightly dampened cloth. Apply only very light pressure and do not make
the screen surface wet. Never use detergents or solvents to clean the screen.
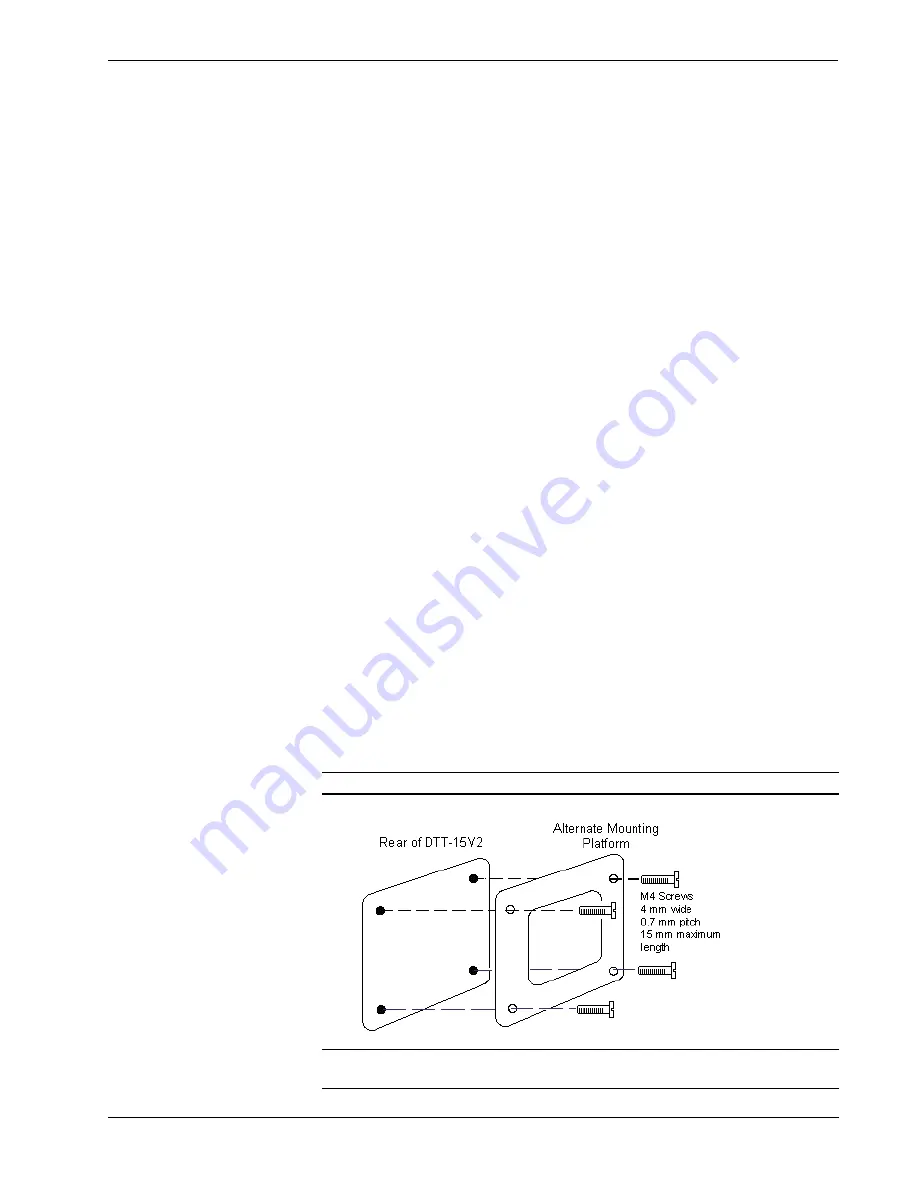
Alternative Mounting
The DTT-15V2 may be removed from the adjustable stand and remounted to a
VESA
®
conforming mount arm or stand. The Video Electronics Standards
Association (VESA) is an international non-profit corporation that supports and sets
industry-wide interface standards for the PC, workstation, and computing
environments. VESA's Flat Display Mounting Interface (FDMI) Standard defines a
set of mounting interface standards for the complete range of flat displays with
viewing areas ranging in size from 102 mm (4") to 2286 mm (90") diagonal. FDMI
supports a broad range of mounting options including desktop, wall, overhead,
mobile and specialty mounting applications. Corresponding standards describe the
interface mounting pads, wall mount brackets and other mounting apparatus to be
provided by mounting equipment manufacturers. The complete standard is available
on the VESA website. The DTT-15V2 is VESA MIS-D, 100/75, C compliant, and is
equipped with a 75 x 75 mm mounting hole pattern.
Follow these instructions for removing the adjustable stand and attaching the
DTT-15V2 to an alternative VESA conforming mount.
1. Turn off the system and disconnect all cables.
2. Protect the screen surface by placing the DTT-15V2 facedown on a soft
cloth.
3. Remove the four screws that secure the stand.
4. Use four M4 regular screws, no longer than 15 mm, 7 mm wide with a 0.7
mm pitch to attach the new mounting.
NOTE:
Screws longer than 15 mm could damage the DTT-15V2.
CAUTION:
When attaching the DTT-15V2 to an alternate mounting platform, be
sure to follow all instructions supplied by the manufacturer.
y
DualTouch™ Technology Touchpanel: DTT-15V2
Operations Guide – DOC. 6342
16


