16
ENGLISH
STEP 4. DRIVER CONNECTION
+
+
B
DRIVER
O
SPLICING TERMINALS
10
11
H
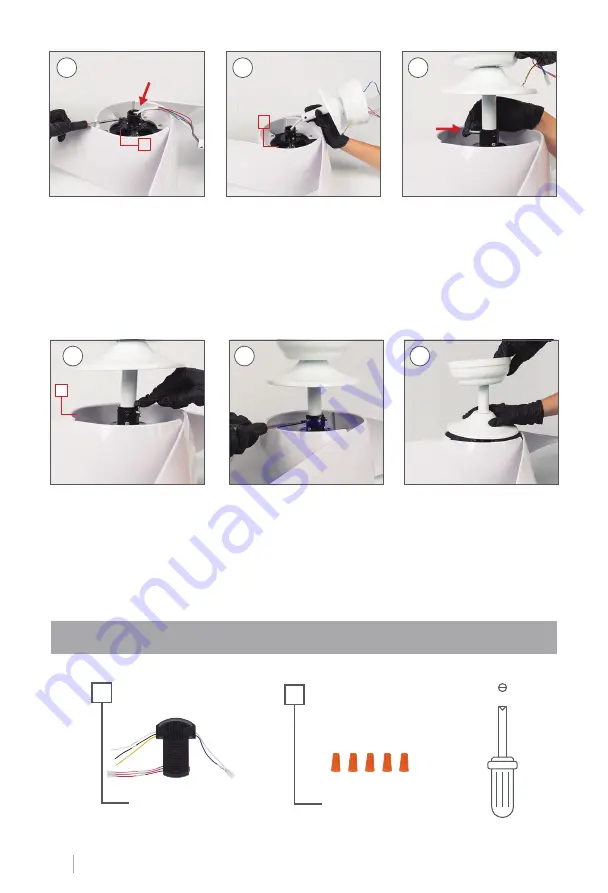
Put the locking piece on the
pin so that it does not come
out.
Then replace the two
screws so that the post is
fully attached.
Once the stem is well an-
chored to the piece
H,
the
main body of the fan motor
will be assembled.
12
H
7
8
9
H
Insert the seatpost into the
top of the piece
H.
Make
sure no wires get pinched.
Once the seatpost has been
inserted, place the pin of the
piece
I
/
J
so that it matches
the hole in the seatpost.
With the help of a screw-
driver, remove the 2 screws
from the top of the piece
H
.
Summary of Contents for WIND FOLD
Page 1: ...1 ENGLISH WIND FOLD CEILING FAN WITH LIGHT MANUAL ASSEMBLY ...
Page 2: ......
Page 3: ......
Page 23: ......
Page 24: ...24 ENGLISH ...


