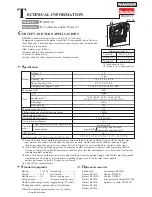
background image

5

English

TOOL SPECIFICATIONS

Height (inch/meter) 

6.3/0.16

Width (inch/meter)

1.7/0.04

Length (inch/meter)

8.9/0.22

Weight (lbs/kg)

2/0.91

Recommended Operating Pressure 

60‑100 psi (4.1 to 6.9 bar)

Air Consumption per 100 cycles

1.56 SCF

Loading capacity

170 nails

Lubrication

Oil

ASSEMBLY AND ADJUSTMENTS


WARNING: To reduce the risk of serious personal 

injury, turn unit off and remove air supply before 

making any adjustments or removing/installing 

attachments or accessories.

 An accidental actuation 

can cause injury.

The label on your tool may include the following symbols. The 
symbols and their definitions are as follows:

BPM ....................beats per minute
V ......................... volts
min .....................minutes

j

 or DC ............direct current

…/min ..............per minute
RPM .................... revolutions  per 

minute

A .........................amperes
Hz .......................hertz
W ........................watts
Wh ......................watt hours
no .......................no load speed
n .........................rated speed

c

 .....................safety alert symbol

h

 ..................... wear  respiratory 

protection

f

 ..................... wear eye protection

i

 ..................... Class II Construction 

(double insulated)

g

 ..................... wear  hearing 

protection

a

 ..................... read  all 

documentation

n

 ..................... avoid staring at 

light

l

 or AC............alternating current

Ah ....................... amp  hours

mouth, eyes, or lay on the skin may promote absorption of 

harmful chemicals. Direct particles away from face and body.

• 

Use the appropriate dust extractor vacuum to remove 

the vast majority of static and airborne dust

. Failure 

to remove static and airborne dust could contaminate the 

working environment or pose an increased health risk to 

the operator and those in close proximity.

• 

Use clamps or other practical ways to secure and 

support the workpiece to a stable platform.

 Holding 

the work by hand or against your body is unstable and may 

lead to loss of control and injury.

• 

Air vents often cover moving parts and should be 

avoided.

 Loose clothes, jewelry or long hair can be caught 

in moving parts.

Additional Safety Information


WARNING: 

Never modify the power tool or any part of 

it. Damage or personal injury could result.


WARNING: ALWAYS 

use safety glasses. Everyday 

eyeglasses are NOT safety glasses. Also use face or 

dust mask if cutting operation is dusty. ALWAYS WEAR 

CERTIFIED SAFETY EQUIPMENT:
•  ANSI Z87.1 eye protection (CAN/CSA Z94.3),
•  ANSI S12.6 (S3.19) hearing protection,
•  NIOSH/OSHA/MSHA respiratory protection.


WARNING: 

Some dust created by power sanding, 

sawing, grinding, drilling, and other construction activities 

contains chemicals known to the State of California to 

cause cancer, birth defects or other reproductive harm. 

Some examples of these chemicals are:
•  lead from lead‑based paints,
•  crystalline silica from bricks and cement and other 

masonry products, and

•  arsenic and chromium from 

chemically‑treated lumber.

Your risk from these exposures varies, depending on 

how often you do this type of work. To reduce your 

exposure to these chemicals: work in a well ventilated 

area, and work with approved safety equipment, such 

as those dust masks that are specially designed to filter 

out microscopic particles.

• 

Wear protective clothing and wash exposed areas 

with soap and water. 

Allowing dust to get into your 


WARNING:

  This tool is not intended for use in 

potentially explosive atmospheres and is not insulated 
from coming into contact with electrical power.

•  Use the pneumatic tool only for the purpose for which it 

was designed.

•  Do not use the tool as a hammer.
•  Always carry the tool by the handle with hand off 

both  triggers. 

•  Never lift, pull, lower, or carry the tool by the air hose.
•  Whipping hoses can cause severe injury.  Always check for 

damaged or loose hoses or fittings.

•  Never direct compressed air at yourself or anyone else.
•  Compressed air can cause severe injury.
•  Do not alter or modify this tool from the original design or 

function without approval from CRAFTSMAN.

•  Never clamp or tape the trigger in an actuated position.
•  Ensure tool is always safely engaged on the workpiece and 

cannot slip.

•  Never leave a tool unattended with the air hose attached.

TO PREVENT ACCIDENTAL INJURIES:

•  Never place a hand or any other part of the body in fastener 

discharge area of tool while the air supply is connected.

•  Never actuate the tool unless nose is directed at the work.
•  Do not actuate the tool while loading.
•  Keep hands and body parts away from the discharge 

area of the tool. While in use NEVER grasp the tool by the 
magazine or canister, a mis‑driven fastener can exit the 
nose causing injury.

Summary of Contents for CMPPN23

Page 1: ...ISATION MANUALDEINSTRUCTIONES 23 GA Pin Nailer Clous de calibre 23 GA Pistola de clavos de pasador calibre 23 IFYOUHAVEQUESTIONSORCOMMENTS CONTACTUS POURTOUTEQUESTIONOUTOUTCOMMENTAIRE NOUSCONTACTER SITIENEDUDASOCOMENTARIOS CONTÁCTENOS 1 888 331 4569 WWW CRAFTSMAN COM ...

Page 2: ...English original instructions 3 Français traduction de la notice d instructions originale 10 Español traducido de las instrucciones originales 19 ...

Page 3: ...Gâchette secondaire 3 Arrivée d air avec coupleur à raccord rapide 4 Échappement arrière 5 Bouton de libération du magasin 6 Magasin 7 fenêtre de l indicateur de bas niveau des clous 8 Nez Componentes 1 Gatillo principal 2 Gatillo secundario 3 Entrada de aire con acoplador de conexión rápida 4 Escape trasero 5 Liberación de cargador 6 Cartucho 7 Ventana de indicador de pocos clavos 8 Pieza de punt...

Page 4: ...2 Fig B Fig C Fig D Fig E Fig F 3 9 10 5 6 8 11 3 ...

Page 5: ...e of a workpiece or at steep angles use care to minimize chipping IMPORTANT SAFETY INSTRUCTIONS WARNING Only persons who have read and understand the tool operating safety instructions should operate the tool WARNING Actuating tool may result in flying debris collation material or dust which could harm operator s eyes Operator and others in work area MUST wear safety glasses with side shields Thes...

Page 6: ...of the tool splitting or splintering or free flight or ricochet of fasteners which may cause injury Do not drive fasteners on top of other fasteners or with the tool at an overly steep angle as this may cause deflection of fasteners which could cause injury Do not load tool with fasteners when any one of the operating controls is activated Use extra caution when driving fasteners into existing wal...

Page 7: ...D SAFETY EQUIPMENT ANSI Z87 1 eye protection CAN CSA Z94 3 ANSI S12 6 S3 19 hearing protection NIOSH OSHA MSHA respiratory protection WARNING Some dust created by power sanding sawing grinding drilling and other construction activities contains chemicals known to the State of California to cause cancer birth defects or other reproductive harm Some examples of these chemicals are lead from lead bas...

Page 8: ...t leaks or has damaged parts Preparing the Tool WARNING Read the section titled IMPORTANT SAFETY INSTRUCTIONS at the beginning of this manual Always wear proper eye ANSI Z87 1 CAN CSA Z94 3 and hearing protection ANSI S12 6 S3 19 when operating this tool Keep the fastener pointed away from yourself and others For safe operation complete the following procedures and checks before each use of the fa...

Page 9: ... Fig A B E WARNING Disconnect the tool from the air supply and remove fasteners from magazine before making adjustments or personal injury may result Depth Adjustment WARNING To reduce the risk of serious personal injury turn unit off and remove air supply before making any adjustments or removing installing attachments or accessories An accidental actuation can cause injury CAUTION Air pressure i...

Page 10: ...ent a safety notification is required under the Federal Consumer Safety Act Register online at www craftsman com registration Repairs WARNING To assure product SAFETY and RELIABILITY repairs maintenance and adjustment including brush inspection and replacement when applicable should be performed by a CRAFTSMAN factory service center or a CRAFTSMAN authorized service center Always use identical rep...

Page 11: ...se driver to clean Cylinder sleeve not seated correctlyon bottom bumper Disassemble to correct Head valve dry Disassemble lubricate Air pressure too low Check air supply equipment Skipping fasteners intermittent feed Worn bumper Replace bumper Tar dirt in driver channel Disassemble and clean nose and driver Air restriction inadequate air flow through quick disconnect socket and plug Replace quick ...

Page 12: ...t avec la pièce à travailler peut être tiré par inadvertance blessant un utilisateur ou un passant CONSIGNES IMPORTANTES DE SÉCURITÉ AVERTISSEMENT seulement les personnes ayant lu et compris les instructions de fonctionnement sécurité de l outil doivent utiliser l outil AVERTISSEMENT l outil actionné pourrait projeter des débris de la colle d assemblage ou de la poussière qui peuvent tous provoque...

Page 13: ...tez l alimentation d air Évitez le contact avec la gâchette durant les ajustements AVERTISSEMENT lorsque vous utilisez l outil Manipulez toujours l outil avec soin Ne jamais faire des plaisanteries Ne jamais appuyer sur la gâchette à moins que le nez soit dirigé vers le travail Ne jamais pointer l outil vers vous ou d autres personnes Gardez les autres personnes à une distance sécuritaire de l out...

Page 14: ... parties de votre corps hors de la ligne de décharge de l outil Lors du travail ne JAMAIS agripper l outil par son magasin ou sa bonbonne une fixation non éjecté pourrait être relâché et causer des blessures Ne jamais saisir ou appuyer sur la gâchette par inadvertance lorsque vous vous déplacez lorsque vous changez de lieu de travail lorsque vous rangez ou suspendez l outil ou lorsque vous prépare...

Page 15: ...s blessures L étiquette sur votre outil peut comporter les symboles suivants Les symboles et les définitions sont les suivants BPM battements par minute V volts min minutes jou CC courant continu min par minute Tr min tours par minute A ampères Hz hertz W watts Wh Wattheures non vitesse à vide n vitesse nominale c symbole d alertes de sécurité h portez une protection respiratoire f portez une prot...

Page 16: ...e Préparation de l outil AVERTISSEMENT lisez la section intitulée CONSIGNES DE SÉCURITÉ IMPORTANTES au début de ce manuel Portez toujours une protection oculaire ANSI Z87 1 CAN CSA Z94 3 et auditive ANSI S12 6 S3 19 appropriée lorsque vous utilisez l outil Ne pas diriger la fixation vers vous ou d autres personnes Pour une utilisation sécuritaire effectuez les procédures suivantes et vérifiez la f...

Page 17: ...vers vous et suivez ces instructions pour le retirer 1 Déconnectez l alimentation d air de l outil 2 Poussez le bouton de libération du magasin 5 et tirez les magasin 6 en arrière Retirez les fixations 3 Retirez le tampon de protection 11 et utilisez la clé hexagonale pour déposer les deux boulons 10 et le nez 8 4 Retirez la fixation bloquée 5 Examinez le passage d alimentation et éliminez les clo...

Page 18: ...doivent être réalisés cela comprend l inspection et le remplacement du balai le cas échéant par un centre de réparation en usine CRAFTSMAN ou un centre de réparation agréé CRAFTSMAN Toujours utiliser des pièces de rechange identiques Accessoires AVERTISSEMENT puisque les accessoires autres que ceux offerts par CRAFTSMAN n ont pas été testés avec ce produit leur utilisation pourrait s avérer danger...

Page 19: ...ressort de bouchon de cylindre Embout bloqué dans le bouchon Démonter vérifier lubrifier Manque de puissance cycle lent Outil sec manque de lubrification Utilisez du lubrifiant pour outil pneumatique Ressort de bouchon de cylindre brisé Remplacez le ressort de bouchon Joints toriques joints d étanchéité coupés ou fissurés Remplacez les joints toriques joints d étanchéité Échappement bloqué Vérifie...

Page 20: ...rtes pour l outil Utilisez seulement les fixations recommandées Fixations tordues Cessez d utiliser ces fixations Mauvais formats de fixations Utilisez seulement les fixations recommandées Le joint d étanchéité du bouchon d embout fuit Serrez les vis remplacez le joint d étanchéité Joint torique de la valve de gâchette coupé usé Remplacez les joints toriques Enfonceur brisé ébréché Remplacez l enf...

Page 21: ...bajo puede dispararse involuntariamente y causar lesiones a un operador o transeúnte INSTRUCCIONES DE SEGURIDAD IMPORTANTES ADVERTENCIA Sólo las personas que hayan leído y comprendido las instrucciones de operación seguridad de la herramienta deben operar la herramienta ADVERTENCIA La herramienta en funcionamiento puede generar residuos volátiles materiales colacionados o polvo que pueden dañar lo...

Page 22: ...tilice el sentido común cuando emplee una herramienta eléctrica No utilice la herramienta si está cansado o bajo el efecto de drogas alcohol o ADVERTENCIA Cuando se opera la herramienta Siempre maneje la herramienta con cuidado Nunca juegue bruscamente con otros Nunca jale el gatillo a menos que la nariz esté dirigida hacia el trabajo Nunca apunte la herramienta hacia usted o hacia otros Mantenga ...

Page 23: ... manos y partes del cuerpo alejadas del área de descarga de la herramienta Mientras esté en uso NUNCA sujete la herramienta por el cargador o depósito un sujetador insertado incorrectamente puede salir de la punta causando lesiones medicamentos Un momento de descuido mientras se opera una herramienta eléctrica puede provocar daños personales graves ADVERTENCIA Después de insertar un sujetador la h...

Page 24: ...ES DE SUJETADOR Modelo Clavo Clavos de pasador calibre 23 Longitudes 1 2 13 mm 1 25 mm Entrada de aire 1 4 NPT 6 4 mm NOTA Sólo use sujetadores aprobados por CRAFTSMAN ESPECIFICACIONES DE HERRAMIENTA Altura pulgadas metros 6 3 0 16 Ancho pulgadas metros 1 7 0 04 Longitud pulgadas metros 8 9 0 22 Peso lbs kg 2 0 91 Presión de operación recomendada 60 100 psi 4 1 a 6 9 bar MONTAJE Y AJUSTES ADVERTEN...

Page 25: ... conexiones o accesorios Una activación de arranque accidental puede causar lesiones Uso de Gatillo Secundario Fig A ADVERTENCIA Para reducir el riesgo de lesiones utilice siempre protección para los ojos ANSI Z87 1 CAN CSA Z94 3 y auditiva ANSI S12 6 S3 19 cuando opere esta herramienta ADVERTENCIA No mantenga el gatillo presionado cuando la herramienta no esté en uso Puede resultar en lesiones pe...

Page 26: ...as apague la unidad y retire el suministro de aire antes de realizar cualquier ajuste o retirar instalar conexiones o accesorios Una activación accidental puede causar lesiones Eliminación de Clavo Atascado Fig A B E ADVERTENCIA Desconecte la herramienta del suministro de aire y retire los sujetadores del cargador antes de realizar ajustes o podrían producirse lesiones personales Si un clavo queda...

Page 27: ...cto está garantizado por un año a partir de la fecha de entrega contra cualquier defecto en su funcionamiento así como en materiales y mano de obra empleados para su fabricación Nuestra garantía incluye la reparación o reposición del producto y o componentes sin Accesorios ADVERTENCIA Debido a que no se han probado con este producto otros accesorios que no sean los que ofrece CRAFTSMAN el uso de d...

Page 28: ...o causado cuando otros hayan realizado o intentado reparaciones ESTA GARANTÍA LIMITADA SE OTORGA EN LUGAR DE Registro en Línea Gracias por su compra Registre su producto ahora para SERVICIO EN GARANTÍA Si completa esta tarjeta podrá obtener un servicio en garantía más eficiente en caso de que exista un problema con su producto CONFIRMATCIÓN DE PROPIEDAD En caso de una pérdida que cubra el seguro c...

Page 29: ...l resorte de la cabeza de válvula silenciador Ensamble de gatillo desgastado fugas Reemplace el ensamble de gatillo Suciedad brea acumulados en accionador Desensamble la punta accionador para limpiar Camisa de cilindro no asentada correctamente en tope inferior Desensamble para corregir Válvula de cabeza seca Desensamble lubrique Presión de aire demasiado baja Revise el equipo de suministro de air...

Page 30: ...onador desgastado Reemplace la punta revise la puerta Sujetadores de tamaño incorrecto Use sólo sujetadores recomendados Sujetadores doblados Deje de usar estos sujetadores Tornillos de cargador punta sueltos Apriete todos los tornillos Accionador roto astillado Reemplace el accionador ...

Page 31: ......

Page 32: ...11 20 Part No N915268 CRAFTSMAN 701 East Joppa Road Towson MD 21286 Copyright 2020 ...

Reviews: