background image

25

OPERACIÓN

ADVERTENCIA:

 Utilice siempre protección ocular, 

auditiva, de manos, pies y corporal para reducir el riesgo 

de sufrir lesiones durante la operación de esta unidad. 

Utilice una máscara facial o para polvos si la máquina 

levanta polvo durante su funcionamiento.

CÓMO SOSTENER LA UNIDAD 

•  Párese en la posición de arranque (Fig. 6). Párese derecho. No 

se incline sobre el aparato. 

• Mantenga los pies alejados y apoyados firmemente sobre el suelo. 
• Sostenga la unidad con firmeza. 
• Sostenga la unidad delante y separada del cuerpo (Fig. 6). 

RECOMENDACIONES PARA MEJORES RESULTADOS 

• Conserve agua utilizando la sopladora en lugar de una 

manguera para realizar muchas tareas de limpieza en exteriores. 

• Opere la unidad sólo en horarios razonables, ni temprano de 

mañana ni a la noche tarde cuando se puede molestar a la 

gente. Acate las horas detalladas en las ordenanzas locales. La 

recomendación usual es de 9:00 am a 5:00 pm, de lunes a sábado. 

• Para reducir el nivel de ruido, opere la unidad a la velocidad 

mínima necesaria para la tarea. Limite el número de equipos de 

potencia que se utilizan al mismo tiempo. 

• Use rastrillos o escobas para aflojar los residuos antes de la 

operación. 

• Cuando hay mucho polvo, humedezca ligeramente las superficies. 
• Use el control de crucero para facilitar la operación continua (Fig. 3). 
• Esté atento a los niños, las mascotas, las ventanas abiertas y los 

autos recién lavados. Sople los residuos lejos de ellos. Nunca 

debe apuntar la unidad hacia alguien mientras está funcionando. 

• Desplace la unidad de un lado al otro con el tubo del soplador 

varias pulgadas por sobre el suelo. Avance lentamente, 

manteniendo los desechos acumulados delante del operador. 

• Use únicamente el tubo para uso especial para concentrar e 

intensificar el flujo de aire cuando sea necesario. 

NO use el tubo 

para uso especial para tareas generales ni durante períodos 

prolongados. 

• Limpie al terminar la operación. Elimine los residuos correctamente.

ADVERTENCIA:

 A fin de evitar que se produzcan 

lesiones personales graves, no opere nunca la unidad si el 

tubo superior de la sopladora no está firmemente instalado.

WARNING:

 A fin de evitar que se produzcan lesiones 

graves o daños a la unidad, 

NO sostenga la unidad en su 

costado (Fig. 6). El motor puede estar muy caliente. 

NUNCA bloquee la toma de aire.

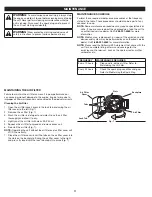
Fig. 6

Manija

Toma de aire

Summary of Contents for B210

Page 1: ...0 19 OPERATOR SMANUAL MANUALDELOPERADOR 2 CYCLE HANDHELD BLOWER SOPLADORPORTÁTILDE2CICLOS 1 888 331 4569 WWW CRAFTSMAN COM IFYOUHAVEQUESTIONSORCOMMENTS CONTACTUS SITIENEDUDASOCOMENTARIOS CONTÁCTENOS B210 CMXGAAMR25BL ...

Page 2: ...restor If it requires replacement contact your local service dealer to install the appropriate muffler assembly Read the operator s manual and follow all warnings and safety instructions Failure to do so can result in serious injury to the operator and or bystanders SYMBOL MEANING The purpose of safety symbols is to attract your attention to possible dangers The safety symbols and their explanatio...

Page 3: ...clean well ventilated outdoor area where there are no sparks or flames DO NOT smoke Never operate the unit without the fuel cap securely in place Avoid creating a source of ignition for spilled fuel Wipe up any spilled fuel from the unit immediately before starting the unit Move the unit at least 30 ft 9 1 m from the fueling source and site before starting the engine DO NOT smoke Never start or ru...

Page 4: ...cessories could lead to serious injury to the user or damage to the unit and void the warranty Keep the unit clean Carefully remove vegetation and other debris that could block moving parts To reduce fire hazard replace a faulty muffler and spark arrestor Keep the engine and muffler free from grass leaves excessive grease or carbon build up If the unit starts to vibrate abnormally stop the unit im...

Page 5: ...s use clean fresh unleaded fuel OIL Refer to operator s manual for the proper type of oil DO NOT USE E85 FUEL IN THIS UNIT CAUTION It has been proven that fuel containing greater than 10 ethanol will likely damage this engine and void the warranty ON OFF STOP CONTROL ON START RUN ON OFF STOP CONTROL OFF or STOP PRIMER BULB Push primer bulb fully and slowly 10 times CHOKE CONTROL START choke positi...

Page 6: ... cc 1 52 cu in Spark Plug Gap 0 025 in 0 635 mm Spark Plug Champion RDJ7J or equivalent plug Lubrication Fuel Oil Mixture Fuel Oil Ratio 40 1 Fuel Tank Capacity 13 5 oz 399 ml Approximate Unit Weight No fuel 9 10 lbs 4 1 4 5 kg Air Volume measured at upper tube general tube special tube 430 320 75 cfm 12 9 2 m3 min Air Speed Peak measured at upper tube general tube special tube 90 145 200 mph 145 ...

Page 7: ... unit on a flat level surface 2 Align the slot on the upper blower tube with the tab on the blower outlet Fig 1 3 Push the upper blower tube onto the blower outlet until the tab locks securely into the slot Fig 1 Installing the General Use Tube or Special Use Tube 1 Set the unit on a flat level surface 2 Align the tab on the general use tube or special use tube with the hole on the upper blower tu...

Page 8: ...t with a fuel additive such as STA BIL Fuel Stabilizer or an equivalent Add 0 8 oz 23 ml of fuel additive per gallon of fuel according to the instructions on the container NEVER add fuel additives directly to the unit s fuel tank Mixing the Fuel NOTE This unit comes with a 3 2 oz 95 ml container of 2 cycle oil To obtain the correct fuel mixture described below pour the entire container into one ga...

Page 9: ...imer bulb press and release the primer bulb until fuel is visible 2 Move the choke lever to the START position Fig 4 3 Crouch in the starting position Fig 5 4 Squeeze and hold the throttle control or move the cruise control to the HI fast position Fig 3 NOTE Continue to SQUEEZE and HOLD the throttle control or keep the cruise control in the HI fast position for ALL further steps Fig 3 5 Pull the s...

Page 10: ... through Saturday To reduce noise levels operate the unit at the lowest speed needed to do the job Limit the number of pieces of power equipment used at any one time Use rakes or brooms to loosen debris before operation In dusty conditions slightly dampen surfaces Use the cruise control to make continuous operation easier Fig 3 Watch out for children pets open windows and freshly washed cars Blow ...

Page 11: ...unit Never perform cleaning or maintenance while the unit is running Disconnect the spark plug wire to prevent the unit from starting accidentally WARNING Wear protective clothing and observe all safety instructions to prevent serious personal injury MAINTENANCE SCHEDULE Perform these required maintenance procedures at the frequency stated in the table These procedures should also be a part of any...

Page 12: ...park plug in the cylinder head Tighten the spark plug with a 5 8 inch socket turning it clockwise until snug NOTE If using a torque wrench torque to 110 120 in lb 12 3 13 5 N m Do not over tighten 6 Reattach the spark plug boot WARNING Do not sand blast scrape or clean spark plug electrodes Grit in the engine could damage the cylinder ADJUSTING THE IDLE SPEED If the engine will not idle properly 1...

Page 13: ... the fuel cap tip the unit and drain the fuel into an approved container Reinstall the fuel cap 2 Start the engine and allow it to run until it stalls This ensures that all fuel has been drained from the carburetor 3 Allow the engine to cool Remove the spark plug and put 5 drops of any high quality motor oil or 2 cycle oil into the cylinder Pull the starter rope slowly to distribute the oil Reinst...

Page 14: ...ain the fuel tank and add fresh properly mixed fuel The air filter is dirty Clean or replace the air filter PROBLEM SOLUTION The air filter is dirty Clean or replace the air filter The fuel is old over 30 days and or improperly mixed Drain the fuel tank and add fresh properly mixed fuel The idle speed is incorrect Adjust the idle speed The fuel is old over 30 days and or improperly mixed Drain the...

Page 15: ... have been used only for residential or otherwise non commercial purposes 4 Must have been used in a manner consistent with the normal and proper intended use Who Can Perform Repairs Under This Warranty In order to qualify for the limited warranty as set forth herein the repairs made under warranty must be performed by an authorized warranty service provider How To Get Service Under This Limited W...

Page 16: ...OR REPLACEMENT OF THE DEFECTIVE PART AS SET FORTH ABOVE SOME STATES DO NOT ALLOW LIMITATIONS ON HOW LONG AN IMPLIED WARRANTY LASTS SO THE ABOVE LIMITATION MAY NOT APPLY TO YOU 2 THE PROVISIONS AS SET FORTH HEREIN PROVIDE THE SOLE AND EXCLUSIVE REMEDY ARISING FROM THE SALE MTD LLC SHALL NOT BE LIABLE FOR INCIDENTAL OR CONSEQUENTIAL LOSS OR DAMAGES INCLUDING WITHOUT LIMITATION FOR TRANSPORTATION OR ...

Page 17: ...e chispas Si requiere reemplazo póngase en contacto con su representante local de servicio para instalar el conjunto de silenciador adecuado SÍMBOLOS SIGNIFICADO El objetivo de los símbolos de seguridad es dirigir su atención hacia posibles peligros Los símbolos de seguridad así como sus explicaciones necesitan su atención y comprensión completas Las advertencias de seguridad no eliminan por sí mi...

Page 18: ...SEA Z87 1 vigentes y que tengan la identificación correspondiente Utilice una protección auditiva al operar esta unidad Utilice una máscara facial o para polvos si la máquina levanta polvo durante su funcionamiento Use pantalones largos y gruesos botas guantes y camisa de mangas largas No use ropa holgada alhajas pantalones cortos sandalias ni ande descalzo Sujétese el cabello a nivel de los hombr...

Page 19: ...onecte la bujía para realizar tareas de mantenimiento o reparación Use sólo piezas de reemplazo y accesorios del fabricante del equipo original OEM para esta unidad Los puede adquirir al distribuidor de servicio autorizado Si usa cualquier otra pieza o accesorio el usuario podría lesionarse gravemente o la unidad podría dañarse y se anularía la garantía Mantenga limpia la unidad Quite con cuidado ...

Page 20: ...l tipo adecuado de aceite NO UTILICE COMBUSTIBLE E85 EN ESTA UNIDAD PRECAUCIÓN Se ha demostrado que el combustible que contiene más de un 10 de etanol es probable que dañe este motor y anule la garantía APAGADO ENCENDIDO DE CONTROL DE PARADA ENCENDIDO ARRANQUE MARCHA APAGADO ENCENDIDO DE CONTROL DE PARADA APAGADO o PARADA BULBO DEL CEBADOR Presione por completo el bulbo del cebador lentamente 10 v...

Page 21: ...1 52 pulgadas cúbicas Separación de las bujías 0 025 pulgadas 0 635 mm Bujía de encendido Champion RDJ7J o bujía equivalente Lubricación Mezcla de combustible y aceite Relación combustible aceite 40 1 Capacidad del depósito de combustible 13 5 onzas 399 ml Peso aproximado de la unidad sin combustible 9 10 libras 4 1 4 5 kg Volumen de aire medido en tubo superior tubo para uso general tubo especial...

Page 22: ...plana y nivelada 2 Alinee la ranura del tubo superior de la sopladora con la lengüeta de la salida de la unidad Fig 1 3 Oprima el tubo superior de la sopladora en la salida de la sopladora hasta que la lengüeta se trabe firmemente en la ranura Fig 1 Instalación del tubo de uso general y del tubo para uso especial 1 Coloque la unidad sobre una superficie plana y nivelada 2 Se debe alinear la lengüe...

Page 23: ...n un aditivo para combustible como el estabilizador de combustible STA BIL u otro equivalente Agregue 0 8 onzas 23 ml de aditivo para combustible por galón de combustible según las instrucciones del recipiente NUNCA agregue aditivos para el combustible directamente al depósito de combustible de la unidad Mezcla del combustible NOTA La presente unidad viene con un recipiente de 3 2 onzas 95 ml de a...

Page 24: ...l bulbo del cebador lentamente 10 veces Fig 4 Si no puede ver combustible en el bulbo del cebador oprima y suelte el bulbo del cebador hasta que se vea combustible 2 Coloque la palanca del estrangulador en la posición START arranque Fig 4 3 Agacharse en la posición de arranque Fig 5 4 Apriete y mantenga oprimido el control del acelerador o mueva el control de crucero a la posición HI rápido Fig 3 ...

Page 25: ... de potencia que se utilizan al mismo tiempo Use rastrillos o escobas para aflojar los residuos antes de la operación Cuando hay mucho polvo humedezca ligeramente las superficies Use el control de crucero para facilitar la operación continua Fig 3 Esté atento a los niños las mascotas las ventanas abiertas y los autos recién lavados Sople los residuos lejos de ellos Nunca debe apuntar la unidad hac...

Page 26: ...limpieza o mantenimiento mientras la unidad esté en funcionamiento Desconecte el cable de la bujía para evitar que la unidad arranque accidentalmente ADVERTENCIA Utilice vestimenta de protección y respete todas las instrucciones de seguridad para evitar que se produzcan lesiones personales graves PLAN DE MANTENIMIENTO Lleve a cabo los procedimientos necesarios de mantenimiento con la frecuencia in...

Page 27: ...adas girando en el sentido de las agujas del reloj hasta que quede ajustada NOTA Si se usa una llave de par apriete hasta 110 120 pulgada libra 12 3 13 5 N m No ajuste demasiado 6 Vuelva a colocar la funda de la bujía ADVERTENCIA No limpie de forma abrasiva ni raspe o limpie los electrodos de las bujías La presencia de polvo abrasivo en el motor podría dañar el cilindro AJUSTE DE LA VELOCIDAD DE R...

Page 28: ...largo plazo 1 Retire la tapa de combustible incline la unidad y drene el combustible en un recipiente aprobado Vuelva a colocar la tapa del combustible 2 Arranque el motor y déjelo correr hasta que se detenga Esto asegura que todo el combustible se haya drenado del carburador 3 Deje que el motor se enfríe Quítele la bujía y eche 5 gotas de cualquier aceite de motor de 2 tiempos de alta calidad en ...

Page 29: ... el depósito de combustible y agregue combustible nuevo que se haya mezclado adecuadamente El filtro de aire está sucio Limpie o reemplace el filtro de aire PROBLEMA SOLUCIÓN El filtro de aire está sucio Limpie o reemplace el filtro de aire El combustible está viejo más de 30 días y o no se mezcló adecuadamente Drene el depósito de combustible y agregue combustible nuevo que se haya mezclado adecu...

Page 30: ...de la fecha de compra como se indica en el comprobante de venta original correspondiente al Producto Período de la Garantía Defectos de Mano de Obra o Materiales Excepto por las Exclusiones se garantiza que el Producto estará libre de defectos de fabricación en la mano de obra o los materiales durante el Período de la Garantía Durante el Período de Garantía MTD LLC tendrá la opción de reparar o re...

Page 31: ...lementos personales 4 Daño resultante de la instalación o el uso de cualquier accesorio o pieza que no sea del OEM fabricante de equipo original para utilizar con el Producto Limitaciones 1 NO HAY NINGUNA GARANTÍA INCLUYENDO SIN LIMITACIÓN NINGUNA GARANTÍA TÁCITA DE COMERCIABILIDAD O APTITUD PARA UN DETERMINADO USO PASADO EL PERÍODO DE GARANTÍA NO SE APLICARÁ NINGUNA GARANTÍA SEGÚN LO ESTABLECIDO ...

Page 32: ...CIÓN 1 888 331 4569 PRODUCTMANUFACTUREDBY PRODUCTOFABRICADOPOR MTD LLC P O Box361131 Cleveland OH44136 0019 CRAFTSMAN ISAREGISTEREDTRADEMARKOFSTANLEY BLACK DECKER INC USEDUNDERLICENSE ESUNAMARCAREGISTRADADESTANLEY BLACK DECKER INC UTILIZADABAJOLICENCIA 2019 CRAFTSMAN U S CANADAONLY SÓLOENEE UU YCANADÁ ...

Reviews: