background image

18

ENGINE

FUEL SYS TEM
IMPORTANT
:  It is important to prevent 
gum deposits from forming in essential fuel 
system parts such as carburetor, fuel fi lter, 
fuel hose, or tank during storage. Alcohol 
blended fuels (called gasohol or using 
ethanol or methanol) can attract moisture 
which leads to separation and formation of 
acids during storage. Acidic gas can damage 
the fuel system of an engine while in storage.
•   Empty the fuel tank by starting the en-

gine and letting it run until the fuel lines 
and car bu re tor are empty.

•   Never use engine or carburetor cleaner 

prod ucts in the fuel tank or permanent 
damage may occur.

•   Use fresh fuel next season.
NOTE: Fuel stabilizer is an acceptable 
alternative in min i miz ing the formation of 
fuel gum deposits during stor age.  Add 
stabilizer to gasoline in fuel tank or stor-
age container.  Always follow the mix ratio 
found on stabilizer container.  Run engine 
at least 10 min utes after adding stabilizer 
to allow the stabilizer to reach the car-
buretor.  Do not empty the gas tank and 
carburetor if using fuel stabilizer.

ENGINE OIL
Drain oil (with engine warm) and replace 
with clean engine oil.  (See “ENGINE” in 
the Maintenance section of this man ual).

CYLINDER
1.   Remove spark plug.
2.   Pour one ounce (29 ml) of oil through 

spark plug hole into cylinder.

3.   Pull starter handle slowly a few times 

to dis trib ute oil.

4.   Replace with new spark plug.

OTHER

•   Do not store gasoline from one season 

to another.

•   Replace your gasoline can if your can 

starts to rust.  Rust and/or dirt in your 
gasoline will cause problems.

•   If possible, store your unit indoors and 

cover it to protect it from dust and dirt.

•   Cover your unit with a suitable pro tec -

tive cover that does not retain mois ture.  
Do not use plastic.  Plastic cannot 
breathe, which allows condensation to 
form and will cause your unit to rust.

IMPORTANT:  Never cover mower while 
engine and exhaust areas are still warm.

 CAUTION:  Never store the lawn 

mower with gaso line in the tank in side a 
build ing where fumes may reach an open 
fl ame or spark.  Allow the engine to cool 
before storing in any enclosure.

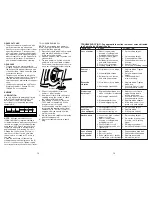
Does not start        1.   Dirty air fi lter.                           1.   Clean/replace air fi lter.
                                2.   Out of fuel.                               2.   Fill fuel tank.
                                3.   Stale fuel.                                 3.   Empty fuel tank and refi ll tank
                                                                                            with fresh, clean gasoline.
                                4.   Water in fuel.                           4.   Empty fuel tank and refi ll tank
                                                                                            with fresh, clean gasoline.
                                5.   Spark plug wire is                    5.   Connect wire to plug.
                                      disconnected.                               
                                6.   Bad spark plug.                        6.   Replace spark plug.
                                7.   Loose blade or broken             7.   Tighten blade bolt or
                                      blade adapter.                                replace blade adapter.  
                                8.   Control bar in released            8.   Depress control bar to
                                      position.                                         handle.
                                9.   Control bar defective.              9.   Replace control bar.
                                10. Fuel valve lever (if so               10. Turn fuel valve lever
                                      equipped) in OFF position.            to the ON position.
                                11. Weak battery (if equipped).     11. Charge battery.
                                12. Disconnected battery               12. Connect battery to engine. 
                                      connector (if equipped).
                                13. Blown fuse (if equipped).         13. Replace fuse.

PROBLEM                 CAUSE                                        CORRECTION 

TROUBLESHOOTING - See appropriate section in manual unless directed 
to a Sears Parts & Repair Centre.

15

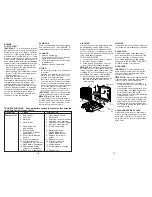
AIR FILTER 
Your engine will not run properly and may 
be damaged by using a dirty air fi lter. 
Replace the air fi lter cartridge every 100 
hours of op er a tion or every season, which-
 ev er occurs fi rst.  Service air cleaner more 
often under dusty conditions.

TO CLEAN AIR FILTER
1.   Loosen screw and tilt cover to re move.
2.   Carefully remove cartridge.
3.   Clean by gently tapping on a fl at sur-

face. If very dirty, replace car tridge.

 CAUTION:  Pe tro leum solvents, such as 

ker o sene, are not to be used to clean car-
 tridge. They may cause de te ri o ra tion of the 
cartridge. Do not oil car tridge. Do not use 
pres sur ized air to clean or dry car tridge.
4.   Install cartridge, then replace cover 

making sure the tabs are aligned with 
the slots in the back plate. Fasten 
screw securely. 

MUFFLER
Inspect and replace corroded muffl er as it 
could create a fi re hazard and/or dam age.

SPARK PLUG
Replace spark plug at the beginning of 
each mowing season or after every 100 
hours of operation, whichever occurs 
fi rst.  Spark plug type and gap setting 
are shown in the “PROD UCT SPEC I FI C-
A TIONS” section of this manual.

CLEANING

IMPORTANT:  For best performance, 
keep mower housing free of built-grass 
and trash. Clean the underside of your 
mower after each use.

 CAUTION:  Disconnect spark plug wire 

from spark plug and place wire where it 
cannot come in contact with plug.
•   Clean the underside of your lawn 

mower by scraping to remove build-up 
of grass and trash.

•   Clean engine often to keep trash from 

accumulating.  A clogged engine runs 
hotter and shortens engine life.

•  Keep fi nished surfaces and wheels free 

of all gasoline, oil, etc.

•   We do not recommend using a garden 

hose to clean lawn mower unless the 
elec tri cal system, muffl er, air fi lter and 
carburetor are covered to keep water 
out.  Water in engine can result in short-
ened engine life.

CLEAN UNDER DRIVE COVER
Clean under drive cover at least twice a 
season. Scrape underside of cover with 
putty knife or similar tool to remove any 
build-up of trash or grass on underside of 
drive cover.

Back plate

Slot

Lip

Cover 

tab

Cartridge

Cover

Summary of Contents for 944.360040

Page 1: ...l No 944 360040 CAUTION Read and follow all Safety Rules and Instructions before operating this equipment Owner s Manual ROTARY LAWN MOWER 625 Series Briggs Stratton Engine Power Propelled 22 Multi Cut Sears Canada Inc Toronto Ontario M5B 2B8 ...

Page 2: ...op machine if anyone enters the area Do not operate the mower when barefoot or wearing open sandals Always wear substantial foot wear Do not pull mower backwards unless absolutely necessary Always look down and behind before and while moving backwards Never direct discharged material toward anyone Avoid discharging material against a wall or obstruction Material may richochet back toward the opera...

Page 3: ...entwithaportablecontainer ratherthan from a gasoline dispenser nozzle Keep the nozzle in contact with the rim of the fuel tank or container opening at all times until fueling is complete Do not use a nozzle lock open device Iffuelisspilledonclothing changeclothing immediately Never overfill fuel tank Replace gas cap and tighten securely V GENERAL SERVICE Never run machine inside a closed area Neve...

Page 4: ...AIN VALID Sears retains the exclusive right to repair or replace the product or offer a full refund of the purchase price at its sole discretion SUCH REMEDY SHALL BE YOUR SOLE AND EXCLUSIVE REMEDY FOR ANY BREACH OF WARRANTY CUSTOMER RESPONSIBILITIES In additional to complying with all suggested maintenance guidelines and instructions customers obligations shall include but shall not be limited to ...

Page 5: ...rque 35 40 ft lbs The model and serial numbers will be found on a decal on the rear of the lawn mower housing Record both serial number and date of purchase in space provided above PRODUCT SPECIFICATIONS LIST OF APPLICABLE WARRANTY PERIODS The following list contains the applicable Warranty Period for your Craftsman product and is based on a combination of the type of product or component and the ...

Page 6: ...e carefully so as not to pinch or damage control cables 1 Raise lower handle section to operating positionandalignholeinhandlewithone of three height positioning holes 2 Insert handle bolt through handle and bracket and secure with knob 3 Repeat for opposite side of handle 4 Remove protective padding raise up per handle section into place on lower handle and tighten both handle knobs 5 Remove any ...

Page 7: ...HOUT OIL OR GASOLINE in the engine Operator presence control bar Handle knobs MEETS CPSC SAFETY REQUIREMENTS Sears rotary walk behind power lawn mowers conform to the safety standards of the American National Standards Institute and the U S Consumer Product Safety Com mission WARNING The blade turns when the engine is running Operator presence control bar must be held down to the handle to start t...

Page 8: ...r DRIVE CONTROL Self propelling is controlled by holding the operator presence control bar down to the handle and pulling either drive control lever rearward to the handle The further toward the handle a lever is pulled the faster the unit will travel Forward motion will stop when either the operator presence control bar or a drive control lever are released To stop forward motion without stopping...

Page 9: ...rass catcher installed 2 Mulcher door closed and locked FOR SIDE DISCHARGING 1 Rear door closed 2 Discharge deflector installed CAUTION Do not run your lawn mow er without rear door closed or approved grass catcher in place Never attempt to operate the lawn mower with the rear door removed or propped open TO EMPTY GRASS CATCHER 1 Lift up on grass catcher using the frame handle 2 Remove grass catch...

Page 10: ...l to use see ENGINE in the Maintenance section of this manual CAUTION DO NOT overfill engine with oil or it will smoke heavily from the muffler on startup 1 Be sure lawnmower is level 2 Remove oil dipstick from oil fill spout 3 You receive a container of oil with the unit Slowly pour the entire container down the oil fill spout into the engine NOTE Initial oil fill requires only 18 oz due to resid...

Page 11: ...For extremely heavy grass reduce your width of cut by overlapping previously cut path and mow slowly Certain types of grass and grass conditions may require that an area be mulched a second time to completely hide the clippings When doing a sec ond cut mow across perpendicular to the first cut path Change your cutting pattern from week to week Mow north to south one week then change to east to wes...

Page 12: ...pe lubricant sparingly Wheel adjuster on each wheel Engine oil Rear door hinge Handle bracket mounting pins Mulcher door hinge pin 21 CRAFTSMAN ROTARY LAWN MOWER MODEL NUMBER 944 360040 NOTE All component dimensions given in U S inches 1 inch 25 4 mm IMPORTANT Use only Original Equipment Manufacturer O E M replacement parts Failure to do so could be hazardous damage your lawn mower and void your w...

Page 13: ... adapter and check the key inside hub of blade adapter The key must be in good condition to work properly Replace adapter if damaged TO REPLACE BLADE 1 Position the blade adapter on the en gine crankshaft Be sure key in adapter and crankshaft keyway are aligned 2 Position blade on the blade adapter IMPORTANT To ensure proper assembly center hole in blade must align with star on blade adapter 3 Be ...

Page 14: ...nning low on oil Change the oil after every 25 hours of operation or at least once a year if the lawn mower is not used for 25 hours in one year Check the crankcase oil level before starting the engine and after each five 5 hours of continuous use Tighten oil plug securely each time you check the oil level Container TEMPERATURE RANGE ANTICIPATED BEFORE NEXT OIL CHANGE SAE VISCOSITY GRADES 20 0 30 ...

Page 15: ... or broken 7 Tighten blade bolt or blade adapter replace blade adapter 8 Control bar in released 8 Depress control bar to position handle 9 Control bar defective 9 Replace control bar 10 Fuel valve lever if so 10 Turn fuel valve lever equipped in OFF position to the ON position 11 Weak battery if equipped 11 Charge battery 12 Disconnected battery 12 Connect battery to engine connector if equipped ...

Page 16: ...ualified service center for repair and or adjustment IMPORTANT Never tamper with the engine governor which is factory set for proper engine speed Overspeeding the engine above the factory high speed setting can be dangerous If you think the engine governed high speed needs adjusting contact a Sears or other qualified service center which has proper equipment and experience to make any necessary ad...

Reviews: