background image

Summary of Contents for 486.24560

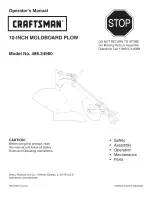
Page 1: ...s or Assembly Questions Call 1 866 576 8388 o CAUTION Before using this product read this manual and follow all Safety Rules and Operating Instructions Safety Assembly Operation Maintenance Parts Sears Roebuck and Co Hoffman Estates IL 60179 U S A www sears com craftsman PRINTED IN U S A FORM NO 49070 03 03 09 ...

Page 2: ...g use of tractor and attachment Always begin transmission in first low gear and gradually increase speed only when needed CRAFTSMAN FULL WARRANTY When operated and maintained according to all supplied instructions if this Craftsman product fails due to a defect in material or workmanship within one year from the date or purchase return it to any Sears store or other Craftsman outlet in the United ...

Page 3: ...lter Blade 2 2 Half Beam 8 1 Landside 3 1 Moldboard 9 1 Hitch Bracket 4 1 Standard 10 2 Adjustment Bracket 5 1 Coulter Standard 11 1 Coulter Fork 6 1 Coulter Hub 12 1 Threaded Tube Call 1 866 576 8388 for missing parts or assembly help 3 DO NOT RETURN TO STORE ...

Page 4: ... 25 3O 26 31 34 32 J J J J J J J J J J J J J J J J J J J J J J J J J J 18 28 35 NOT SHOWN FULL SIZE I l I 36 38 4 Call 1 866 576 8388 for missing parts or assembly help DO NOT RETURN TO STORE ...

Page 5: ...er 5 16 30 4 Hex Nut 5 8 18 1 Hex Bolt 1 2 x 1 3 4 31 2 Hex Nut 1 2 19 3 Lock Nut 5 16 32 3 Lock Nut 1 2 20 2 Hex Nut 3 8 33 2 Lock Nut 5 8 21 1 Roll Pin 5 16 x 1 3 4 34 2 Hex Bolt 5 8 x 2 22 1 Square Nut 1 2 35 1 Coulter Axle 23 1 Washer 5312 x 1 0625 x 09 36 1 U Bolt 5 8 24 2 Carriage Bolt 1 2 x 1 1 2 37 1 Coulter Clamp 25 1 Spacer 1 2 x 9 16 38 1 Trunnion Call 1 866 576 8388 for missing parts o...

Page 6: ... slight resistance when crank is turned Do not overtighten and cause crank to bind Lock nut in place using two wrenches and second 5 8 nut 5 8 NUT i_ _ t_ SPACER 5 8 x 5 8 THREADED TUBE CRANK STEP 1 SEE FIGURE 1 Assemble adjusting brackets to inside of both beams using one 1 2 x 1 3 4 hex bolt and 1 2 lock nut Do not tighten yet 1 2 x 1 3 4 HEX BOLT 1 2 LOCK NUT ADJUSTING BRACKETS FIGURE 1 FIGURE ...

Page 7: ...5 SEE FIGURE 5 Attach the standard to the frog using a 1 2 x 2 plow bolt and 1 2 hex nut Do not tighten yet 1 2 HEX NUT j 1 2 x 2 PLOW BOLT FIGURE 5 STEP 7 SEE FIGURE 7 Insert the standard between the beams and fasten together using the lower hole in the standard with one 1 2 x 1 3 4 hex bolt and 1 2 lock nut Attach end of threaded tube to upper hole on side of standard using one 1 2 x 1 1 2 hex b...

Page 8: ...b to the coulter blade using three 5 16 x 3 4 carriage bolts 5 16 fiat washers and 5 16 lock nuts 5 16 x 3 4 CARRIAGE BOLT 5116 LOCK UT _ _ COULTER 5 16 FLAT BLADE WASHER FIGURE 9 STEP 11 SEE FIGURE 11 Attach the coulter assembly to the plow beam using the U bolt coulter clamp two spacers located between the plow beams and secure with two 5 8 hex nuts Position the coulter standard between the U bo...

Page 9: ...ition when turning If your plow is not plowing at 4 to 5 deep on your initial two passes readjust the plow depth crank by turning it clockwise to go deeper or counter clockwise to go shallower Make this adjustment one turn at a time until desired depth is obtained See figure 16 on page 11 NOTE The rest of the furrows will be made with the tractor tires in the previously cut furrows therefore the p...

Page 10: ...ones Leave some room at each end of the field for turning your tractor Always lift the plow before turning Do not plow too fast Move steadily along so that the earth will turn over and not fall back over the furrow In most soils this is done at full throttle in third gear NOTE If plowing speed changes it may be necessary to re adjust the depth crank to maintain desired plowing depth In light soils...

Page 11: ... ii 1 2 Hex Nuts Loosen before land bolt Landside Tracking Adjusting Bolt FIGURE 17 LiFT ASSIST ADJUSTMENT ADJUSTABLE SLEEVE HITCHES ONLY Raise the tractor lift handle to transport position in order to adjust the spring to decrease lift effort of the attachment Loosen the hex jam nut against the spring bushing Turn adjusting bolt clockwise until the washer is flush with hitch bracket This extends ...

Page 12: ...or wait until soil conditions are suitable Extreme variations in soil texture and or moisture Adjust for shortest cut height See tracking adjustment Clean bottom frequently during use until polish is obtained by clean bottom with rag soaked in turpentine or mineral spirits Old brick or pumice may also be used to polish bottom Or rub with a rag soak in oil and dipped in sand See plowing tips Soil t...

Page 13: ...Call 1 866 576 8388 for missing parts orassembly help 13 DO NOT RETURN TO STORE ...

Page 14: ...RD PLOW 32 23 2t 28 18 4 k_ 32 24 31 3 28 30 30 16 18 41 _ 0 _39 _39 _ 46 45 38 32 lO 8 14 33 34 5 15 _t i i i 30 37 26 36 27 35 6 29 _ 29 17 11 19 4 17 19 14 Call 1 866 576 8388 for missing parts or assembly help DO NOT RETURN TO STORE ...

Page 15: ...t 33 712 0261 2 Lock Nut 5 8 11 64842 1 Coulter Fork 34 47947 2 Hex Bolt 5 8 x 2 12 49056 1 Threaded Tube 35 49067 1 Coulter Axle 13 49063 1 Plow Bolt 1 2 x 2 36 49068 1 U Bolt 14 49062 5 Plow Bolt 3 8 x 1 37 25218 1 Coulter Clamp 15 41155 2 Spacer 5 8 x 1 2 38 25225 1 Trunnion 16 41156 1 Spacer 5 8 x 5 8 39 R73220700 2 Hex Nut 7 16 17 43081 3 Washer 5 16 40 43070 3 Flat Washer 3 8 18 R74780828 2 ...

Page 16: ...www sears ca Our Home For repair of carry in items like vacuums lawn equipment and electronics call anytime for the location of your nearest Sears Parts Repair Service Center 1 800 488 1222 U S A 1 800 469 4663 Canada www sears com www sears ca To purchase a protection agreement on a product serviced by Sears 1 800 827 6655 U S A Para pedir servicio de reparaci6n a domicilio y para ordenar piezas ...

Reviews: