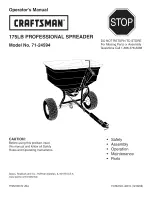
background image

Summary of Contents for 24594 - Professional Universal Broadcast Spreader

Page 1: ... Parts or Assembly Questions Call 1 866 576 8388 CAUTION Before using this product read this manual and follow all Safety Rules and Operating Instructions Safety Assembly Operation Maintenance Parts Sears Roebuck and Co Hoffman Estates IL 60179 U S A www sears com craftsman PRINTED IN USA FORM NO 42012 12 08 08 ...

Page 2: ...4 Any power equipment can cause injury if operated improperly or if the user does not understand how to operate the equipment Exercise caution at all times when operating equipment Read the towing vehicle owners manual and towing vehicle safety rules Know how to operate your tractor before using the broadcast spreader attachment Read the chemical label instructions and cautions for handling and ap...

Page 3: ...J J J J q jB E NOT SHOWN FULL SIZE KEY QTY A 2 B 2 C 2 D 2 E 2 DESCRIPTION Hex Bolt 5 16 x 1 3 4 Hex Bolt 1 4 x 1 3 4 Nylock Hex Nut 1 4 Nylock Hex Nut 5 16 Cotter Pin 1 8 x 1 1 2 KEY QTY DESCRIPTION F 1 Hair Cotter Pin 1 8 G 4 Flat Washers 3 4 H 1 Hitch Pin I 2 Spacers J 1 Drive Pin Call 1 866 576 8388 for missing parts or assembly help 3 DO NOT RETURN TO STORE ...

Page 4: ...aft support plate STEP 2 SEE FIGURE 2 4 Assemble the two OUTER hitch braces to the hitch tube using a 1 4 x 1 3 4 B hex bolt and a 1 4 nylock hex nut C DO NOTTIGHTEN YET Do not assemble the inner hitch braces at this time HITCH B 1 4 x 1 3 4 HEX BOLT C 1 4 NYLOCK HEX NUT HITCH BRACE OUTER HITCH BRACE OUTER FIGURE 2 MIDDLE BOLT HITCH TUBE SHAFT SUPPORT PLATE CROSSOVER TUBE LOCK NUT FIGURE 1 STEP 3 ...

Page 5: ...bracket located near the bottom of the hopper HOPPER SLIDE GATE BRACKET FIGURE 5 FLOW CONTROL ROD STEP 6 SEE FIGURE 6 7 Turn the spreader upright on its wheels 8 Assemble the flow control mounting tube to the hitch tube using two 5 16 x 1 3 4 he bolts A and 5 16 nylock hex nuts D DO NOTTIGHTEN YET FLOW CONTROL MOUNTING TUBE A 5 16 x 1 3 4 HEX BOLT FIGURE 6 STEP 7 SEE FIGURE 7 13 Assemble the two I...

Page 6: ... 9 SEE FIGURE 9 Place screen down into hopper sliding edge of screen under one of the clips Slightly bow the screen to slide opposite side of the screen under other clip FIGURE 9 CLIPS STEP 10 SEE FIGURE 10 For most vehicles you can keep the assembled hitch extension bracket in its default position shown in figure 10 Attach the spreader hitch to your vehicle hitch Check for interference with the s...

Page 7: ...isture shield but should not be used as a rain cover t OVERLAP I t I FIGURE 11 Determine approximate square footage of area to be covered and estimate amount of material required Before filling the hopper make sure the flow control arm is in the off position and the closure plate is shut Break up any lumpy fertilizer as you fill the hopper Set the adjustable stop with the flow control arm still in...

Page 8: ...et positions in relation to the slotted gear determine which direction the spreader plate will spin Be sure to reassemble them in their original positions Refer to figure 4 on page 5 Use shim washers Ref no 21 on pages 10 and 11 as needed for minimum backlash Add grease to gear and sprocket LOCKED UP SPREADER Turn the spreader over so that the wheels are off the ground Loosen all three nuts on the...

Page 9: ... Rinse inside of hopper and exterior of spreader and Store in a clean dry area dry off before storing Call 1 866 576 8388 for missing parts or assembly help 9 DO NOT RETURN TO STORE ...

Page 10: ...9 35 63 9 9 40 5 13 24 23 36 F 29 _l 21 50 19 20 21 22 14 35 47_ 44 J 42 45 54 37 23 37 16 35 37 15 24 7 9 56 37 54 39 49 50 55 i 17 50 37 10 Call 1 866 576 8388 for missing parts or assembly help DO NOT RETURN TO STORE ...

Page 11: ...ing Flange 56 43343 1 24 47683 2 Tube Spacer 57 44566 1 25 25305 1 Shaft Sprocket 58 43661 5 26 04367 1 Spreader Plate 59 46055 1 27 43850 1 Pin Spring 8 Dia x 5 8 60 44950 1 28 44468 1 Sprocket 6 Tooth 61 23697 1 29 44285 2 Bushing Delrin 62 48515 1 30 25672 2 Clip 63 48514 1 31 48934 1 Hairpin Agitator 64 44481 1 32 43070 5 Washer Flat 3 8 65 40825 1 33 43054 2 Bolt Hex 3 8 16 x 2 Lg 42012 1 DES...

Page 12: ...www sears ca Our Home For repair of carry in items like vacuums lawn equipment and electronics call anytime for the location of your nearest Sears Parts Repair Service Center 1 800 488 1222 U S A 1 800 469 4663 Canada www sears com www sears ca To purchase a protection agreement on a product serviced by Sears 1 800 827 6655 U S A Para pedir servicio de reparaci6n a domicilio y para ordenar piezas ...

Reviews: