17
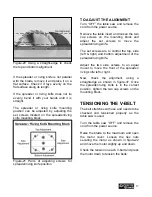
Figure-20 Using a straight-edge to check
the top and bottom alignment
If the spreader or riving knife is not parallel
with the blade, remove it and place it on a
flat surface. Check if it lays evenly on the
flat surface along its length.
If the spreader or riving knife does not lie
evenly, bend it with your hands until it is
straight.
The spreader or riving knife mounting
position can be adjusted by adjusting the
set screws located on the spreader/riving
knife mounting block.
Figure-21 Pairs of adjusting screws for
spreader/riving knife position
TO ADJUST THE ALIGNMENT
Turn “OFF” the table saw and remove the
cord from the power source.
Remove the table insert and loosen the two
cap screws on the mounting block and
adjust the set screws to move the
spreader/riving knife.
The set screws are to control the top, side
(left & right) and bottom adjustment of the
spreader/riving knife.
Adjust the two side screws to an equal
mount to move the front of the spreader/
riving knife left or right.
Now, check the alignment, using a
straightedge as shown in figure-37. Once
the spreader/riving knife is in the correct
position, tighten the two cap screws on the
mounting block.
TENSIONING THE V-BELT
The belt stretches with use and needs to be
checked and tensioned properly as the
table saw is used.
Turn the table saw “OFF” and remove the
cord from the power source.
Raise the blade to the maximum and open
the motor cover. Loosen the hex nuts
securing the motor as shown in figure-22
and move the motor slightly up and down.
Check the tension on each V-belt and press
the motor down to tension the belts.
Summary of Contents for CX208
Page 1: ...MODEL CX208 10 CABINET TABLE SAW WITH 30 FENCE USER MANUAL Version 1 0 ...
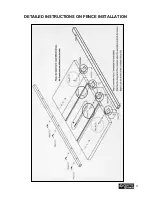
Page 11: ...11 DETAILED INSTRUCTIONS ON FENCE INSTALLATION ...
Page 19: ...19 CX208 PARTS DIAGRAM ...
Page 20: ...20 ...
Page 21: ...21 ...
Page 22: ...22 ...
Page 29: ...29 FENCE PARTS DIAGRAM ...
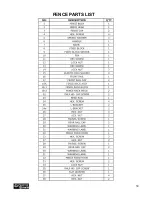
Page 30: ...30 FENCE PARTS LIST ...


