background image


9

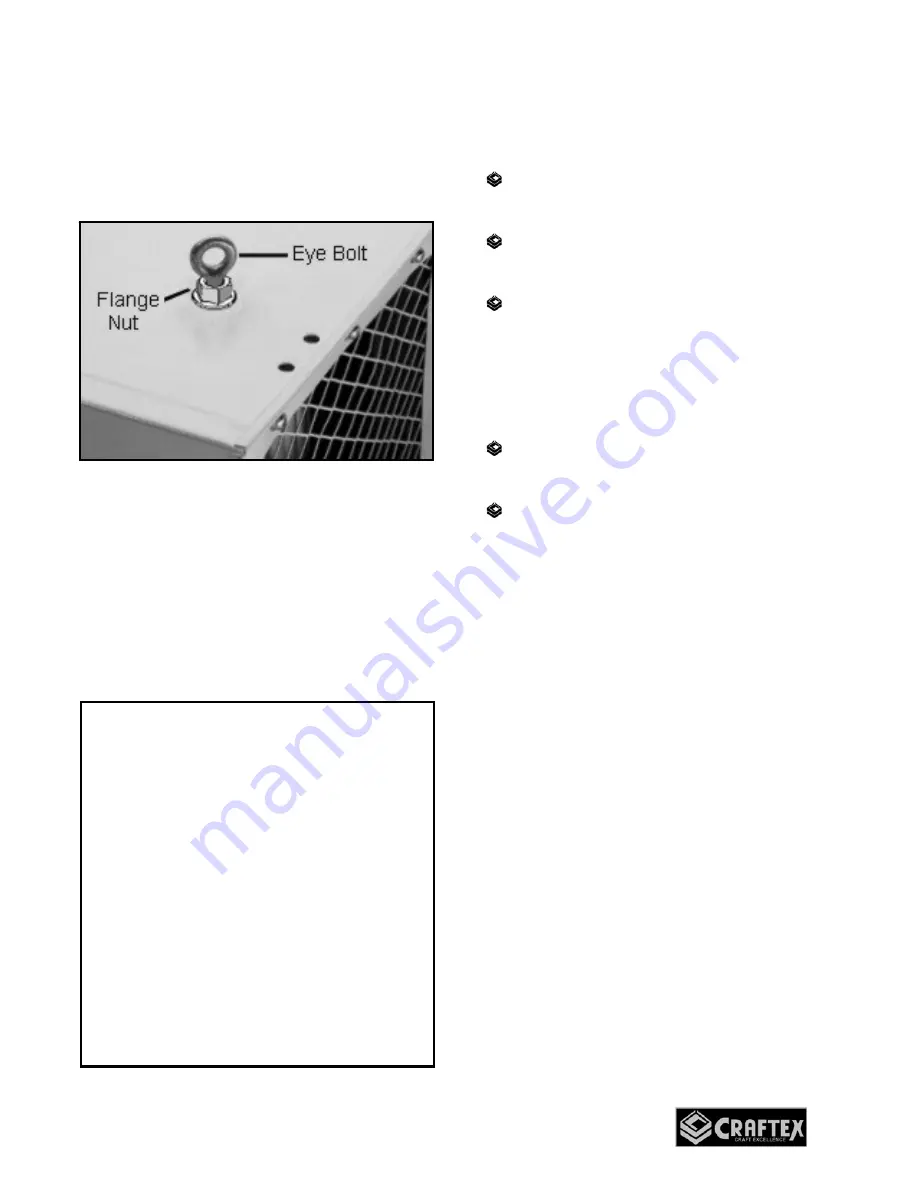
Thread each of the provided M10 flange 
nuts approximately half way onto the 
provided eye bolts. Thread the eye bolts 
into the hole where plug screws were 
removed. See figure-6. 


Figure-6 Installing the eye bolt 


Tighten the eye bolts until they are snug 
against the air filter. 
 
Get the help of an assistant or a friend and 
raise the air cleaner and secure to the four 
hanging lines through the four eye bolts. 
 

When the air cleaner is supported by wood 
structural member: 
 

 The minimum recommended eye bold 

size should be 5/16” -18” x 2”. 


  Drill 1/4" pilot holes are recommended 

to help guide the eye bolts. 


  Ensure the eye bolts penetrate at lease 

40mm into the wood structure. 


When the air cleaner is supported by 
concrete structure: 
 

  The minimum recommended expansion 

eye bolt size is 5/16” – 18” x 2”. 


  Drill 12mm pilot holes into the concrete 

structure and press the expansion eye 
bolt into hole and tighten the bolt until it 
is securely held to the ceiling. 


FLUSH MOUNT 


When the shop is small, the CT168 air 
cleaner can be installed flush to the ceiling 
of the shop or to the table top using flange 
mounts. 
 
Mount the air cleaner ONLY to load bearing 
supports, wall studs, steel chain or table 
that can hold 150 lbs of load. 
 
To install the air cleaner: 
 
Locate the supports on the wall or ceiling 
and mark the air cleaner unit bolt pattern on 
the wall or ceiling (17-1/4” from left to right 
and 31” from front to rear) 
 
Drill the holes to accept at least 1/4" shank 
bolts for studs or use 1/4” nuts, bolts and 
washers for mounting. 


WARNING 


Do not fasten the air cleaner onto sheet 
rock or dry wall, drop ceiling tile or frame. 
Do not use a rope or power cord to hang 
the air cleaner. Do not locate the unit in a 
corner or near any heating or cooling 
vents. Do not use chain rated for a 
minimum of 150 lbs working load for 
each support. Do not use fasteners that 
can tear out and make the air cleaner 
fall. 
 
Failure to follow these instructions may 
result in serious damage (to the unit), 
injury or death.  

Summary of Contents for CT168

Page 1: ...CT168 DELUXE CEILING MOUNTED AIR CLEANER User Manual...

Page 2: ...Safety Instructions 4 CT168 Features 5 Un Packing Inventory 6 Proper Grounding 7 Mounting 8 Table Top Mount 8 Hanging Mounting 8 Flush Mount 9 Control Panel 10 Remote Controller 11 Filters 11 Changin...

Page 3: ...NOT use prescription or other drugs that may affect your ability or judgment to safely use your machine DISCONNECT the power source when changing drill bits hollow chisels router bits shaper heads bl...

Page 4: ...ronment that has volatile fumes from fuels paints pesticides smoke etc NEVER operate the air cleaner in an environment that has the particles of silica metal asbestos or hazardous bacteria MAKE SURE b...

Page 5: ...like all power tools proper care and safety procedures should be adhered to Motor 1 5 HP 115 Volts Single Phase 60 Hz Motor Low Speed 750 RPM Motor Medium speed 960 RPM Motor High Speed 1200 RPM Fan...

Page 6: ...ilter 5 Micron 1 C Secondary Filter 1 Micron 1 Figure 2 Inventory LIST OF CONTENTS QTY D Remote Control 1 E AAA Battery 2 F Flange Bracket 4 G Rubber Feet 4 H Eye Bolts M6 1 0 x 20 4 I Hex Bolts M6 1...

Page 7: ...tached to the metal screw of the receptacle Figure 3 115 Volts Outlet for CT168 It is strongly recommended not to use extension cords with your CT168 Always try to position your machine close to the p...

Page 8: ...r cleaner as shown in figure 4 For permanent table top mounting refer to the Flush Mount procedure on page 9 and install the unit on the table top with the flush mount flange brackets Figure 4 Rubber...

Page 9: ...tighten the bolt until it is securely held to the ceiling FLUSH MOUNT When the shop is small the CT168 air cleaner can be installed flush to the ceiling of the shop or to the table top using flange mo...

Page 10: ...EL The CT168 control panel allows you turn the air cleaner ON and OFF manually and set the fan speed Figure 8 Control panel The control panel features two buttons OFF and ON SPEED OFF Button Allows tu...

Page 11: ...Low to Medium to High TIME Button Allows setting the auto shut off time for the air cleaner in 1 hour 2 hours and 4 hours FILTERS When to change the primary filter and when to service the secondary f...

Page 12: ...warm water until it is clean Let it dry See figure 11 Figure 10 Removing the primary filter Remember not to clean the secondary filter using compressed air Doing so will damage the filter and reduce...

Page 13: ...13 CT168 PARTS BREAKDOWN...

Page 14: ...14 CT168 PARTS LIST...

Page 15: ...handy All returned merchandise will be subject to a minimum charge of 15 for re stocking and handling with the following qualifications Returns must be pre authorized by us in writing We do not accept...

Reviews: