


Once you have a valid feature license, click
Add
to create a new OpenVPN tunnel. Click
Edit
to make changes to an existing tunnel.
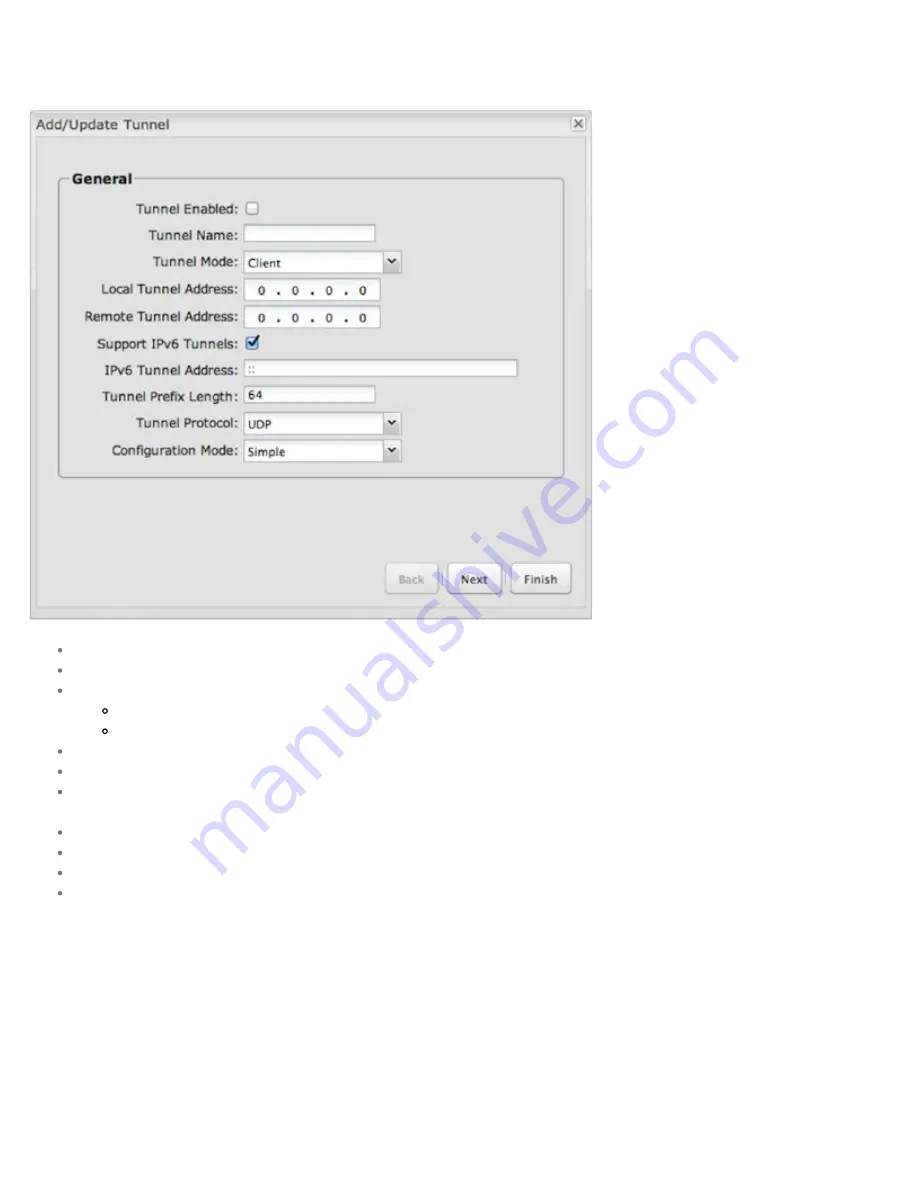
Add/Edit Tunnel – General
Tunnel Enabled
– Click to enable/disable this tunnel.
Tunnel Name
– Enter a name to uniquely identify this tunnel.
Tunnel Mode
– Select which mode this tunnel endpoint is required to be. Choose from the following:
Client
Server
Local Tunnel Address
– Enter the IP Address of the LNS (tunnel server) peer.
Remote Tunnel Address
– Enter the IP Address of the LNS (tunnel server) peer.
Support IPv6 Tunnels
– Allow IPv6 traffic to be forwarded over this tunnel. If you select this option, also input an
IPv6 Tunnel Address
and
Tunnel Prefix
Length
for IPv6.
Tunnel Protocol
– Choose UDP or TCP.
Configuration Mode
– Simple configuration requires the least amount of configuration for the tunnel, while advanced allows for a more detailed setup.
Ping
– (Displays if the
Configuration Mode
is
Advanced
) If no packets have been sent in the amount of time entered, a ping is sent to the remote endpoint.
Ping Restart – (Displays if the
Configuration Mode
is
Advanced
) If no pings have been received in the amount of time entered, OpenVPN restarts the tunnel.
Add/Edit Tunnel – Remote Hosts
Create a list of remote server connections to connect to. OpenVPN will try to connect to each host in the list. If a disconnect occurs from a given server, the next server will be
tried in a round-robin fashion.
CradlePoint COR IBR1100/IBR1150 – Manual
10/13/2014
117


