background image

VENTING

This appliance must be properly connected to a venting

system.

Consult local ordinances governing venting.  Install only

UL listed type BW 4” oval gas vent.  When the vent enters the
attic, a listed type B-1 round flue pipe may be used.  See Figure
2, Page 7.

Vent pipe must connect to the wall furnace header plate

with a “B” vent base plate and terminate with a cap at a point at
least 12 foot above the bottom of the wall furnace, two feet
above any obstacle within a 10 foot radius, and at least 3 foot
above the roof.

Provisions must be made for adequate combustion and

ventilation air.

This appliance is equipped with a manual reset blocked

flue switch designed to protect against a blocked flue condition,
which would cause combustion products to spill back into the
living quarters.  NOTE:  A partially blocked, inadequate, or
disconnected vent system may not activate the switch.
Discoloration of the grille is an indication of a bad vent.  If this
occurs, the vent can be checked by a qualified serviceman using
a draft gauge.  After 15 minutes the gauge should read between
-.02 up to -.04 inches w.c.  Vent must be checked at the
beginning of each heating season.

The switch when activated on a bulb control burner will

extinguish the pilot flame, on a thermostat controlled burner, the
thermostat circuit will be broken, turning off the main burner
flame.  Before the heater can be relit, the reset button must be
activated.  See Figure B for location of the manual reset blocked
flue switch.  To reset the switch,  insert a slender rigid object
(i.e. screwdriver) through the front panel louvers and push the
reset button down.  See Figure B-1.  However, you may have
to remove the front panel, then reset the switch and reinstall the
front panel to relight heater.  If homeowner experiences this
problem, the vent system must be checked and corrected.
NOTE:  A pre-existing vent that has worked for years may not
be adequate for todays design because of higher efficiency
requirements that result in lower stack temperatures.  See
“Possible Causes and Corrective Action” on Page 16.

All type “B” vents shall extend in a generally vertical

direction with offsets not exceeding 45 degrees, except that a
vent system having not more than one 60 degree offset may be
allowed.

Any angle greater than 45 degrees from the vertical is

considered horizontal.  The total horizontal run of a vent plus
the horizontal vent connector shall be not greater than 75 percent
of the vertical height of the vent.

Any offsets used should be as far above the

drafthood as possible to allow a venting action to begin
before any restriction is encountered.

BASED ON 4,000 BTU OF TOTAL INPUT
RATING OF ALL GAS APPLIANCES, THE
HEATER ONLY REQUIRES A MINIMUM
FREE AREA OF:

Page 6

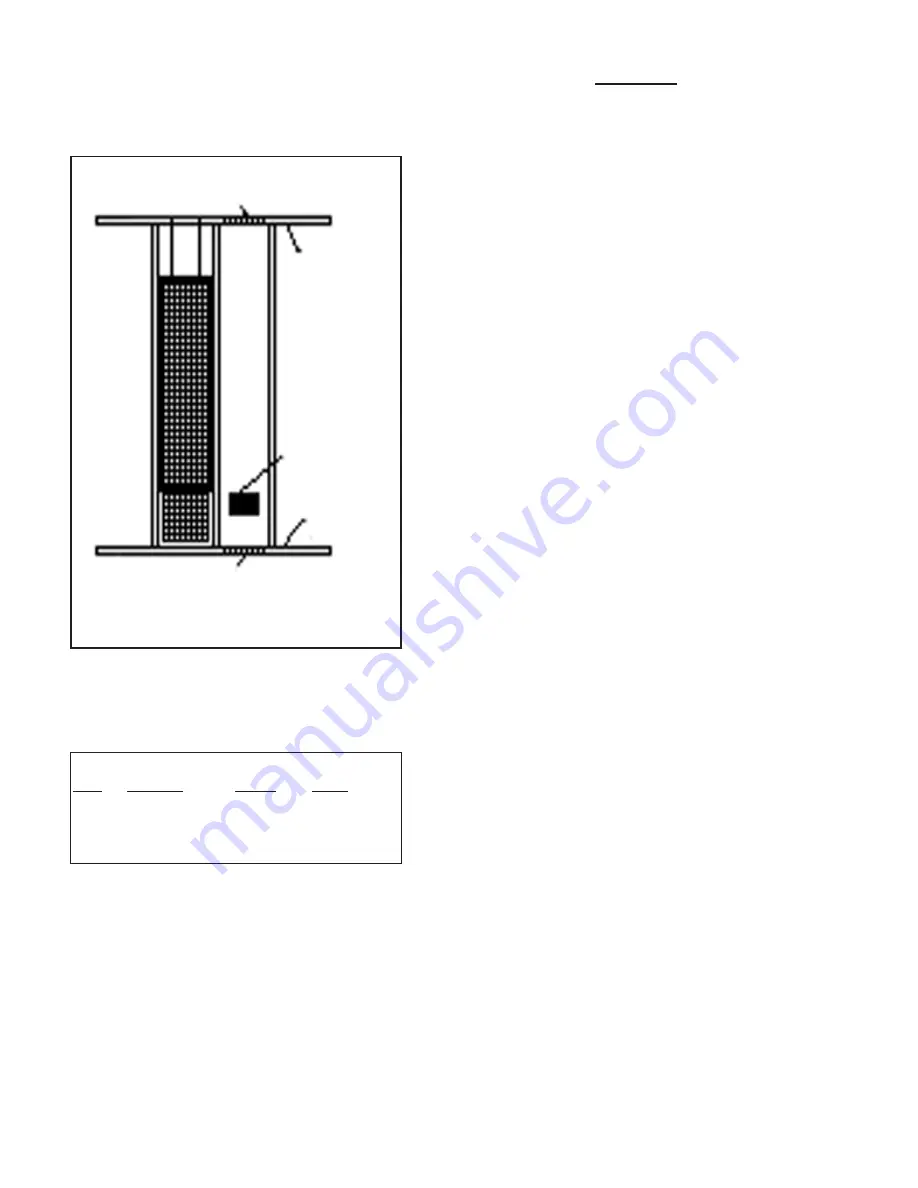
USING ADJACENT STUD SPACE
FOR ALL COMBUSTION AIR
FROM OUTSIDE

HOLES CONNECTING
TO VENTILATED ATTIC

CEILING
PLATE

AIR
GRILLE

FLOOR
PLATE

HOLES CONNECTING TO
VENTILATED CRAWL
SPACE

     SQUARE

HOLE

     SQUARE

BTU

           IN.

SIZE =

            IN.

25,000

       6.25

1”

        .785

35,000

       8.75

1.5”

      1.76

50,000

     12.50

2”

      3.14

Summary of Contents for W255F and

Page 1: ...on of this furnace when not connected to a properly installed and maintained venting system can result in Carbon Monoxide C O poisoning and possible death For your safety this furnace and the venting system should be inspected at least annually by a qualified service technician This appliance is equipped with a blocked flue switch designed to protect against a blocked flue condition Thecoatingsele...

Page 2: ...ER SPECIFICATIONS Your vented wall furnace comes packed in a single carton For wall thermostat models that includes the thermostat thermostat wire and insulated staples Before installing the wall furnace check the rating plate to verify that the Model Number is correct and that the wall furnace is equipped for the type gas you intend to use CONTENTS Page 2 Introduction 2 Lighting Instructions 11 S...

Page 3: ...DIRECTLYon carpeting tile or any combustible material other than wood flooring the heater shall be installed on a metal or wood panel secured to the floor extending the full width and depth of the heater H Installation and repair must be done by a qualified installer or service technician The wall furnace must be inspected before use and at least annually by a Page 3 1 CONTROLS All controls are pr...

Page 4: ...donewithin12inchesofthefloor Theseopeningsshallcommunicatedirectly withtheoutdoors orspacesthatcommunicatefreelywiththeoutdoors suchasaventilatedatticandcrawlspace through galvanized or equivalent corrosion resistant ducts Exception unobstructed stud and joist spaces are acceptable ducts provided that not more than one fire block is removed Special provisions must be taken to insurethatthesestudan...

Page 5: ...of attic Outlet Air Inlet Air Duct Ends 1 ft 300mm above floor FIGURE C FIGUREB ALLCOMBUSTIONAIRFROM OUTDOORS INLETAIRFROM VENTILATEDCRAWLSPACEAND OUTLETAIRTOVENTILATEDATTIC ULListed Vent Cap ULListed Gas Vent Ventilation Louvers each end of attic Outlet Air Inlet Air Ventilation louvers for unheated crawl space Page 5 ALLCOMBUSTIONAIRFROM ADJACENTINDOORSPACES THROUGHINDOORCOMBUSTION AIROPENINGS U...

Page 6: ...forlocationofthemanualresetblocked flue switch To reset the switch insert a slender rigid object i e screwdriver through the front panel louvers and push the reset button down See Figure B 1 However you may have toremovethefrontpanel thenresettheswitchandreinstallthe front panel to relight heater If homeowner experiences this problem the vent system must be checked and corrected NOTE A pre existin...

Page 7: ...ightofleftstudthroughfloor plate See Figure 1 located on Page 7 Page 7 FIGURE C Installation of B W Gas Vent for one story buildings or for first floor of multi story buildings Ceiling plate spacers to center B W gas vent in stud space nail securely at both ends Plate cut away for full width of stud space to provide ventilation Studs on 16 inch centers Sheet metal screw base plate to header Use ma...

Page 8: ...level of multi story buildings Firestop spacers supplied by manufacturer of B W gas vent Plate cut away to provide passage of B W gas vent Nail firestop spacer securely VENT INSTALLATION 2 FT MIN LISTED VENT TOP STORM COLLAR ROOF FLASHING OVAL TO ROUND ADAPTER CEILING PLATE SPACERS 12 FT MIN LISTED BW VENT PIPE BASE PLATE HEADER PLATE 2 X 4 WALL STUDS CEILING PLATE SPACER LANCES Page 8 FIGURE 2 VE...

Page 9: ...asconnectionusingconnectorthe samesizeasgasconnectionoffurnace CHECK ALL CONNECTIONS FOR GAS LEAKS WITH LEAK DETECTOR SOLUTION DO NOT USE OPEN FLAME STEP 9 For wall thermostat units see Wiring section for thermostat connections Make sure all connections are correct and connector stems arenottouching STEP 10 To fasten front panel to furnace be sure exposedportionofheaderisfreeofdebris Place outer p...

Page 10: ...ght televisions fireplaces hidden hot or cold water pipes drafts etc The thermostatmustneverbeinstalledinanadjoiningroomwhere a door can be closed between the thermostat and wall furnace Thiswallfurnaceisequippedwithaselfgenerating control system Never connect to a 24 volt transformer or to the household electrical system Do not use more thermostatwirethanisincludedwiththewallfurnace Do not run th...

Page 11: ... Read the information on the safety label 2 Set thermostat to it s lowest setting 3 Open cabinet door 4 Depress and turn gas control knob clockwise to OFF 5 Wait five 5 minutes to clear out any gas Then smell for gas including near the floor If you smell gas STOP Follow B in the information on the safety label If you don t smell gas go to the next step 6 Locate the pilot Follow metal pilot tube fr...

Page 12: ...lating air passageways and venting systems of the appliance be kept clean 2 If the appliance has been equipped with the optional WFF81 C fan kit assembly the bearings of the motor should be oiled every six months with approximately 2 drops of S A E 20 oil 3 The appliance area must be kept clear and free of any combustible materials gasoline and other flammable vapors and liquids 4 It is essential ...

Page 13: ...P N 40230 heat shield and the drilled holes in the front panel Attach using two 2 8x screws provided Make sure heat shield is between the BBSK control switch and the heat exchanger STEP7 Connect each end of the black wires to the two outside terminals on the BBSK control switch route wires down the inside of the front panel See Figure 11 STEP8 Straighten the bulb capillary tube using extreme care ...

Page 14: ...9 BBSK CONTROL SWITCH 40225 SWITCH BRACKET 40230 HEAT SHIELD SENSING BULB FRONT PANELSIDE 6X1 4 2 SCREW CONTROL KNOB 8X1 2 2 SCREW CONTROLROD CAPILLARY TUBE FIGURE10 GASVALVE SENSINGBULB NYLONCLIP 10 24X3 8SCREW FIGURE12 GASVALVE BBSKCONTROL SWITCH BLACKWIRE FIGURE11 BlueWire BlueWire Blocked Flue Switch ...

Page 15: ...STOP Read the information on the safety label 2 Turn temperature control knob clockwise to LO 3 Open cabinet door 4 Depress and turn gas control knob clockwise to OFF 5 Wait five 5 minutes to clear out any gas Then smell for gas including near the floor If you smell gas STOP Follow B in the information on the safety label If you don t smell gas go to the next step 6 Locate the pilot Follow metal p...

Page 16: ...ewall Markasmallverticallinewhichalignswiththeslot located toward the rear of the fan kit casing STEP3 Using the four one inch screws provided secure the wall mounting bracket to wall 1 8 below the horizontal line Fan attachment bracket must be up and threaded nut sert aligned with the small vertical line Note Anchors not provided may be required STEP4 Removejunctionboxandconnect115vpowersupplyina...

Page 17: ...ACK BLACK MOTOR WHITE GREEN GROUND WIRE L2 White L1 Black 115 VAC 60 HZ Less than 12 Amps If any of the original wire as supplied with this appliance must be replaced it must be replaced with type thermoplastic 105 degree C wire or its equivalent WFF81 C WIRING SCHEMATIC Page 17 ...

Page 18: ...ce is installed attach rear register grilleas shown in Figures 16 17 by insertion over plaster ground and attach with sheet metal screws provided STEP 5 Damper as showninFigure17canbeadjustedfromfullopenformaximumheattofullyclosed Page 18 14 3 8 12 5 8 8 1 4 PLASTER PLASTER STUD PLASTER STUD PLATE 45 3 4 ROUGH INDIMENSIONSFORREARREGISTER FIGURE13 OPENING7 8 FROMEACH STUD HOLEFOR BACK REGISTER PLAS...

Page 19: ...CES Page 19 INNERPANEL FIGURE 15 Plaster Ground Frame Closed Position Rear Register Grille 2 x4 Upright Finished Wall Casing Open Position Damper FIGURE 17 Finished Wall Heater Casing Casing Opening Retainer Screw Holes Rear Register Grille Plaster Ground Frame FIGURE 16 Form 84504 REV 07 98 ...

Page 20: ...ean burner ports Do not enlarge ports 3 Low gas pressure 3 Check gas supply pressure 4 Pilot decreases in size when main burners 4 Supply piping is inadequately sized Consult local come on gas utility or competent installer 5 Air shutter open too far 5 Close air shutter to proper setting as outlined in these instructions slight yellow tipping is allowable on L P Gas See Page 12 6 Drafts around app...

Page 21: ... A Vent too short A The vent should terminate a minimum of 12 feet above the floor See Figure 2 Also the top of the vent must be at least 2 foot above any obstacle within a 10 foot radius including the roof See Figure A B Restriction in B All type B vents shall extend in a generally vertical direction with offsets not exceeding 45 vent system degrees except that a vent system having not more than ...

Page 22: ...O B factory GRAVITY WALL FURNACE LIST PRICES MARCH 2013 57 59 60 55 58 56 FSK A FREESTANDING KIT 19 14 18 15 16 17 21 20 13 48 49 WFF81 C FAN KITUsed on Single and Dual Wall models REARREGISTERKIT Used on Single Wall models only 27 25 26 23 22 24 THERMOSTAT 40 BURNERASSEMBLY SINGLE WALL FURNACE 38 39 35 29 36 31 30 32 44 BURNERASSEMBLY DUAL WALL FURNACE 44 29 38 29A 36 43 39 35 32 33 28 Page 22 3 ...

Page 23: ... N A 40220 2 60 Bell Pull 26 85003 1 60 for W506F Register Assembly 27 40355 23 80 Orifice Coupling 30 84631 5 80 N A N A Installation Manual N A 84504 N C Elbow 3 8 90 Degree 31 84124 2 50 N A N A Orifices 32 Manifold 33 N A N A 84072 33 30 Floor Plate Assembly 55 40405 24 60 Pipe Nipple N A 84123 2 20 N A N A Right Side Assembly 56 40410 37 60 Pilot Tubing w Fittings 44 74452 8 60 74452 8 60 Upp...

Page 24: ... locate the installer the user should write directly to the manufacturer and the name of an alternative service source will be supplied The product safety registration card packed inside the appliance must be completed and returned to the factory THIS WARRANTY IS EXPRESSLY IN LIEU OF ANY OTHER WARRANTIES EXPRESS OR IMPLIED WHETHER WRITTEN OR ORAL ANY IMPLIED WARRANTY OF MERCHANTABILITY OR OF FITNE...

Reviews: