


1018029-A
Page 19
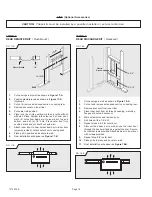
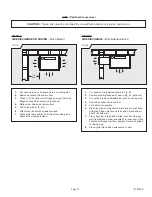
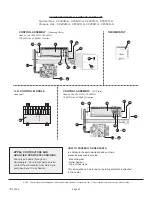
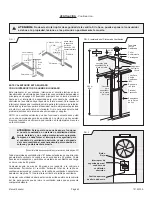
306SR-A
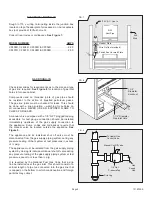
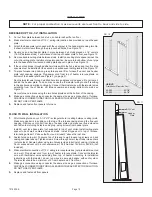
SIDE DISCHARGE ON CASING
( Flush Mount )
30SRB-A
SIDE DISCHARGE
( With Extension Boot )
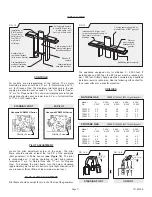
KITS (Optional Accessories)
CAUTION:
These kits must be installed by a qualified installer or service technician.
1.
Cut out and remove embossed area on casing side.
2.
Remove knockout from inner liner.
3.
Place 1-1/2” boot from kit through opening, matching
flanges of boot to knockout on inner boot.
4.
Mark screw holes and remove boot.
5.
Drill holes with a 1/8” drill.
6.
Attach inner boot with screws provided.
7.
Place grille into position, drill holes into casing, and
attach with screws provided.
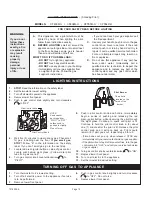
1.
Cut opening in drywall as shown in Fig. 20.
2.
Position plasterground as shown in Fig. 20 (optional).
3.
Cut out and remove embossed section on casing side.
4.
Remove knockout on inner liner.
5.
Put heater into position.
6.
Place inner boot into position, mark and cut boot flush
with wall. Place outer boot into position, mark and cut
boot flush with wall.
7.
Place boot trim into position, slide inner boot through
wall from adjacent room and attach to inner liner. Slide
outer boot through wall from adjacent room and attach
to casing side.
8.
Place grille into position and secure to wall.
FIG. 19
18”
Min.
FIG. 20