Coyote C1CSB-2LP Use & Care Manual Download Page 11


10


The system has a thermal element that will shut off the flow of gas in the event of a fire. 

The system has a flow limiting device which, when activated, will limit the flow of gas to 10 cubic feet per 
hour. 

NEVER

 use side burner without leak testing this connection. 

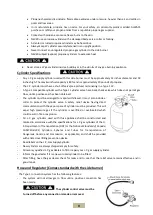
LP (Propane) Gas Supply Connection 

1.


The tank valve should be in the “OFF” position. If not, turn the knob 
clockwise until it stops.   

2.


Make sure all burner valves are in the “OFF” position.   

3.


Always connect the gas supply regulator as follows:   
Insert the regulator inlet into the tank valve and turn the coupling nut 
clockwise until the coupler tightens up (see picture). Do not over-tighten the 
coupler. Turn the main tank valve on, and turn the burner control valves on 
the unit to the “HIGH” position for about 20 seconds to allow the air in the 
system to purge before attempting to light the burners.   

Pre-Operation Leak Testing 


1.


Do not insert any tool into the valve outlet or safety relief valve. You may damage the valve and cause a 
leak. Leaking propane may result in explosion, fire, severe personal injury, or death.   

2.


If a leak is detected at any time, or you cannot stop a gas leak, immediately close the tank’s shut-off valve 
(gas supply from LP tank to the Side burner) and call LP gas supplier or your fire department!   

3.


Check all gas supply fittings before each use and each time the gas supply cylinder is connected to the 
regulator. Have a qualified service technician leak test the side burner any time a part of the gas system is 
replaced. 


Never attempt to attach this side burner to the self-contained LP gas system. Do not use the side burner until 
leak testing has been completed. 
 

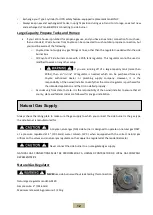
Leak Testing Valves, Hose and Regulator


1.    NEVER smoke while leak testing. 
2.  Extinguish all open flames. Never leak test with an 

open flame.   

3.  Mix a solution of equal parts mild detergent or liquid 

soap and water.   

4.  Turn all side burner control knobs to OFF. 
5.  Ensure that the connections from the regulator to the 

side burner and tank are tight and secure (see 
picture).   

6.  Completely open LP tank valve by turning cylinder 

Summary of Contents for C1CSB-2LP

Page 1: ...bling grill Leave this manual with grill for future reference To consumer Keep this manual for future reference as it contains important Warnings and Instructions COYOTE OUTDOOR LIVING INC Coyote Stai...

Page 2: ...y your new side burner and thank you for choosing our product We hope you consider us for future purchases Read and save the instructions Obey all Warnings and Instructions This Manual provides specif...

Page 3: ...l not be stored in the vicinity of this or any other appliance DANGER DANGER indicates an imminently hazardous situation which if not avoided will result in death or serious injury CAUTION CAUTION ind...

Page 4: ...specified clearances listed in this Manual on page 9 7 NEVER leave the side burner unattended while cooking 8 Risk of Explosion NEVER use natural gas in a unit designed for liquid propane gas or vice...

Page 5: ...o the rack located just under the side burner 25 Fire Hazard Grease is extremely flammable Let hot grease cool down before attempting to handle or dispose of it After use and cool down the drip tray s...

Page 6: ...rust or burn through 5 years limited Flavorizer Bars no rust or burn through 2 years limited Ignition systems Valves 1 year limited Stainless steel frame housing Limited Lifetime Coyote Outdoor Living...

Page 7: ...ice or damages caused by flashback fire or grease fire This limited warranty does not cover scratches dents corrosion or discoloration caused by weather heat abrasive and chemical cleaners pool or spa...

Page 8: ...the side burner in a building garage breezeway shed or other such enclosed areas without an approved ventilation system When in use the side burner will generate a lot of smoke When installing your s...

Page 9: ...M and CSA Z240 RV Series Recreational Vehicle Code as applicable Gas valves are preset at the factory to operate on liquid propane or natural gas If you wish to convert be sure to contact your side bu...

Page 10: ...seal has been obtained The cylinder must be arranged for vapor withdrawal It must also include a collar to protect the cylinder valve A safety relief device having direct communication with the vapor...

Page 11: ...or safety relief valve You may damage the valve and cause a leak Leaking propane may result in explosion fire severe personal injury or death 2 If a leak is detected at any time or you cannot stop a...

Page 12: ...kwise LP Tank Removal Transport and Storage Turn OFF all control knobs and LP tank valve Turn coupling nut counterclockwise by hand only do not use tools to disconnect Install safety cap onto LP tank...

Page 13: ...y company However it is the responsibility of the owner installer to verify that the correct regulator is purchased for the intended application and that it is installed properly o As codes vary from...

Page 14: ...result in a low flame or a hazardous condition that could result in a fire or explosion Natural Gas Supply and Connection 1 Make sure all burner valves are in the OFF position 2 All NG units need to...

Page 15: ...e grill when lighting ALWAYS inspect the hose before using the grill If there is excessive abrasion or wear or if the hose is cut it must be replaced prior to the outdoor cooking gas appliance being p...

Page 16: ...then to your valve and finally into the burner where it will meet the spark from the igniter at the front of the burner Conversely if you turn the knob too slowly you can cause a build up of gas in t...

Page 17: ...utensils used to handle raw food before using them to handle cooked food Always wash all vegetables seafood and poultry before cooking Always leave uncooked foods in the refrigerator until you are rea...

Page 18: ...cleaned periodically to prevent buildup of debris NOTE Allow the drip tray to cool before attempting to clean IMPORTANT Do not leave the side burner outside during inclement weather unless it is cove...

Page 19: ...ner to cool before cleaning polishing stainless steel Do not clean or polish your side burner s stainless steel when the gill is in operation or still hot 2 To clean the stainless steel wash off all d...

Page 20: ...tub 4 Do not store pool chemicals in your island or island cabinets How to Remove Scratches from your Stainless Steel If your situation is a little more serious and you have obtained scratches in your...

Page 21: ...d other flammable vapors and liquids 2 Do not obstruct the flow of combustion and ventilation air 3 Keep the ventilation opening s of the cylinder enclosure free and clear from debris 4 Visually check...

Page 22: ...ts contact our Coyote Customer Service line at 855 520 1559 Problem Possible Causes and Solutions Burner will not light when the igniter button is turned Is your gas supply turned on If this is an L P...

Page 23: ...lve is open and cylinder has fuel Low heat with the knob on HIGH Check to see if the fuel hose is bent or kinked Make sure the cooking area is clear of dust Check your gas supply and gas pressure If i...

Page 24: ...Knob base 1 CICSB12 3 Burner 1 CICSB03 13 knob 1 CICSB13 4 Electrode 1 CICSB04 14 Control Panel 1 CICSB14 5 Burner box CICSB05 15 Logo Badge 1 CICSB15 6 Gas hose 1 CICSB06 16 LP Regulator 1 CICSB16 7...

Reviews: