


ADDITIONAL INFORMATION
18
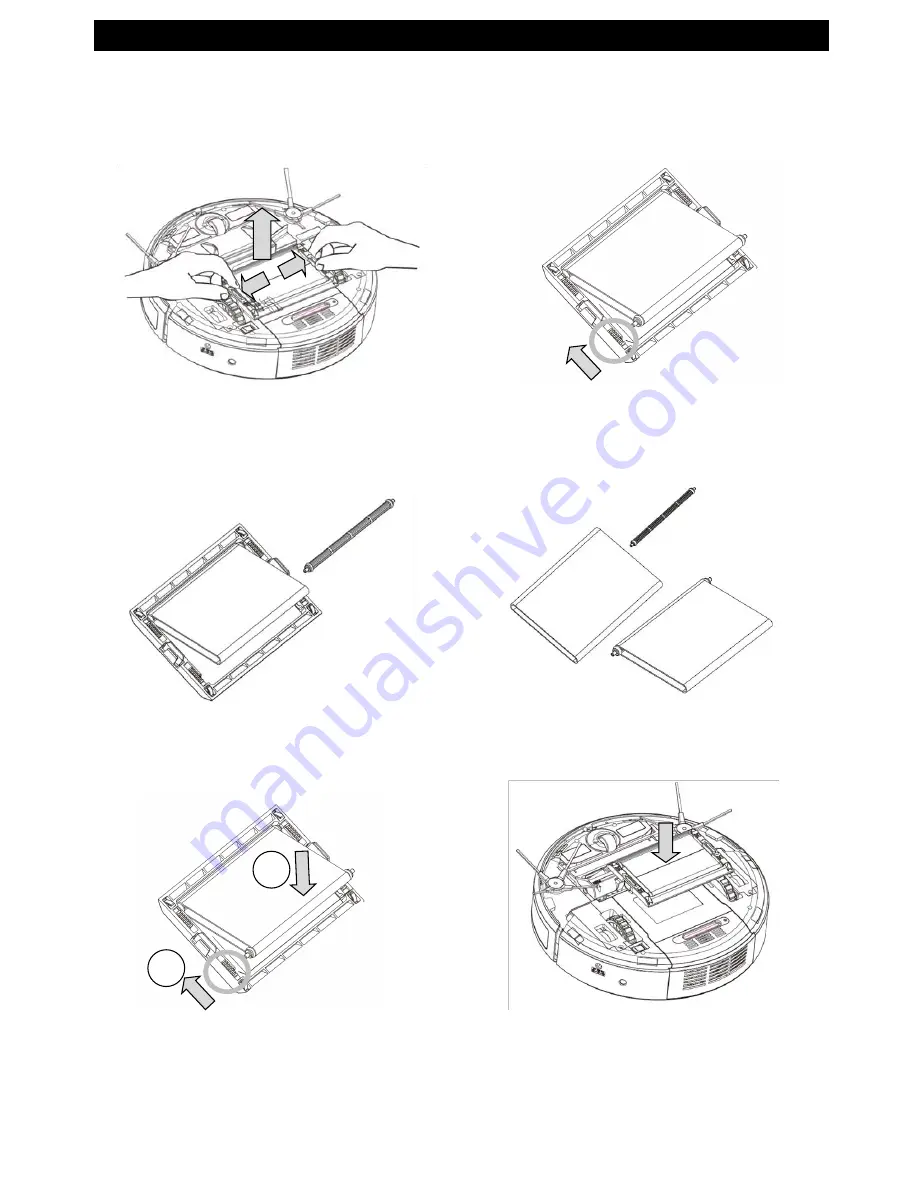
Mopping Module Replacement
DO NOT install mopping module for carpet flooring
1
1. Push both sides of the mopping module
at the position with “arrow” marks, and
lift the module at the same time
New
Old
2. Push the springs on both sides to take
out cloth and roller.
3. Take out both rollers
4. Insert both rollers to new mopping cloth
and insert
5. Insert new mopping cloth and rollers to
module by pushing springs on both
sides
1
2
6. Align hooks (mop set) and slot (robot)
and push down Mopping Module


