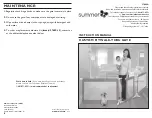
Installation steps
1.
Draw a chalk line around the perimeter of the pool, preferably 30”
away from the pool edge.
2.
Decide the opening of your pool, and mark “X” on the pool deck with
chalk for placement of the initial pole.
3.
Take out the drilling template, carefully align spot “A” with the mark
”X”. Then check to make sure that the template is straight and
aligned with the chalk line, and then mark “B” and “C” (also 30” away
from the pool edge). Ensure the template does not move, drill through
spot marked “A”,” B” and “C”. All holes should be drilled to a depth of
4” (8” if using the long sleeve for soft ground), and at a direct 90-
degree angle to the deck. (Please note, the spot marked “A” and “B” is
where the opening of your pool fence will be. The two poles that fit into
these holes will need to be joined with “safety latch”.
4.
Continue around the entire pool, drill all holes using the drilling
template for guidance. Place the “B” hole marked on the drilling
template over the last hole drilled. (see figure 2), then drill through the
“C” hole
(every 36 inches)
. Repeat this step for every 12 feet (or
at the end of each fence unit), you must also drill through the “A”
hole to accommodate the pole from the new fence unit.
5.
When you have completed all the holes, clear the holes of any drilling
dust. Insert the plastic sleeve into the holes. Always insert the feet with
care, so as not to damage them. Confirm that plastic feet fit snugly into
the holes. If you are having trouble getting the feet to fit into the holes,
tap them gently into place with a rubber mallet.
6.
Attach Safety Latch to end of each fence section, using the pre-drilled
holes in the pole. Inserting your safety fence into the plastic sleeve.
Fasten each section to the next with the safety Latch.
7.
Hose down pool deck to rinse away any chalk marks or drilling dust. If
safety fence will be removed for an extended period of time, use
enclosed plastic caps to seal holes in the ground. This will insure that
the holes with the plastic feet inside do not fill up with any dirt or debris.
Simply remove fence from holes, taking care to leave plastic sleeves in
the holes. Insert the caps into the sleeves.
Congratulations! You have completed your Costway pool safety fence
installation
!
Figure 2


