background image

17

18

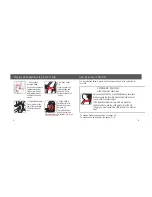
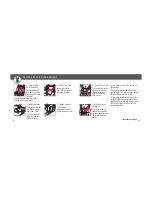
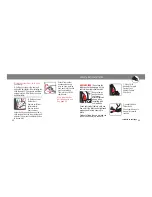
Removing Seat Pad for Cleaning

You must remove the harness system to remove the pad from 

the shell. See pages 12-14.

1.

 Release Elastic 

Straps From Tabs 
on Back of Shell 

2. 

Remove Pad

Pull pad off the 
bottom of shell and 
remove pad from top 
of shell.

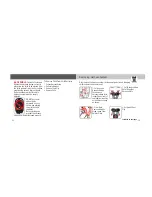
WARNINGS: 

Do not use child 

restraint without the seat pad. Failure 
to do this can result in serious injury 
or death.

Cleaning Pad

Machine wash separately with cold water 
on a gentle cycle. Do not use bleach. 
Tumble dry separately for 10-12 minutes 
on low heat. Remove immediately.

Cleaning Harness Straps

Spot clean using warm sudsy water 
and damp cloth.

Replace Pad  

Starting from bottom of child 
restraint, slip pad on shell. Pull 
harness adjustment strap through 
pad. Wrap pad around the top of 
shell. Attach all of the elastic straps. 
Install harness system, see pages 
19-21.

Summary of Contents for FINALE

Page 1: ... 1 132 1 cm KEEP INSTRUCTIONS FOR FUTURE USE Read all instructions before using this child restraint Failure to follow the warnings on the labels and in the instruction manual can result in serious injury or death to your child FUN SMART SIMPLE 2016 Dorel Juvenile All Rights Reserved To see installation videos scan the QR Code or visit www coscokids com LOWER ANCHOR BELT Page 28 TETHER Page 38 CUP...

Page 2: ...t Install Page 40 Vehicle Belt Install Page 44 Lap and Shoulder Belt Install Page 48 FORWARD FACING with internal harness 30 65 lb 13 6 29 kg 32 49 in 81 3 125 cm At least 1 year old Children up to 1 year of age must ride rear facing The American Academy of Pediatrics recommends that children remain rear facing until they are at least 2 years old BOOSTER SEAT 40 100 lb 18 1 45 4 kg 43 52 in 110 1 ...

Page 3: ...ety Information 24 Child Restraint Use 24 Installation in Vehicle 25 Vehicle Seating Position 26 Vehicle Information 28 Choosing Lower Anchor or Vehicle Belts 28 Knowing Your Vehicle Belts 31 Aircraft Information 35 Forward Facing with Internal Harness 36 Tether Use 38 Lower Anchor Belt Installation 40 Vehicle Belt Installation 44 Booster Seat 48 Lap and Shoulder Belt Installation 50 Important Inf...

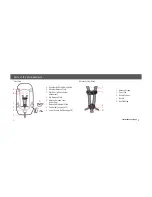
Page 4: ...rness Slots C Arm Rest with cup holder attachment D Hip Harness Slots E Harness Release Lever under flap F Harness Adjustment Strap G Cup Holder see page 22 H Lower Anchor Belt see page 28 continued on next page Harness System Detail I Harness Straps J Chest Clip K Buckle Tongue L Buckle M Buckle Strap I K J L ...

Page 5: ...age G Tether see page 38 H Instruction Manual Storage I Splitter Plate C B D E Side View A Shoulder Belt Positioning Guide B Lower Anchor Belt Attachment for Storage under side of shell C Cup Holder D Forward Facing Belt Path E Shell child restraint A ...

Page 6: ...ace harness strap out of the way 2 Unbuckle Harness Press in towards the top of the red button Pull buckle tongues out To change harness strap position see pages 7 8 To prepare seat as a booster see pages 12 16 Use the guidelines below to determine if the harness strap is in the right place for your child FORWARD FACING with Internal Harness Harness strap MUST be at or slightly above shoulders Alw...

Page 7: ...For Your Child See page 6 for fit guidelines 5 Attach Harness Strap Loops to Splitter Plate As Shown Sewn ends of the harness strap loops MUST face towards you DO NOT twist harness strap or harness adjustment strap Make sure the loops are fitted COMPLETELY ON both sides of the splitter plate WARNINGS Make sure that harness height is correct for your child s size Do not use this child restraint for...

Page 8: ...hten Harness Pull on harness adjustment strap to tighten harness snugly 5 Position Chest Clip The chest clip must be placed at mid chest even with armpits and away from the child s neck 6 Check Harness Tightness Try to pinch the har ness at the shoulders vertically between index finger and thumb as shown If your fingers slip off the harness is tight enough If you can pinch the harness strap tighte...

Page 9: ...lky clothing can prevent the harness straps from being tightened properly To Remove Child From Child Restraint 1 Loosen Harness Strap 2 Unbuckle Harness 3 Release Chest Clip 4 Remove Child Removing Harness System Only remove the harness system to clean seat pad or when changing child restraint to a booster seat 1 Fully Loosen Harness Straps Push down on harness release lever under flap on front of...

Page 10: ...hell and Pad 9 From Top of Seat Pull Buckle Out of Shell 7 Turn Seat Over Locate buckle s metal retainer on bottom of shell 6 Pull Harness Strap Out of Seat 5 Unthread Buckle Do not unbuckle the buckle To store harness for booster seat use see pages 15 16 ...

Page 11: ...ce Wrapped Harness Strap into Slot for Storage 3 Insert Buckle s Metal Retainer Up Through Buckle Slot As Shown Buckle will hang down underneath shell when stored 2 Turn Seat Over and Locate Buckle Slot on Bottom of Shell 8 Replace Pad 7 Place Chest Clip into Slot for Storage Secure Splitter Plate Pull the harness adjustment strap toward you so the splitter plate is flush against the shell as show...

Page 12: ...d Failure to do this can result in serious injury or death Cleaning Pad Machine wash separately with cold water on a gentle cycle Do not use bleach Tumble dry separately for 10 12 minutes on low heat Remove immediately Cleaning Harness Straps Spot clean using warm sudsy water and damp cloth Replace Pad Starting from bottom of child restraint slip pad on shell Pull harness adjustment strap through ...

Page 13: ... Pull Metal Retainer Completely Through Pad and Shell 5 Pull Harness Strap Across Bottom of Shell Harness strap MUST lay in front of harness adjustment strap as shown Push harness strap up through other hip harness slot 6 Make Harness Strap Even Sewn ends of harness strap loops MUST face each other 7 Thread Buckle and Chest Clip Harness strap ends go through the back of buckle tongues and through ...

Page 14: ...late As Shown Sewn ends of the harness strap loops MUST face towards you DO NOT twist harness strap or harness adjustment strap Make sure the loops are fitted COMPLETELY ON both sides of the splitter plate Cup Holder The cup holder can be attached to the end of either armrest It is dishwasher safe on top rack only sewn end To Attach Cup Holder Push cup holder onto end of armrest until you hear a c...

Page 15: ... except those approved by Dorel Juvenile Group Never allow any child to play with this child restraint it is not a toy Do not remove or cover up any of the warning labels or other labels on the child restraint Read all instructions for additional warnings On the side of the child restraint there is a date of manufacture label Do not use this child restraint more than 10 years after the date of man...

Page 16: ...wner s man ual contact Dorel Juvenile Group Care Department or visit your local Child Passenger Inspection Station Go to http www safercar gov cpsApp cps index htm to find your closest station Vehicle Seating Position Installation in Vehicle WARNINGS Check the vehicle belt or lower anchor belt before each use Use only if the belt can be tightened properly and locked securely in place This child re...

Page 17: ...y be considerably different than those pictured here continued on next page Children are safer when prop erly restrained in rear seating positions than in the front seating positions According to National Highway Traffic Safety Administration information children in rear seating positions are statistical ly safer whether you have air bags advanced air bags or no air bags at all To avoid your child...

Page 18: ...GS When used correctly the lower anchor belt or vehicle belts are equally safe Do not use both the lower anchor belt and vehicle belt at the same time Your vehicle s features may be considerably different than those pictured here When installing this child restraint with vehicle belts the lower anchor hooks and belt MUST be properly stored Storing Lower Anchor Belt Thread lower anchor belt through...

Page 19: ...nch or two As it goes back in you will most likely hear a ratcheting sound Gently pull the belt to see if it has locked You will not be able to pull any more belt out if the lock has engaged Types of Retractors Knowing Your Vehicle Belts 1 You MUST Review Your Vehicle Owner s Manual Your vehicle owner s manual will let you know what vehicle belts and seating positions child restraints can be insta...

Page 20: ... It will automatically lock after slowly pull ing the seat belt out at least halfway and letting the belt go back into the retractor an inch or two If the retractor does not lock it is most likely an Emergency Locking Retractor These retractors only lock during a sud den stop or collision Automatic Locking Retractor Emergency Locking Retractor See Step 4 Check the Latch Plates Locking Latch Plate ...

Page 21: ...rcraft belts Aircraft Information This restraint is certified for aircraft use when used with the internal harness This child restraint is not certified for aircraft use when used as a booster seat because aircraft seats do not have shoulder belts Install the child restraint in a window seat to avoid blocking the aisle If the aircraft lap belt is too short ask the flight attendant for a belt exten...

Page 22: ...ating position does not have a tether anchor use a different seating position or see your dealer or a qualified mechanic and have one installed WARNING Do not fasten multiple tether hooks on the same tether anchor in the vehicle WARNINGS In this child restraint your child MUST be at least 1 year old before they sit forward facing The American Academy of Pediatrics recommends that children remain r...

Page 23: ...Pull lower anchor belt packaging out of forward facing belt path Remove lower anchor from packaging Discard the packaging continued on next page Adjusting Tether Strap To tighten After the child restraint is locked into place with lower anchor belt or vehicle belt push down on child restraint and gently pull on free end of tether To loosen Lift up on tether lock adjuster and push it towards tether...

Page 24: ...e tether strap to remove all slack and create tension on the strap 9 Check Belt Tightness Hold child restraint at the belt path with your weakest hand Push and pull from side to side It should not move more than 1 in 2 5 cm 2 Route Lower Anchor Belt Through Forward Facing Belt Path Do not twist belt Lower anchor adjuster can be on either side 3 Finished Lower Anchor Routing 4 Place Child Restraint...

Page 25: ...fic location Vehicle Belt Installation continued on next page If it moves more than 1 in 2 5 cm you can try A Putting your knee in the seat and pulling the belt tighter B Reinstalling the child restraint C Changing to a different seating location D Switching to vehicle belt installation To Release Lower Anchor Belt Remove child from child restraint Remove tension from the lower anchor belt by push...

Page 26: ...ighten 3 Check if Your Vehicle Belts Will Work With This Child Restraint This is very import ant because not all vehicle belts will work with child restraints Review pages 31 34 and your vehicle owner s manual to determine what kind of vehicle belt you have and how to lock a child restraint in place 4 Route Vehicle Lap or Lap Shoulder Belt Through Forward Facing Belt Path Do not twist belt Buckle ...

Page 27: ...ove the harness system to use as a booster seat See pages 12 14 40 100 lb 18 1 45 4 kg 43 52 in 110 1 132 1 cm If it moves more than 1 in 2 5 cm you can try A Putting your knee in the seat and pulling the belt tighter B Reinstalling the child restraint C Changing to a different seating location D Switching to the lower anchor belt installation if lower anchors are available in your vehicle 8 Check...

Page 28: ...ster seat Do not use this booster seat if the tops of your child s ears are above the top of the booster seat Use only the vehicle s lap and shoulder belt system when restraining the child in this booster seat Do not use only the lap belt when using this seat as a booster seat The shoulder belt must always be adjusted snugly across the child s chest NEVER place the shoulder belt under the child s ...

Page 29: ...t problems You MUST have a lap and shoulder belt to use a locking clip Do not use the locking clip when using this seat as a booster seat For Forward Facing installation follow Pages 44 46 Warnings and Steps 1 6 before starting locking clip installation 4 Position Shoulder Belt on Child Pull up on shoulder belt to tighten The shoulder belt should lay snugly across the center of the child s shoulde...

Page 30: ...straint 4 Rebuckle Vehicle Belt 1 Determine Locking Clip Position Grasp both vehicle belts together just behind the latch plate to mark the position for locking clip Unbuckle the belt NOTE If the latch plate ends up just at the belt path opening so you cannot grasp the vehicle belt at the latch plate grasp the vehicle belts on the opposite side of the child restraint as close to the latch plate as...

Page 31: ... child restraints with the most comfort and convenience available today Remember parents are a child s first teachers and examples If you always buckle your seat belt your child will think it is the natural thing to do Make it a firm rule that the vehicle does not go until everyone is buckled up Make no exceptions No one can predict if use of a child restraint will prevent injury or death in a par...

Page 32: ...rd only We do not accept cash personal checks or other credit cards All outside of U S and Canada MUST use credit card Ship To Please Print Name _______________________________ Address _________________________ City ____________________________ State Province __________Zip ________ Telephone _______________________ Email Address ____________________ We MUST have this information Model Number 8 to ...

Page 33: ...rnia Georgia Indiana Missouri South Carolina and Texas residents add applicable sales tax Grand Total _______ No shipping and handling on instructions for quantities under 6 Add 50 for each instruction over 6 then add applicable shipping and handling Troubleshooting 1 Locate a Child Safety Seat Inspec tion Station for hands on training on how to use your child restraint Visit your local Child Pass...

Page 34: ...product Limitation of Damages The war ranty and remedies as set forth are exclusive and in lieu of all others oral or written expressed or implied In no event will DJG or the dealer selling this product be liable to you for any damag es including incidental or consequen tial damages arising out of the use or inability to use this product Limitation of warranties and other warranty terms and state ...

Reviews: