background image

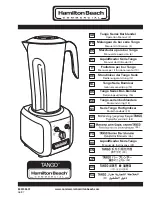
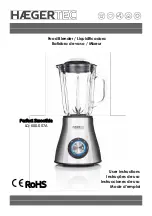
Food Processor Blender 

9635

Instructions

v003 2/03/15

PARTS

1. Blender jug cap
2. Blender jug cover
3. Blender jug
4. Speed control knob
5. Base
6. Plastic spatula
7. Push cover
8. Processor jug cover
9. Processor jug
10. Reversible blade
11. Stainless steel blade
12. Plastic blade
13. Rotor
14. Lid cover
15. Grinder
16. Grinder cover
17. Blade cover

TO ASSEMBLE THE GRINDER

• Attach the grinder cover (16) to the grinder (15) and

twist it anti-clockwise to secure.

• Remove the blender jug from the base, if fitted, and

attach the assembled grinder.  Secure by twisting
anti-clockwise.

•   

Ensure alignment arrows are 
in line before use.

1

2

6

7

8

9

10

11

12

13

14

15

16

17

3

4

5

ASSEMBLY

Before use, wash all parts that come into contact with
food thoroughly.

TO ASSEMBLE THE BLENDER:

• Attach the blender jug cover (2) to the blender jug

(3) and push down the jug cover to secure.

• Fit the cap (1) into the blender jug cover (2) and

twist clockwise to secure.

•   Attach the assembled

blender jug to the taller side
of the base (5) ensuring the
nodules on the jug are

aligned with the lugs on

the base and twist

anti-clockwise to
secure.

•   

Ensure

alignment arrows

are in line before

use.

Please read carefully before use
and retain for future reference.

Alignment
arrows

Alignment
arrows

Summary of Contents for 9635

Page 1: ...d grinder Secure by twisting anti clockwise Ensure alignment arrows are in line before use 1 2 6 7 8 9 10 11 12 13 14 15 16 17 3 4 5 ASSEMBLY Before use wash all parts that come into contact with food thoroughly TO ASSEMBLE THE BLENDER Attach the blender jug cover 2 to the blender jug 3 and push down the jug cover to secure Fit the cap 1 into the blender jug cover 2 and twist clockwise to secure A...

Page 2: ...r Attach the processor jug 9 to the shorter side of the base Place the assembled rotor section over the column in the centre of the processor jug as diagram 1 Attach the processor jug cover 8 to the processor jug and twist anti clockwise to secure ensuring the long plastic catch fits into the recess on the taller side of the base Push food into the processor using the push cover 7 as diagram 2 Dia...

Page 3: ...e reversible blade 10 onto the rotor with the slicing blade lowermost and twist clockwise to secure as diagram 4 To further chop the food add the stainless steel blade 11 to the rotor Once the food is processed lift out the jug USING THE BLENDER Remove the blender jug cover by twisting the cover anti clockwise Place food into the blender jug and replace the blender jug cover twisting it clockwise ...

Page 4: ...ket is switched on Check that all 3 alignment points are correctly located If any of the 3 points are incorrectly located the safety feature will cut power to the appliances CLEANING Always switch off the appliance at the mains and unplug before cleaning After use disconnect the accessories that require cleaning and wash them in warm soapy water Dry thoroughly before replacing or storing Wipe the ...

Reviews: