background image

11

In

 more 

detail...

BFU60CL Built under larder fridge

GB

IE

Operation

Product functions

• 

The thermostat automatically regulates the temperature inside the  

refrigerator, depending on what number you have turned the thermostat 

control knob to: 


Position <0>

 means that the appliance will not operate.  


Position <1> 

provides highest temperature inside of the fridge

.


Position <7> 

provides lowest temperature inside of the fridge. 


Ideally the thermostat should be set to a position of between

 <3> 

to

 <4>.


Your refrigerator can maintain a temperature of between 4 to 6°C.

Note

The ambient temperature of the room, the temperature of food and the 

amount of food that has been placed in the appliance and how often 

the door is opened, will all affect the temperature being maintained by 

the appliance.

Note

Do not run the appliance with the thermostat above number <5> in 

normal usage otherwise the defrost drain hole will freeze.

Arranging and storing food in your refrigerator

• 

Warm food or evaporating liquids should not be stored in your refrigerator, as 

this will increase the humidity inside of the appliance.

• 

All foods should be wrapped or covered, this is particularly important if 

the food has a strong flavour. You should use polythene bags or sheets, 

aluminium foil or wax paper to wrap the food. Liquids should be stored in 

sealed containers or bottles.

• 

To maximise the space inside of your refrigerator, any excessive packaging 

on the food should be removed.

• 

Quickly perishable food should be stored at the back of the refrigerator, which 

is the coldest part of the appliance.

• 

No food items should be allowed to come into contact with the back wall of 

the refrigerator.

• 

Make sure that you arrange food in such a way that the door can close 

completely. Particular attention should be given to bottles that may protrude 

when placed on shelves inside the main section of the refrigerator.

BFU60CL-C&L-A5-GB-IM-11.indd   11

10/15/13   4:13 PM

Summary of Contents for BFU60CL

Page 1: ...uilt under larder fridge BFU60CL Version 01 GB IE Built under larder fridge Barcode 5052931258499 WARNING Read the instructions before using the appliance BFU60CL C L A5 GB IM 11 indd 1 10 15 13 4 13 PM ...

Page 2: ...2 01 x 1 02 x 2 03 x 2 04 x 2 05 x 1 06 x 2 BFU60CL Built under freezer 1 1 08 x 4 4 x 18mm 07 x 27 3 x 12mm 2 for spare use 09 x 2 5 x 16mm BFU60CL C L A5 GB IM 11 indd 2 10 15 13 4 13 PM ...

Page 3: ... reference Getting started 04 Your product 04 Before you start 05 Safety 06 In more detail 10 Operation 10 Care and maintenance 13 Troubleshooting 14 Recycling and disposal 15 Technical and legal information 15 Guarantee 16 CE Declaration of conformity 18 Appendix 19 Installation GB IE BFU60CL C L A5 GB IM 11 indd 3 10 15 13 4 13 PM ...

Page 4: ...tion guide located at the end of the guidebook Your product 01 Thermostat dial and light 02 Removable glass shelves 03 Crisper 04 Ventilation grills 05 Leveling feet 06 Egg trays 07 Bottle shelf 08 Dairy shelf 08 01 02 03 04 05 06 07 BFU60CL C L A5 GB IM 11 indd 4 10 15 13 4 13 PM ...

Page 5: ...ection for a detailed explanation of how to keep the channel clear Crisper drawer and cover The crisper drawer are in the bottom of your refrigerator and there is a glass cover that goes over it The cover helps to prevent fruit and vegetables from drying out prematurely Dairy shelf The dairy shelf is suitable for storing eggs cheese and yogurt As well as smaller packages tubes cans etc Bottle shel...

Page 6: ...act Customer Services on 0844 800 1128 UK and 01 4475261 Ireland Check the package and make sure you have all of the parts listed Decide on the appropriate location for your product If this product contains glass please take care when fitting or handling to prevent personal injury or damage to the product The specification plate located on the appliance displays all the necessary identification in...

Page 7: ...g food that needs to be chilled and refrigerated If it is used for any other purpose or it is not used correctly then manufacturer will accept no liability for any damage that might be caused Altering the specification of the appliance must not be attempted for reasons of safety Check the appliance for any signs of transport damage If you notice any damage then you should not connect your applianc...

Page 8: ...terial should be kept away from children This appliance can be used by children aged from 8 years and above and persons with reduced physical sensory or mental capabilities or lack of experience and knowledge if they have been given supervision or instruction concerning use of the appliance in a safe way and understand the hazards involved Children shall not play with the appliance Cleaning and us...

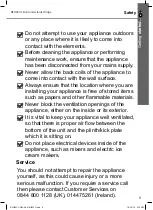
Page 9: ...tored items such as papers and other flammable materials Never block the ventilation openings of the appliance either on the inside or its exterior It is vital to keep your appliance well ventilated so that there is proper air flow between the bottom of the unit and the plinth kick plate which it is sitting on Do not place electrical devices inside of the appliance such as mixers and electric ice ...

Page 10: ...re can be an odour when you first switch on the appliance It will lessen as the appliance starts to cool Before first use You should set the thermostat dial to its maximum setting for 24 hours after switching on the appliance for the first time When you first switch on the appliance the compressor will run continuously until the refrigerator reaches a cool enough temperature You should then adjust...

Page 11: ...ge otherwise the defrost drain hole will freeze Arranging and storing food in your refrigerator Warm food or evaporating liquids should not be stored in your refrigerator as this will increase the humidity inside of the appliance All foods should be wrapped or covered this is particularly important if the food has a strong flavour You should use polythene bags or sheets aluminium foil or wax paper...

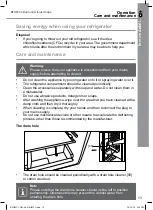
Page 12: ...tor if they are stored in airtight containers Saving energy when using your refrigerator Installing Install the appliance in a cool position If it is placed in direct sunlight or next to an oven or other heat source the energy consumption can increase substantially Ensure the appliance is installed with the correct ventilation requirements Restricting ventilation can increase the energy consumptio...

Page 13: ...ed periodically Clean the accessories separately with soap and water Do not clean them in a dishwasher Do not use abrasive products detergents or soaps After washing the appliance wipe over the area that you have cleaned with a damp cloth and then dry it thoroughly When cleaning is complete dry your hands and then reconnect the plug to your mains supply Do not use mechanical devices or other means...

Page 14: ...contacting the Customer Services please refer to the checklist below My fridge does not appear to be working there is no power to my appliance Check that the plug is fully inserted into the power socket Check that there is power to your mains supply e g that there hasn t been a power cut or that the fuse hasn t blown Check that the thermostat inside the appliance has not been turned to the off pos...

Page 15: ...duct must be handed over to an electric and electronic equipment collection point for recycling On ensuring that this product is disposed of correctly you will help to avoid possible negative consequences for the environment and public health which could occur if this product is not handled correctly To receive more detailed information about recycling this product contact your local government do...

Page 16: ...maining balance of the GAA guarantee will be valid and any further call outs during this prescribed period will be covered by GAA on the replacement appliance Should any person other than an authorized engineer modify or attempt to repair the appliance then the warranty will be invalid The guarantee applies to the UK mainland Scotland Ireland ROI and France but is not transferable between EU count...

Page 17: ...tted position If the appliance is glued grouted or tiled in such a manner that it cannot be removed it is the responsibility of the customer installer to remove and reinstall the appliance to facilitate the repair This Guarantee does not affect your statutory rights The guarantee is offered by GAA Ltd 1301 1303 Lu Plaza 2 Wing Yip St Kwun Tong Kowloon Hong Kong Customer Service To arrange an in gu...

Page 18: ...responding transpositions Standard EN 60335 1 Safety of household and similar electrical appliances Comply with the European Directives 2006 95 CE LVD and the 2004 108 CE EMC MANUFACTURER CATA ADDRESS C Ter nº 2 Torelló 08570 Barcelona Spain B Q plc Chandlers Ford Hants SO53 3LE United Kingdom www diy com CE Declaration of Conformity CE Declaration of Conformity This appliance respects laws of the...

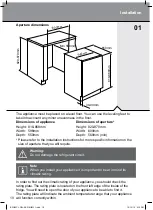
Page 19: ...ation on the size of aperture that you will require Warning Do not damage the refrigerant circuit Note When you install your appliance it is important to bear in mind its climatic rating In order to find out the climatic rating of your appliance you should check the rating plate The rating plate is located on the front left edge of the inside of the fridge You will need to open the door of your ap...

Page 20: ...E and local regulations Your refrigerator comes supplied with a 13 amp plug fitted If in future you need to change the fuse in this plug then a 13 amp ASTA approved BS 1362 fuse must be used The wiring in the mains lead is coloured as follows Brown Live Blue Neutral Green and yellow Earth As the colours of the wires in the appliance s mains lead may not correspond with the coloured markings identi...

Page 21: ...light or exposed to continuous heat or extremes of temperature e g next to a radiator or boiler The door should be able to open completely and freely The appliance should be situated so you can easily access the food that is stored in it You should check whether there is an electrical socket available which will be accessible after your appliance is installed Reversing the door This procedure MUST...

Page 22: ...he appliance from their original position These screws should be partially tightened but not fully tightened 5 Remove the door retaining screws 2 and then reverse the position of the top and bottom hinge as shown in above diagram 6 Reattach the appliance door and then fully re tighten the retaining screws 1 and the door retaining screws 2 7 Insert the cover caps 3 into the holes that are now expos...

Page 23: ...nipulate the seal until it does adhere to the cabinet properly all the way around the door Note Do not heat the door seal on anything but the lowest heat setting or heat the seal for a long period of time Otherwise damage may be caused to the door seal which would not be rectified under the guarantee free of charge When the appliance has been placed underneath the worktop you may decide to attach ...

Page 24: ...te If the appliance is not level then the door and door seal may be affected A cut out must be made in the plinth kickboard for ventilation The cut out should measure 600mm in width and 90 140mm in height Insert the plinth kickboard and then refit the grill in its original position to hold it in place Note Please note that as shown in the above drawing an appropriately sized ventilation cut MUST b...

Page 25: ...everse the door before commencing the installation process See Reversing the door section a Undo the hexagonal screws from the two adjusting bolts that are located on the top of the appliance door and then remove the mounting bracket Mounting bracket Dismantling Freezer door BFU60CL C L A5 GB IM 11 indd 25 10 15 13 4 13 PM ...
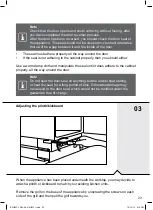
Page 26: ...should be positioned on the line that you have just drawn Please note the position of the mounting bracket in the above drawing to ensure that you have the mounting bracket the correct way up The top of the mounting bracket should be positioned approximately 15mm from the top of the furniture door This will allow you a 5mm gap from the top of the furniture door to the underneath of your worktop Fi...

Page 27: ...ing screws 07 and 09 07 Fitting the furniture door to the appliance c Hang the furniture door onto the appliance door making sure that the brackets on the mounting bracket locate over the adjusting bolts 08 09 07 09 07 04 07 x 4 3 x 12mm 04 x 2 09 x 2 5 x 16mm BFU60CL C L A5 GB IM 11 indd 27 10 15 13 4 13 PM ...

Page 28: ...n of the adjusting bolts The gap should be set to approximately 7mm It is possible to make minor adjustments to the position of the furniture door using the screws on the top and the bottom of the appliance door You should make these adjustments so that the furniture door is level BFU60CL C L A5 GB IM 11 indd 28 10 15 13 4 13 PM ...

Page 29: ...itably sized drill bit to drill through the three holes in the bracket into the work top Note The drill bit should be appropriate for the material that your work top is made from i Secure the bracket to the underside of the worktop using the screws 7 provided Note These screws should be fully tightened 1 2 07 x 3 3 x 12mm BFU60CL C L A5 GB IM 11 indd 29 10 15 13 4 13 PM ...

Page 30: ...1 03 12 If the appliance is being installed under a granite work top use the L shaped brackets 03 provided to secure the fridge to the side of the cabinet In this case step 10 is not applicable Use a suitably sized drill bit to drill through the three holes in the bracket into the cabinet side on the opposite side to the hinges 06 06 07 07 09 09 07 x 4 3 x 12mm 08 x 4 4 x 18mm 03 x 2 06 x 2 07 x 4...

Page 31: ...BFU60CL C L A5 GB IM 11 indd 31 10 15 13 4 13 PM ...

Page 32: ...GB IE B Q plc Chandlers Ford Hants SO53 3LE United Kingdom www diy com BFU60CL C L A5 GB IM 11 indd 32 10 15 13 4 13 PM ...

Reviews: