background image

Operation Controls and Functions

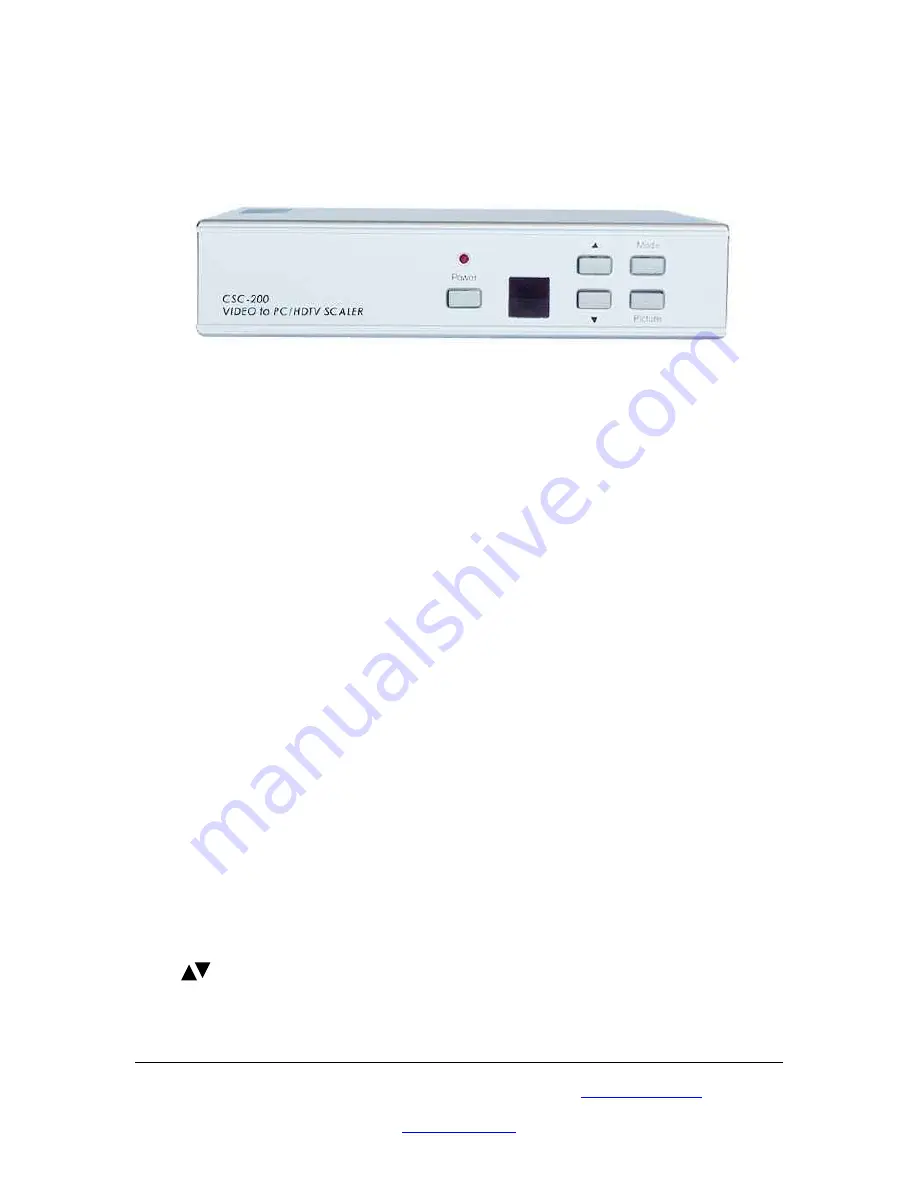
Front Panel

1.

Mode- 

if you press this button repeatedly it will toggle through the following 

adjustment controls- Source-Resolution-Output-Aspect-3D enhance- Digital NR.

Source Mode-

 While under this mode, press the up and down buttons to choose 

the desired input mode from C-Video, S-Video and component inputs. 

Resolution Mode- 

If output is selected as RGB, press the up and down buttons to 

choose from 640 x 480 (VGA), 800 x 600 (SVGA), 1024 x 768 (XGA) or 1280 x 
1024 (SXGA) PC output. If output is selected as YPbPr press the up and down 
arrows to choose from 480p, 576p, 720P or 1080i HDTV output.

Output Mode-

 Press the up and down arrows in order to select between PC RGB 

output and HDTV YPbPr output.

Aspect Mode-

 Press the up and down arrows in order to select between standard 

(4:3) aspect and wide (16:9) aspect ratio.

3D Enhance Mode- 

This mode is used to turn on or off the 3D comb filter 

function. When VCR or non-standard video source is connected to the input the 
output picture may be jittering. If this occurs, please turn off the 3D enhance 
function.

Digital NR Mode-

 To turn on or turn off the digital noise reduction function.

2.

Picture- 

Press this button and it will toggle through the following picture 

adjustment parameters- Contrast-Bright-Colour-Tint-Sharpness.

Contrast- 

Press the up and down arrows in order to adjust the picture contrast 

level (0~48).

Bright- 

Press the up and down arrows in order to adjust the level of picture 

brightness (0~48).

Colour-

 Press the up and down arrows in order to adjust the colour saturation 

level (0~48).

Tint-

 Press the up and down arrows in order to adjust the tint level (0~48).

Sharpness-

 Press the up and down arrows in order to adjust the sharpness level of 

the picture (0~48).

3.

      -

 Press these buttons in order to toggle through the adjustment controls.

4.

IR Sensor- 

This is the infrared remote control sensor.

5.

Power and LED button- 

press once to power on the unit, press again to turn off 

the unit.

Please browse our online catalogue to view our full product range.

44-48 Maitland Road, Mayfield East, NSW, 2304 Australia, 

[email protected]

Phone +61 249689313   Fax +61 249689314

www.converters.tv

Summary of Contents for CSC-200

Page 1: ...interlacer CSC 200 Operation Manual Please browse our online catalogue to view our full product range 44 48 Maitland Road Mayfield East NSW 2304 Australia sales converters tv Phone 61 249689313 Fax 61 249689314 www converters tv ...

Page 2: ... the unit away from TV or other electronic equipment 8 Unplug the unit from the power supply when it is not to be used for a long period of time Features Professional Video Scaler De interlacer Supports VGA SVGA XGA SXGA 1280x1024 PC output Supports HDTV output 480p 576p 720p and 1080i State of the art frame buffer technology Reverse 3 2 2 2 pull down provides clear and crisp de interlacing of vid...

Page 3: ...to the input the output picture may be jittering If this occurs please turn off the 3D enhance function Digital NR Mode To turn on or turn off the digital noise reduction function 2 Picture Press this button and it will toggle through the following picture adjustment parameters Contrast Bright Colour Tint Sharpness Contrast Press the up and down arrows in order to adjust the picture contrast level...

Page 4: ...RCA to 3 RCA YCbCr to connect the YCbCr output of the source video equipment to the connector labeled YCbCr Note that the plugs colours have to match with the colour of the RCA Jacks 4 PC In Computer RGB with H V Sync Connect the source computers VGA output signal to the HD 15 connector PC In This computer input signal is not scaled but is available for pass through when the video scaler is in the...

Page 5: ...e 18 NR Press this button to turn on or off the digital noise reduction 19 Mode Press this button to toggle through the following adjustments Source Resolution Output Aspect 3D Enhance Digital NR 20 Picture Press this button to toggle through the following picture adjustments Contrast Bright Colour Tint Sharpness 21 Reset Press this button and it will revert picture adjust back to factory preset v...

Page 6: ...at Scan VGA 640 x 480 RGBHV Progressive SVGA 800 x 600 RGBHV Progressive XGA 1024 x 768 RGBHV Progressive SXGA 1280 x 1024 RGBHV Progressive HDTV RESOLUTION 16 9 1280 x 720p YPbPr Progressive 16 9 1920 x 1080i YPbPr Interlaced 852 x 480p YPbPr Progressive 862 x 676p YPbPr Progressive Scaled Output Vertical Refresh Rates and Horizontal Scan Rates Manual Control Front Panel Buttons IR Remote Control...

Reviews: