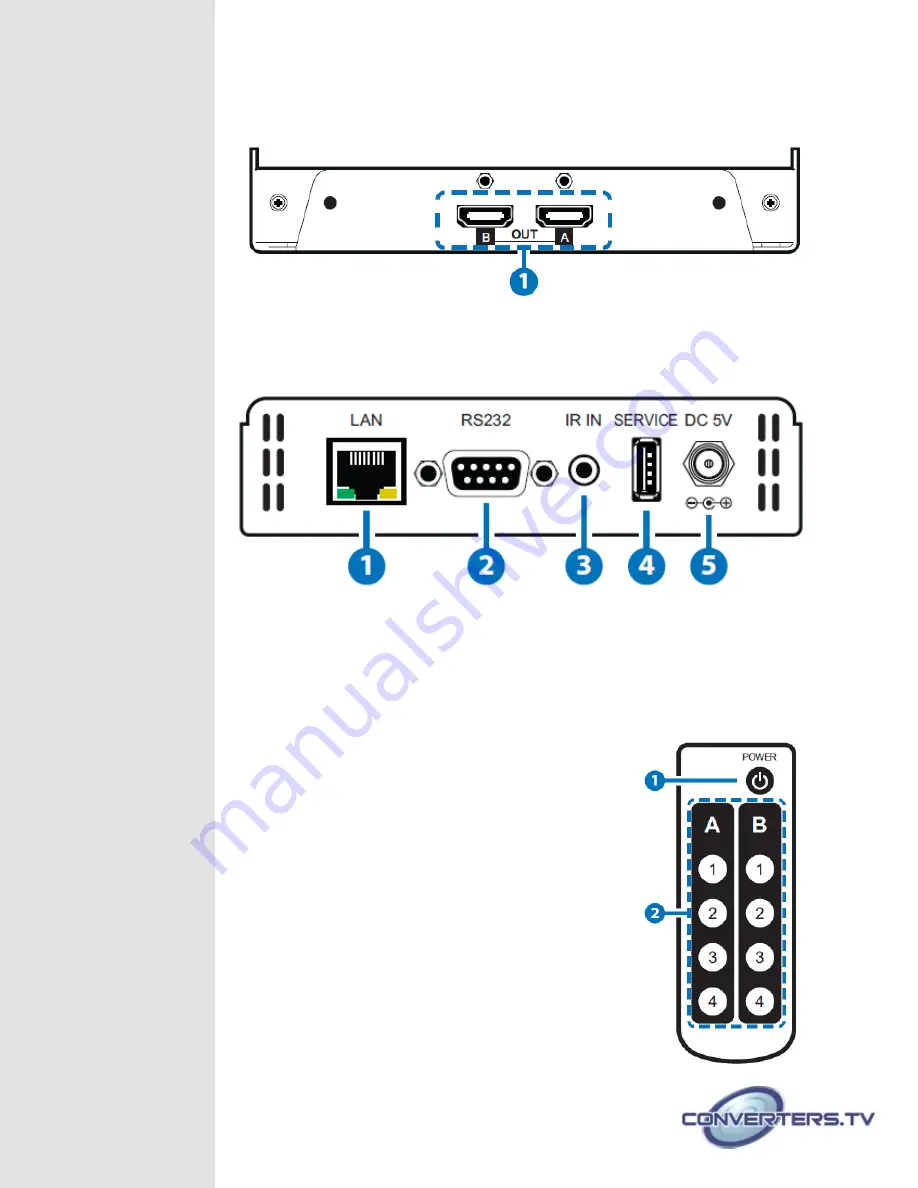
Right Panel
1. HDMI OUT A~B:
Connect to HDMI TV / display or HD amplifier for output image
and audio or audio display up to 6G each port.
Bottom Panel
1. LAN:
Connect to PC / Laptop with active internet service for Telnet / WebGUI control
with RJ-45 terminated cable.
2. RS232:
Connect to PC / Laptop to control the device.
3. IR IN:
Connect the IR Receiver cable from the package for receive IR signal from the
remote control.
4. SERVICE:
This is reserved for firmware update use only.
5. DC 5V:
Connect with adapter included from the package and
connect to AC wall outlet for power supply. Once it’s
connected all LEDs on the panel will light up for few seconds to
represent a successful connection.
Remote Control
1. POWER:
Press Power key to turn on the device or set to
standby mode.
2. OUTPUT A1~A4 & B1~B4:
Press these OUT buttons once
a time to select an input source for an output display.


