GB
78
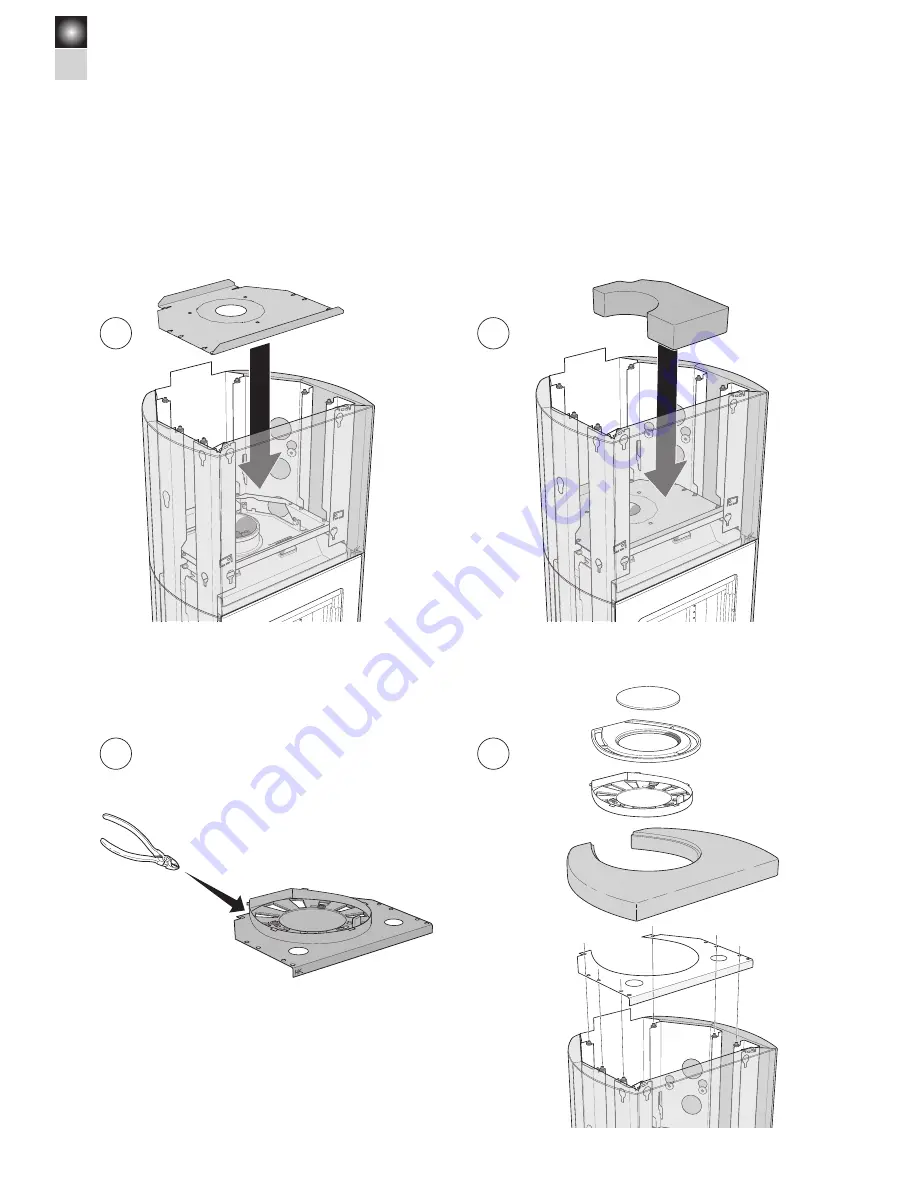
Heat reservoir to soapstone top
Installation of accessories – Heat reservoir
1
2
3
4
INSTALLATION
Page 1: ...Installation instructions C 34T www contura eu...
Page 2: ...LARED PERFORMANCE Essential characteristics Performance Harmonised technical specification Reaction to fire A1 WT Minimum distance to combustible material 100 mm to rear 415 mm to side Other safety di...
Page 3: ...Read how to best light your stove in the lighting instructions The stove becomes very hot During operation certain surfaces of the stove become very hot and can cause burn injuries if touched Also tak...
Page 4: ...h side of the stove or have a 200 mm extension on each side of the opening The hearth plate can consist of natural stone concrete metal plate or glass A painted metal or glass hearth plate is availabl...
Page 5: ...0 629 900 900 6 4 0 Fire retardant wall of brick or concrete 217 50 700 1100 50 325 Fire retardant wall of brick or concrete Place the stove on the hearth plate and check that the installation distanc...
Page 6: ...t the knockout using a hammer The air duct connector on the stove has an external diameter of 64 mm In hot areas the duct has to be insulated with 30 mm mineral wool covered with a moisture barrier pl...
Page 7: ...flector The clos ing force of the hatch can be adjusted by moving the spring between the three notches on the lever The angle of the stove also affects the closing force of the spring If the spring fo...
Page 8: ...in the chimney of at least 12 Pa The draft is affected both by the length and area of the chimney and by how well sealed it is The minimum recommended chimney length is 3 5 m and suitable cross secti...
Page 9: ...con nected to the top Connection to chimney Sweeping When sweeping the smoke baffle must be removed on the Con tura 30 series this can be done by lifting the smoke baffle and removing the side piece...
Page 10: ...F 603499 F 603496 The stones are numbered as illustrated above We recommend that the stones be installed in the order described on the fol lowing pages Take care of the soapstones They scratch easily...
Page 11: ...GB 75 10 10 VAN ADI UM No 7 CH RO M E Do not tighten the screws 3 4 5 6 7 INSTALLATION...
Page 12: ...LATION Final inspection of the installation It is extremely important that the installation is inspected by an authorised chimney sweep before the stove is used Also read the Lighting instructions bef...
Page 13: ...adjustment brackets to the upper concrete screws Adjust the stone so it is aligned with the side stones along the top edge Tighten the 4 concrete screws Check that the distance between the door and to...
Page 14: ...GB 78 Heat reservoir to soapstone top Installation of accessories Heat reservoir 1 2 3 4 INSTALLATION...
Page 15: ......
Page 16: ...n www contura eu Contura reserves the right to change dimensions and procedures described in these instructions at any time without special notice The current edition can be downloaded from www contur...