


2
Installing the motion sensor
To install the batteries:
1
Remove the battery cover on the back of the motion sensor,
then install the 9V battery into the battery compartment.
Tip:
Keep the battery cover off until after the motion
sensor is identified to the system.
After the battery is connected, the motion sensor’s red
LED (visible through the motion sensor window) will blink
for about eight seconds while a wireless connection is
established.
Note:
The motion sensor requires a warm-up time of
about 60 seconds before it can reliably detect motion.
2
After the motion sensor is powered up, the walk test LED
(red LED) is automatically enabled for five minutes, allowing
the red LED to indicate when motion is detected (see “Walk
test and adjustment” below). This allows the installer time to
adjust the motion sensor positioning and perform walk tests
to verify that motion detection is functioning as desired.
Note:
Battery Low and Battery Critical events are
generated by the Control4 system when the battery
level on the motion sensor drops to a certain level.
These events can be used by Composer scripts to
signal the installer and the homeowner that battery
replacement is needed.
To add the motion sensor to the Composer Pro project:
1
In the
Search
tab in Composer Pro, type “Motion Sensor,”
then double-click the motion sensor in the search results to
add it to your project.
2
When prompted to identify the device to the system, press
the button inside the battery compartment four times.
The green LED blinks twice to confirm the ID has been sent
to the Control4 system and the MAC address of the device
will be added to the appropriate field.
3
To configure Composer project events based on the motion
sensor’s states, refer to Composer Pro documentation.
To mount the motion sensor:
1
Select a mounting location. Consider the following:
• A mounting height of six to eight feet is recommended.
• Making sure the motion sensor is positioned for good
ZigBee wireless reception by (1) ensuring it is within 100
feet of another ZigBee device and (2) avoiding other
electrical equipment that may cause interference with the
ZigBee signal (such as 2.4GHz cordless telephones).
• Shielding the motion sensor from direct sunlight, if
possible, for better motion sensing reliability.
• Avoiding placement of the motion sensor near heat- or
cold-producing devices (for example, air conditioning
or furnace vents, fans, ovens, and heaters) to avoid false
triggers.
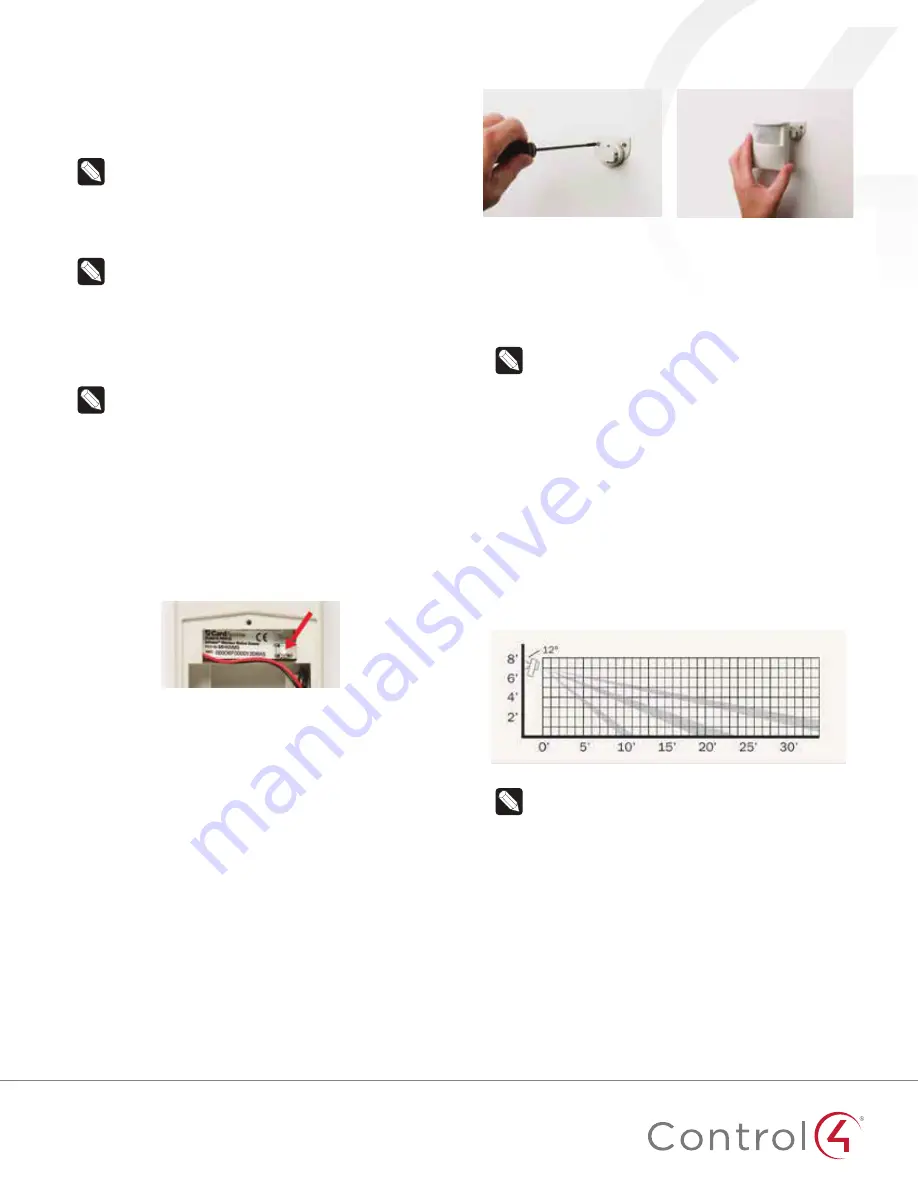
2
Attach the wall mount swivel bracket using the screws and
wall anchors provided.
3
If mounting the motion sensor to drywall, you may need to
mark and pre-drill two 3/16-inch mounting holes at the two
screw hole locations, then press the plastic wall anchors
(included) into the drilled holes.
4
Slide the back of the sensor into the wall mount swivel
bracket.
Note:
The mounting angle can be adjusted. See to
“Walk test and adjustment” below to determine the best
mounting angle.
Walk test and adjustment
It is important to perform a walk test after mounting the motion
sensor in order to determine if the sensor is properly detecting
motion in the desired areas. The Walk Test mode will indicate
whether motion is detected by illuminating the red LED on the
motion sensor. The Walk Test mode is automatically activated for
five minutes after the device is first powered up or any time its ID
button is pressed.
The angle of the motion sensor may be adjusted, in order to
control how far the motion sensor can “see.”
1
To reduce the detection range, simply tilt the sensor
downward. To increase the range, tilt the sensor upward.
Range is maximized when the sensor is tilted to 12°.
Tip:
We recommend that the motion sensor is
not
adjusted to less than a 12° angle. Maximum range may
not be desired if the motion sensor is placed outdoors,
since a false trigger may occur if the motion sensor is
set to detect motion in the distance. Motion sensitivity
is also adjustable on the
Properties
page in Composer
Pro. (See “Advanced settings” below for information on
adjusting the sensitivity.)


