6
Attach the power box and touch screen
To attach the power box and touch screen:
1
Align and bend the wires carefully to fit them inside the wall
box.
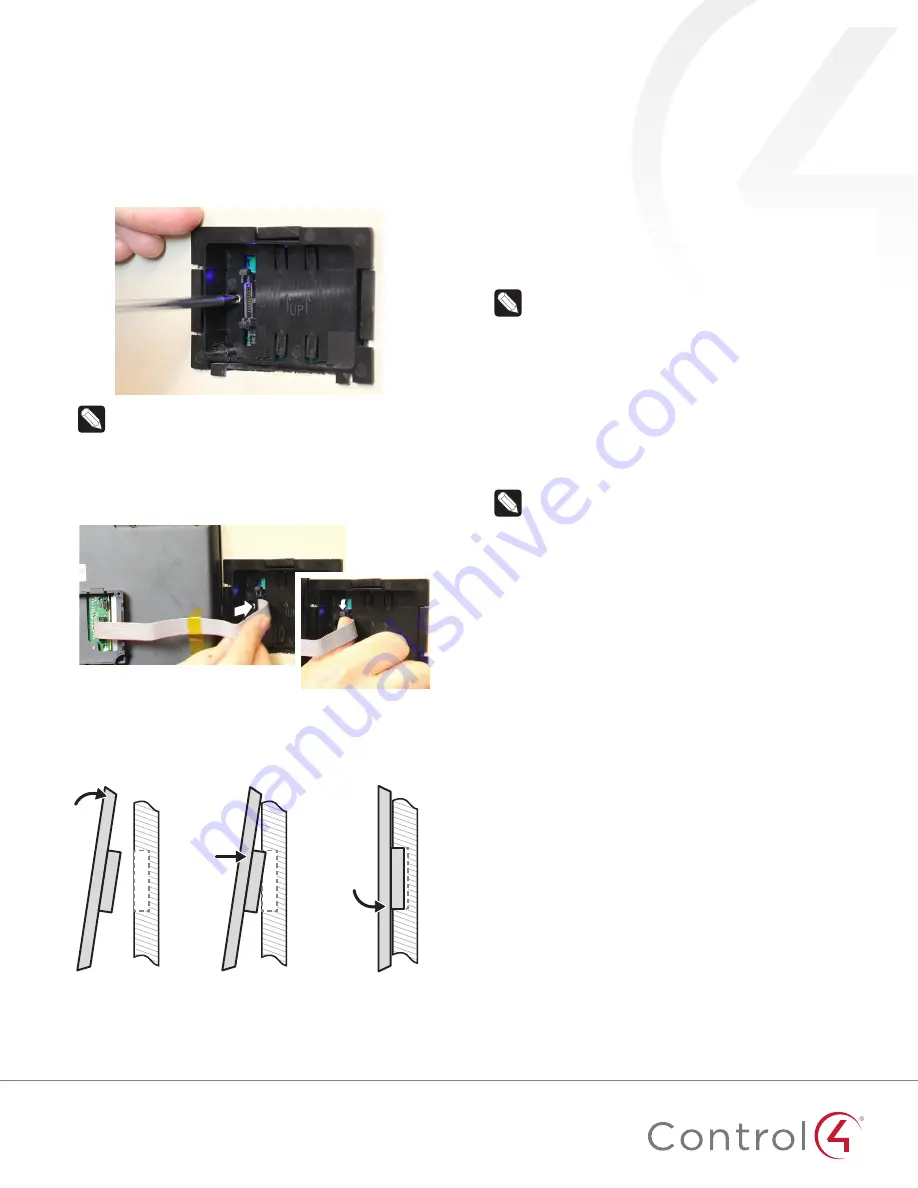
2
Align slide the power box into the wall box, then secure the
power box to the wall box using the two screws provided.
Figure 11: Secure power box to wall box
Note:
Overtightening the power box screws can warp
the box and make it difficult to attach the touch screen.
3
Straighten out the ribbon cable taped to the back of the
touch screen, then plug it into the ribbon cable port in the
power box. To make sure it’s securely connected, press it into
the port until the two locking tabs close onto the connector.
Figure 12: Attach ribbon cable to the power box
4
For easiest installation, angle the top of the touch screen
toward the wall, insert the top tabs of the mounting ring into
the power box, then press the bottom of the touch screen
into place.
Figure 13: Attach the touch screen top first
Configuration
Configure the touch screen for wireless (optional)
To configure the touch screen for wireless:
1
After initialization, tap
Network
. The network configuration
page opens.
2
Under
Wi-Fi
, tap or slide
OFF/ON
to enable WiFi, then tap
the
Wi-Fi
field to open a list of available networks.
3
Tap the network name you want to connect to.
4
Tap the
Password
field, then use the on-screen keyboard to
type the password (if required).
Note:
If you need to enter a static IP address, follow the
instructions under “To set a wireless static IP address”
below before proceeding.
5
Tap
Connect
.
If you don’t see the network you want:
1
Tap
+
, then tap the
Network SSID
field and type the SSID
(name) of the network by using the on-screen keyboard.
2
Tap the
Security
field, then select the type of security to use.
3
Tap the
Password
field, then use the on-screen keyboard to
type the password (if required).
Note:
If you need to enter a static IP address, follow the
instructions under “To set a wireless static IP address”
below before proceeding.
4
Tap
Save
. The new network is added to the bottom of the
network list.
To set a wireless static IP address:
1
Scroll down and tap
Show advanced options
.
2
Tap
IP settings
, then tap
Static
.
3
Select each box one at a time and use the on-screen
keyboard to type the:
•
IP address
•
Gateway
•
Network prefix length
•
DNS 1
(preferred)
•
DNS 2
(alternate)
Configure the touch screen for Ethernet
If you want to use DHCP (default) for your Ethernet connection,
no further setup is required.
To configure a static IP address for Ethernet:
1
After initialization, tap
Network
. The network configuration
page opens.
2
Tap
Ethernet
. The Ethernet settings screen opens.
3
Tap
Static IP Settings
, then tap
Use static IP
.
4
Select each box one at a time and use the on-screen
keyboard to type the
IP Address
,
Gateway
,
Netmask
,
DNS 1
(preferred), and
DNS 2
(alternate).
5
Tap
SAVE
when finished.