


Pre-Installation Instructions
Before You Install in a Control4 Panel
1
Use Composer Pro to add the Bus Power Supply to a project, define its
location in a panel, and print the panel report. See the
+),+/!.ŏ.+ŏ/!.ŏ
1% !
for details.
2
Install the panel following the instructions in the
Ćġ(+0ŏ* ŏĂġ(+0ŏ*!(ŏ
*/0((0%+*ŏ1% !
.
3
Install and wire the Terminal Block for the Bus Power Supply following the
instructions in the
!.)%*(ŏ(+'ŏ */0((0%+*ŏ1% !
and in the location
defined by the Composer Pro panel reports.
Installation Instructions
Install in a Control4 Panel
1
The Mounting Bracket fits both 2-Slot and 5-Slot Panels. If you are mounting
into a 2-Slot Panel, gently bend the tab 90 degrees to the left or right (see
Figure 1).
IMPORTANT!
To prevent sharp edges and cut fingers, use caution when
bending the tab and avoid breaking it.
2
Orient the Bus Power Supply bracket with the mounting holes facing down
(see Figure 2).
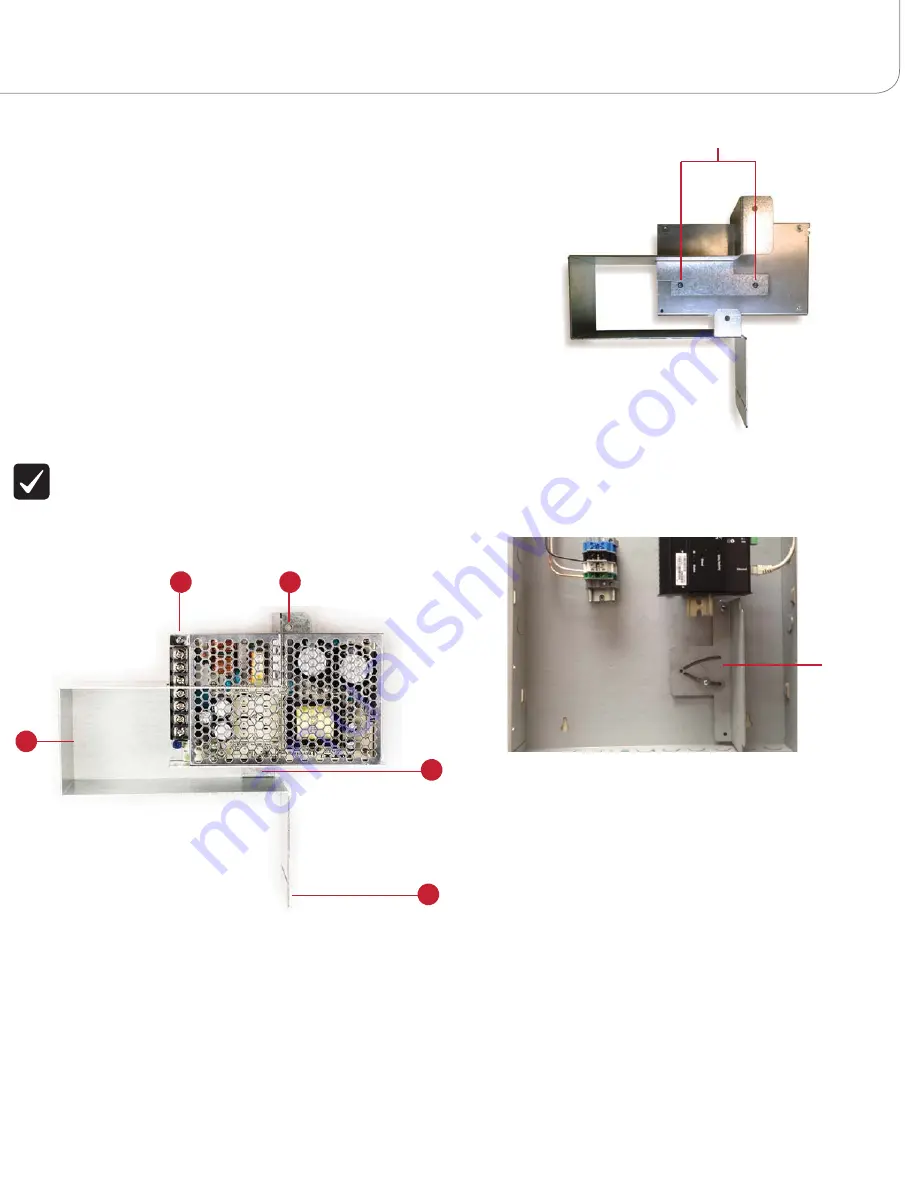
Figure 2. Bus Power Supply Mounting Bracket
A Mounting
Bracket
B Terminal
Screws
C Mounting
Holes
D Bendable
Tab
3
Insert the Bus Power Supply into the bracket with the screw terminals facing
toward you on the left-hand side (see Figure 2).
4
Rotate the bracket and Bus Power Supply 180 degrees, align the power
supply mounting holes, and attach the Bus Power Supply to the bracket using
the screws provided (see Figure 3).
Figure 3. Mounting Holes
5
Use a screwdriver to remove the screws and the Class 1/2 Swivel Divider plate
at the bottom of the panel (see Figure 4). You’ll be installing the Bus Power
Supply and bracket there.
Figure 4. Divider Plate
6
Mount the Bus Power Supply and bracket using the same screws that were
used to mount the divider plate (see Figure 5).
Mounting Holes
Divider
Plate
A
B
C
C
D


