6
6
5. Avoid opening the Oven Door too frequently to prevent heat loss.
6. When toasting, frozen bread or many slices should be at a darker setting
than 1 regular slice.
7. When baking, smoke will likely appear. Removing excess fat prior to baking
can reduce this. Always use Multi – use pan.
CARE AND CLEANING
1. Before using your Toaster Oven, wash all of the accessories
– Wire Rack and Multi – use pan, in hot water with detergent or soap.
2. Initial start up operation may result in minimal smell and smoke (about
15 min.) This is normal. It is due to the protective substance on heating
elements which protects them from salt effects during shipping from
factory.
3. Always make surer that the appliance is unplugged and allow to cool
before cleaning.
4. The Wire Rack can be removed for easy cleaning.
Open the Oven Door and tilt upward slightly and pull the Wire Rack straight
toward you until it slides out completely. Once the rack is removed, clean
the interior with a damp cloth.
To replace the Wire Rack, open oven Door and tilt upward slightly and slide
the rack into the two rack grooves at either side of the oven chamber and
push straight to the back of the oven chamber. Ensure that the automatic
hooks are in correct position to push in the Wire Rack towards the rear of
oven chamber. The exterior may be wiped with a damp cloth.
REMEMBER
, do not place the entire unit in water or any liquid.
DO NOT WIPE THE HEATING ELEMENTS
– They are self cleaning!
5. Cleaning the Bottom of the Crumb Tray
This appliance has a drop open crumb tray at the bottom of the baking
chamber. First unplug this appliance and allow to cool.
To clean out the crumbs, simply tilt the unit backwards and push the Crumb
Tray Slide Fastener towards the rear, down allow to drop on counter top.
Wipe interior of crumb tray with a damp cloth. After cleaning, slide the
”Crumb Tray Slide Fasteners ” into the tabs to lock the crumb tray.
Washing of the interior of the crumb tray is accomplished by pacing unit on
its back side and allow crumb tray to fall forward for easy cleaning.
DO NOT
use the dishwasher to clean any of the accessories which are
included with this product.
DO NOT
usr any abrasive cleaning products.
CLEAN
accessories with a soft cloth in hot water with liquid detergent or
soap.
•
La comidas
congeladas
y
gruesas tomaran
mas
tiempo
para
enfriarse
y
para cocinarse.
•
No abra la puerta del horno frecuentemente ya que el calor se perderá.
•
Cuando tueste
pan
o
harinas, e
introduzca
mas
de
una
tajada
de
pan
o
harina, usted
debe
considerar
un
nivel
mas
alto
de
temperatura
dada
la
cantidad de alimento.
•
Cuando
dore,
humo
saldrá
de
la
puerta
de
manera
considerable.
Asegúrese de remover la grasa después de cocinar.
CUIDADO Y MANTENIMIENTO
•
Antes de
utilizar
su
horno
tostado
r, lave
todos
los
accesorios.
Utilice
solamente jabón de utensilios de cocina.
•
El primer
uso
de
su
horno,
causara
que
la
película
que
recubre
las
partes
anexas y
que
protege
de
infecciones
y
regeneramiento durante
el
transporte del
horno
de
la
fabrica
a
su casa,
se
queme.
El
olor
a
quemado
y desagradable la primera vez es TOTALMENTE NORMAL.
•
Siempre deje
que
el
horno
se
enfrié
y
que pierda
los
niveles
de
calor
excesivo antes
de
limpiarlo
todo
o
parcialmente
cualquiera
de
sus
partes.
•
La parrilla
de
cocción
puede
ser
removida
para
limpiarla
de
manera
fácil
y
asegurarse que
ningún
tipo
de
exceso
de
grasa
se
Acumule
en
las
partes
principales de
la
misma.
Nunca
limpie
los
elementos
del
horno
que
se
encargan de calentar Ellos poseen un sistema de auto limpieza.
•
Limpie la parte inferior de la bandeja o receptáculo de moronas.
•
Este aparato
posee
una
bandeja
o
receptáculo
de
morones,
como
se
indico en
el
punto
anterior
usted
debe
limpiarla,
este
receptáculo
esta
ubicado en la parte inferior del horno.
•
Limpie dentro
del
horno
cuando
haya
concluido
ciclos
de
cocción
de
cualquier tipo de alimento graso o no graso.
•
NUNCA UTILICE MATERIALES ABRASIVOS
PARA LIMPIAR EL HORNO
.
•
LIMPIE
los accesorios con una tela suave y húmeda en jabón.
•
Después de
limpia
r, cierre
el
panel
y asegúrese
de
que
este
correctamente
cerrado.
PRECAUCIÓN
•
Utilice siempre
el
horno
tostador
con
TODOS SUS
ACCESORIOS
EN
LUGAR CORRESPONDIENTE DE ACUERDO A SU USO.
•
NUNCA OPERE EL HORNO CON LA PUERTA ABIER
TA.
•
NUNCA COLOQUE
la
bandeja
o
parrillas directamente
sobre
las
rejillas
de
calor o
anexos
de
calentamiento
del
horno,
esto
causara
que
los
alimentos
se quemen
y
se estropee
su
cocción
logrando
así
el
daño
permanente
del
horno.
Summary of Contents for CP43539
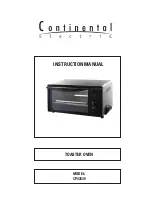
Page 1: ...MODEL CP43539 INSTRUCTION MANUAL TOASTER OVEN ...
Page 2: ...Cua incl P A n S d li q a T e E p e d S c A o E A d E f i p d T C a n ...
Page 3: ...3 BROILING cooking book dial multi use pan ...
Page 4: ...1 2 3 4 5 6 7 8 V P C M P A N p ol d d 1 2 3 ...
Page 6: ... ...
Page 8: ...and re e it ays hen his er ...
Page 10: ...MODEL CP43539 MANUAL DE INSTRUCCIONES HORNO TOSTADOR ...
Page 12: ...3 BRO ...

