3
Wall Mounting
1.
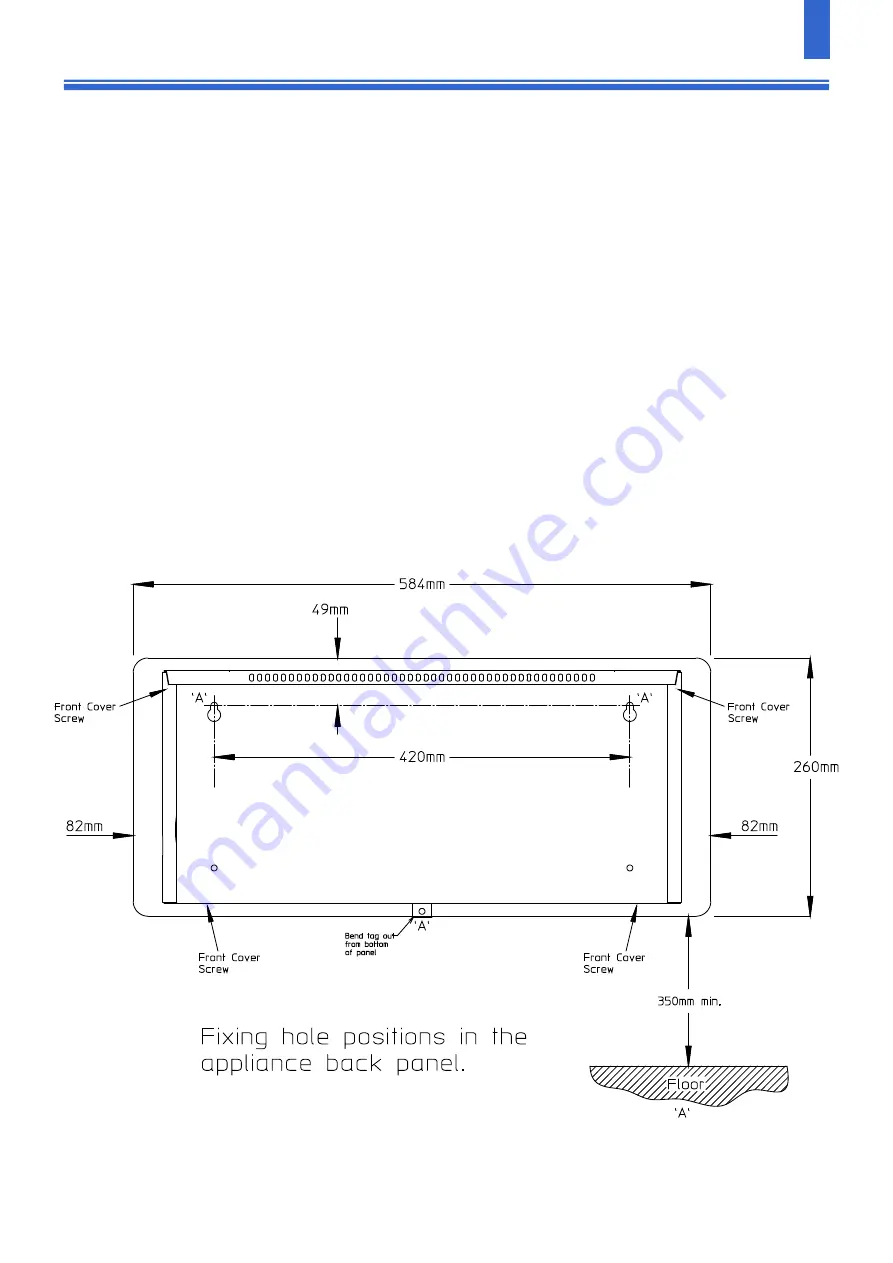
Remove the front cover (2 screws on the side and 2 screws on the bottom).
2.
Mark top 2 screw fixing positions ‘A’ in accordance with the dimension shown on the diagram. The
unit must be screwed to the wall with 3 screws through the holes provided in the case. Drill 2 holes in
the wall to suit No 10 wood screws (round head) and insert wall plugs. At the top 2 screw positions
‘A’ screws can now be screwed in until the heads are approximately 5mm from the wall. The unit
can now be hung on these two screws and the position of the third bottom fixing marked on the
wall. Remove the unit from the wall and drill a third fixing hole in the position marked and insert a
wall plug. The unit can now be hung on the wall and the third screw screwed in. Before tightening
all three screws ensure the unit is horizontal.
3.
Refit front cover. Ensure grille bars internal/external are spaced equally.
OPTIMUM MOUNTING HEIGHT IS 400mm FROM THE FLOOR.
NOTE:
- MINIMUM CLEARANCE FROM THE FLOOR IS 200mm.
- IF THE HEATER IS MOUNTED AT HIGH LEVEL, THE MINIMUM DISTANCE FROM THE CEILING IS 1000mm.
- THE HEATER MUST NOT BE LOCATED IMMEDIATELY BELOW A FIXED SOCKET OUTLET.
58000388 Iss 02


