


“Screen keeper” screen lock
Version 07/11
Item no. 97 55 90
Clip
Item no. 97 55 92
Card
Intended use
1.
The product is intended for locking your personal computer (PC) when you are away from the PC and unlocking when
you are back. The dongle is powered by a USB port and the remote is powered by a button cell battery type CR2025
(97 55 92) / CR2032 (97 55 90).
For safety and approval purposes (CE), you must not rebuild and/or modify this product. If you use the product for
purposes other than those described above, the product may be damaged. In addition, improper use can cause hazards
such as short circuiting, fire, electric shock etc. Read the instructions carefully and keep them. Make this product
available to third parties only together with its operating instructions.
Delivery content
2.
Remote (clip for 97 55 90 / card for 97 55 92)
•
Dongle
•
CD (software and supplier’s operating instructions)
•
Operating instructions
•
Safety instructions
3.
Read the operating instructions carefully and especially observe the safety information. If you do
not follow the safety instructions and information on proper handling in this manual, we assume
no liability for any resulting personal injury or damage to property. Such cases will invalidate the
warranty/guarantee.
Persons / Product
The device is not a toy. Keep it out of the reach of children and pets.
•
Do not leave packaging material lying around carelessly. These may become dangerous playing material for
•
children.
Protect the product from extreme temperatures, direct sunlight, strong jolts, high humidity, moisture, flammable
•
gases, vapours and solvents.
Do not place the product under any mechanical stress.
•
If it is no longer possible to operate the product safely, take it out of operation and protect it from any accidental use.
•
Safe operation can no longer be guaranteed if the product:
is visibly damaged,
-
is no longer working properly,
-
has been stored for extended periods in poor ambient conditions or
-
has been subjected to any serious transport-related stresses.
-
Please handle the product carefully. Jolts, impacts or a fall even from a low height can damage the product.
•
Also observe the safety and operating instructions of any other devices which are connected to the product.
•
(Rechargeable) batteries
Correct polarity must be observed while inserting the (rechargeable) battery.
•
The (rechargeable) battery should be removed from the device if it is not used for a long period of time to avoid
•
damage through leaking. Leaking or damaged (rechargeable) batteries might cause acid burns when in contact with
skin, therefore use suitable protective gloves to handle corrupted (rechargeable) batteries.
(Rechargeable) batteries must be kept out of reach of children. Do not leave (rechargeable) batteries lying around,
•
as there is risk, that children or pets swallow them.
(Rechargeable) batteries must not be dismantled, short-circuited or thrown into fire. Never recharge non-
•
rechargeable batteries. There is a risk of explosion!
Miscellaneous
Consult an expert when in doubt about operation, safety or connection of the device.
•
Maintenance, modifications and repairs are to be performed exclusively by an expert or at a qualified shop.
•
If you have questions which remain unanswered by these operating instructions, contact our technical support
•
service or other technical personnel.
Operating elements (item no. 97 55 92)
4.
1
2
3
4
On / off switch (the side with the dot is the “ON” position)
1.
Status LED
2.
Battery compartment
3.
Effective distance adjustment switch:
4.
·
1 – 3 m
· ·
4 – 7 m
· · ·
8 – 12 m
Battery replacement
5.
The battery has been inserted before delivery, replace the battery when
the battery level is low.
For item no. 97 55 90 (clip)
When the remote is not functioning with the correct operating procedures, it is possible
1.
that the battery level is low.
Unscrew the screw at the back with a Phillips head screw driver.
2.
Replace the battery with a new battery of type CR2032 while observing the correct
3.
polarity, with the positive side facing upwards.
Close the battery compartment while making sure the insertion is fitted into the locator
4.
slot.
Fasten the battery cover with the screw.
5.
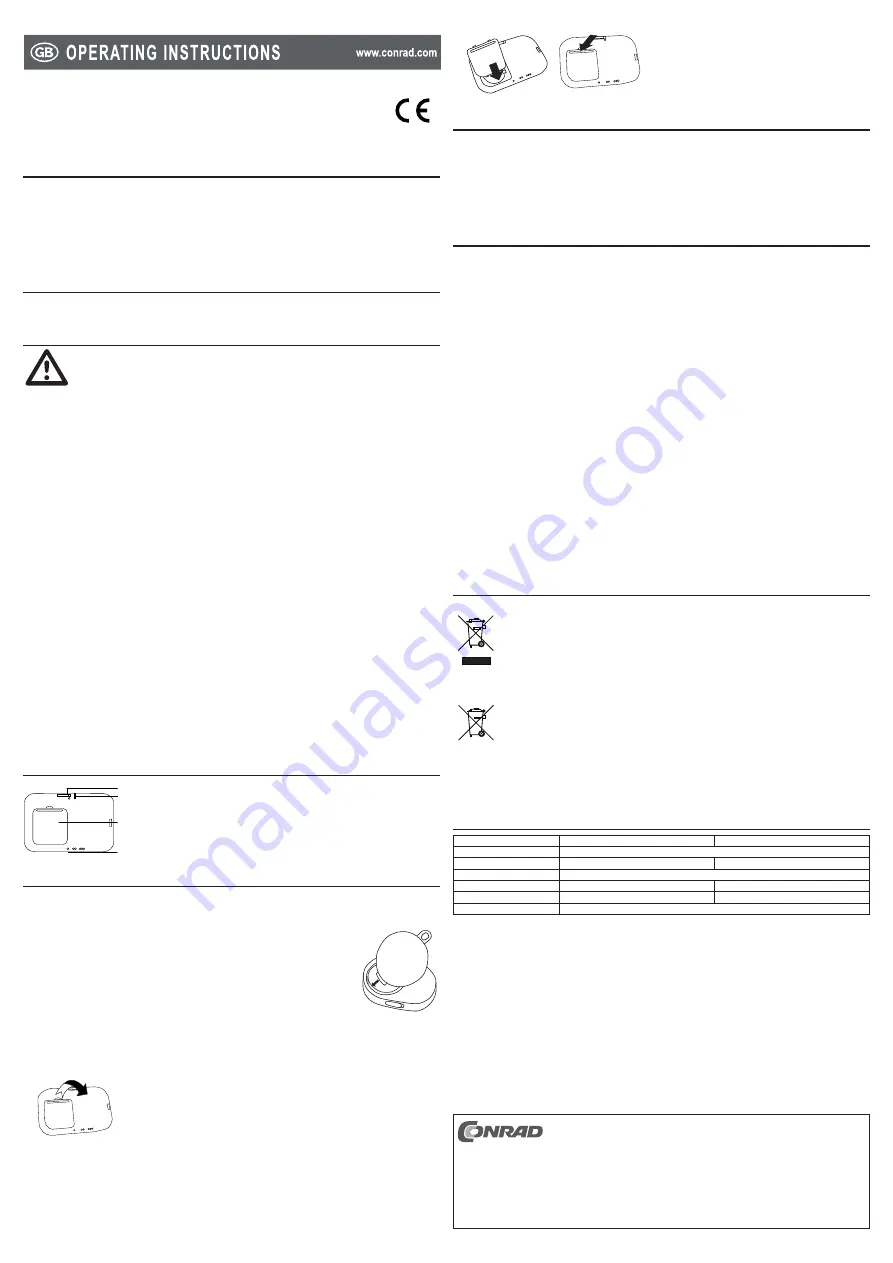
For item no. 97 55 92 (card)
When the status LED lights up in red, the battery level is low.
1.
Flip to open the battery compartment at the back of the remote.
2.
Replace the battery with a new battery of type CR2025 while observing the correct polarity, with the positive side
3.
facing upwards.
To close the battery compartment, insert the lower part of the battery compartment cover into the slot, followed by
4.
the upper part.
Software installation
6.
Insert the CD into your personal computer (PC).
1.
Open the CD-ROM drive and enter the directory “1.SCREENKEEPER Install SW”
2.
Open the executable file “setup.exe” by double clicking on it.
3.
Click the button “Next” to start installation.
4.
If you want to choose the installation location, click the button “Browse” and select the desired location. Otherwise,
5.
a default location will be used. Click the button “Install” to continue the installation.
Check the check box “Run ScreenKeeper” and click the button “Finish” to complete installation.
6.
Operation
7.
Make sure the program “ScreenKeeper” is running. Check in your system tray, as the “ScreenKeeper” icon will be
1.
shaded grey when the dongle is not inserted into your PC.
On the first run of the program “ScreenKeeper”, you are required to enter a password, and confirm it by re-entering it
2.
in the second password box. Then click the button “OK” to confirm. You can set a new password any time afterwards
by right-clicking the “ScreenKeeper” icon in the system tray and selecting “new password”.
To set the lead time for the screen lock, right click the “ScreenKeeper” icon in the system tray, choose “Option”.
3.
Select the “LEAD TIME FOR SCREEN LOCK” from “5 – 9 sec”. The default value is 5.
4.
Enter the “LEAD TIME FOR SCREEN UNLOCK” from 0 – 9 seconds. The default value is 0.
5.
To turn off the monitor of the PC while it is locked for a certain period of time, click the check box “Selection for
6.
Energy Saving Mode” and enter the time interval to turn off the monitor after locking the screen.
To use the screen saver, check the box “Enable” below the “Screen Saver” section and select “Time Out” from the
7.
drop-down menu. Click on the box “Password Protection” if you want password protection after the screen saver.
Turn on the remote by sliding the on/off switch to the “ON” position. For item no. 97 55 90, the status LED flashes
8.
once when it is turned on.
Plug the USB dongle into a vacant port of the PC.
9.
Check if the screen lock function is working properly by switching the remote off. To switch it off, slide the on/off
10.
button away from the “ON” position.
Turn it on again if it is working properly. Wear / take the remote with you during the operation. If it is not working, right
11.
click the “ScreenKeeper” icon on the system tray and select “Restart”.
When you are out of the effective distance (for item no. 97 55 90, it is 4 – 9 m), your PC will be locked after a few
12.
seconds (depending on your setting in step 4). For item no. 97 55 92, slide the distance adjustment switch to change
the effective distance.
When you go back into the effective distance again, your PC will be unlocked immediately / after a few seconds
13.
(depending on your setting in step 5).
If you are away from your computer for more than one hour, the remote will enter its sleep mode. Turn the remote
14.
off and then on to reactivate the remote.
Always turn the remote off when it is not used.
15.
Disposal
8.
General
In order to preserve, protect and improve the quality of environment, protect human health and utilise
natural resources prudently and rationally, the user should return unserviceable product to relevant
facilities in accordance with statutory regulations.
The crossed-out wheeled bin indicates the product needs to be disposed separately and not as municipal
waste.
Batteries / rechargeable batteries
The user is legally obliged
(battery regulation)
to return used batteries and rechargeable batteries.
Disposing used batteries in the household waste is prohibited!
Batteries/ rechargeable batteries
containing hazardous substances are marked with the crossed-out wheeled bin. The symbol indicates
that the product is forbidden to be disposed via the domestic refuse. The chemical symbols for the
respective hazardous substances are
Cd
= Cadmium,
Hg
= Mercury,
Pb
= Lead.
You can return used batteries/ rechargeable batteries free of charge to any collecting point of your local
authority, our stores or where batteries/ rechargeable batteries are sold.
Consequently you comply with your legal obligations and contribute to environmental protection!
Technical data
9.
Item no. 97 55 90
Item no. 97 55 92
System requirement:
Windows® XP (32 bits), 7 (32 / 64 bits), Windows® Vista™ (32 bits)
Operating voltage:
3 V/DC, button cell type CR2032
3 V/DC, button cell type CR2025
Connection:
USB 2.0
Dimensions (W x H x D):
14 x 5.4 x 19 mm
67 x 5.2 x 41 mm
Weight (remote):
7.6 g
13.5 g
Weight (dongle):
1.7 g
These operating instructions are published by Conrad Electronic SE,
Klaus-Conrad-Straße 1, D-92240 Hirschau/Germany.
All rights including translation reserved. Reproduction by any method, e.g. photocopy,
microfilming, or the capture in electronic data processing systems require the prior written
approval by the editor. Reprinting, also in part, is prohibited.
The operating instructions reflect the current technical specifications at time of print.
We reserve the right to change the technical or physical specifications.
© 2011 by Conrad Electronic SE.
V4_0711_02-HL