35
USING THE REMOTE CLIENT
USING THE REMOTE CLIENT
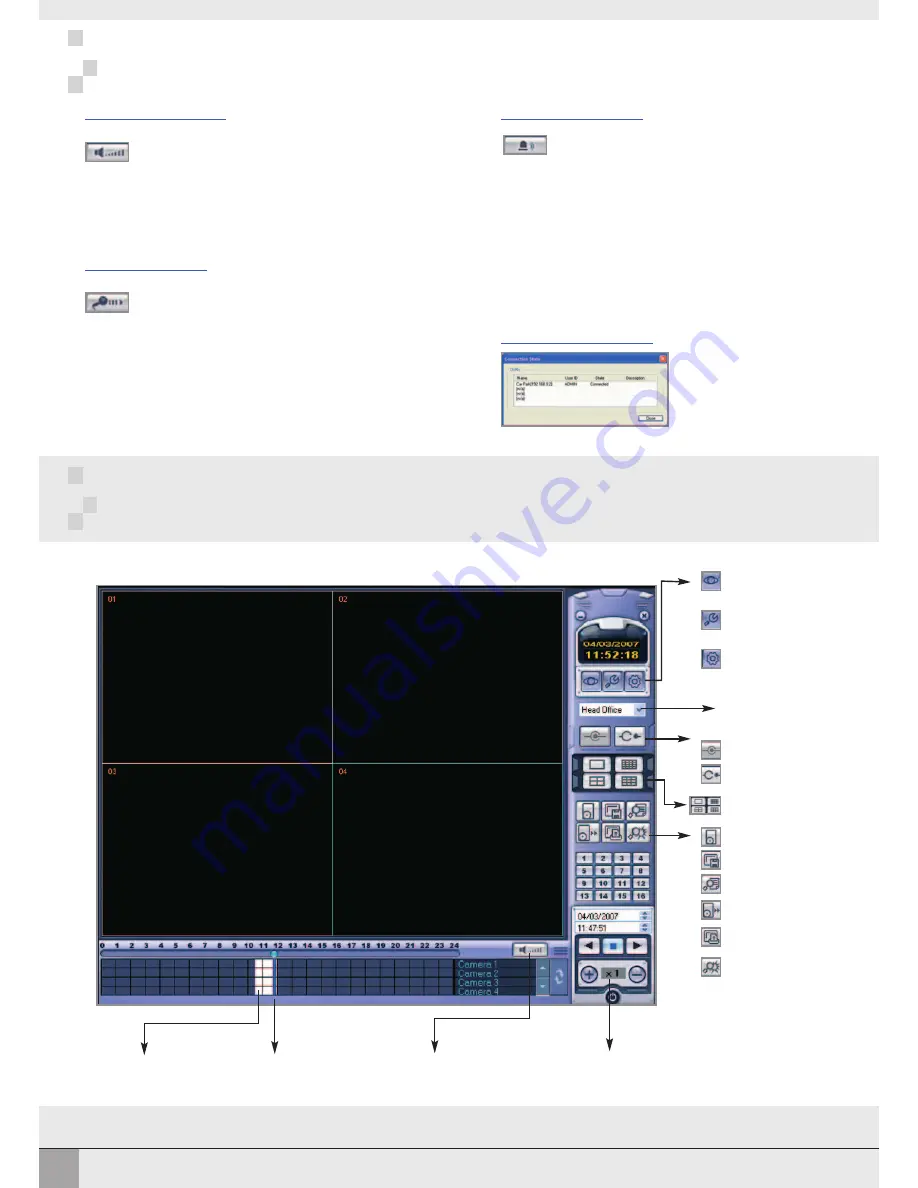
REMOTE CLIENT PLAYBACK
REMOTE CLIENT PLAYBACK
LIVE
button to switch to live
view
SETUP
button to configure
VXM4 connections
VXM4 SETUP
button to
adjust VXM4 settings
remotely
DROP DOWN LIST
to
select a VXM4 connection
CONNECT
button
DISCONNECT
button
DISPLAY
buttons to choose
1,4,9 or 16 screen display
ARCHIVE
button
SNAPSHOT
button
EVENT SEARCH
button
BACKUP PLAYER
button
button
CURRENT EVENT LOG
button
TIMELINE
display
CURSOR
AUDIO
control
REMOTE CLIENT PLAYBACK CONTROLS
PLAYBACK
control
AUDIO MONITORING
AUDIO TALKBACK
ALARM TRIGGERING
CONNECTION STATUS
During a remote client session, the operator can
monitor audio connected to the VXM4.
Click the
AUDIO
button to toggle live audio on or off
During a remote client session, the operator can
‘talkback’ to the VXM4. During talkback, audio is
routed through the
AUDIO OUT
connector on the
rear of the VXM4
To talkback, click and hold the
TALKBACK
button
and speak normally in to the microphone
A suitable microphone must be connected
to the PC for audio talkback to function.
Suitable speakers must be connected to
the PC for audio monitoring to function.
Alarm outputs at the rear of the VXM4 can be
triggered remotely by the operator.
On the 4 channel VXM4. Click any of the channel
displays and click the
ALARM
button. ‘A’ is
displayed on all 4 displays and the relay output on
the VXM4 is activated. Click
ALARM
again to
deactivate the relay.
On the 8 & 16 channel VXM4. Click the appropriate
channel display and click the
ALARM
button. ‘A’ is
displayed on the selected channel display and the
corresponding alarm output on the VXM4 is
activated. Click
ALARM
again to deactivate.
During a remote client
session, the operator can
check the connection status
of the entire group by
clicking the
STATUS
button
Summary of Contents for VXM4-16
Page 49: ...46 NOTES NOTES...
Page 50: ...47 NOTES NOTES...
Page 51: ...48 NOTES NOTES...
Page 52: ......


