159
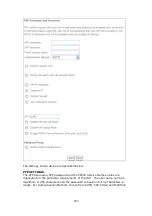
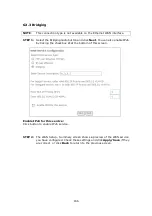
MTU
Maximum Transmission Unit. The size (in bytes) of largest protocol data unit which
the layer can pass onwards. This value is 1492 for PPPoE.
ENABLE PPP Manual MODE
Use this button to manually connect/disconnect PPP sessions.
ENABLE PPP DEBUG MODE
When this option is selected, the system will put more PPP connection information
into the system log. This is for debugging errors and not for normal usage.
BRIDGE PPPOE FRAMES BETWEEN WAN AND LOCAL PORTS
(This option is hidden when PPP IP Extension is enabled)
When Enabled, this creates local PPPoE connections to the WAN side. Enable this
option only if all LAN-side devices are running PPPoE clients, otherwise disable it.
The VI-3223u supports pass-through PPPoE sessions from the LAN side while
simultaneously running a PPPoE client from non-PPPoE LAN devices.
ENABLE IGMP MULTICAST PROXY
Tick the checkbox
to enable Internet Group Membership Protocol (IGMP)
multicast. This protocol is used by IPv4 hosts to report their multicast group
memberships to any neighboring multicast routers.
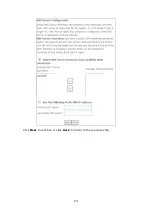
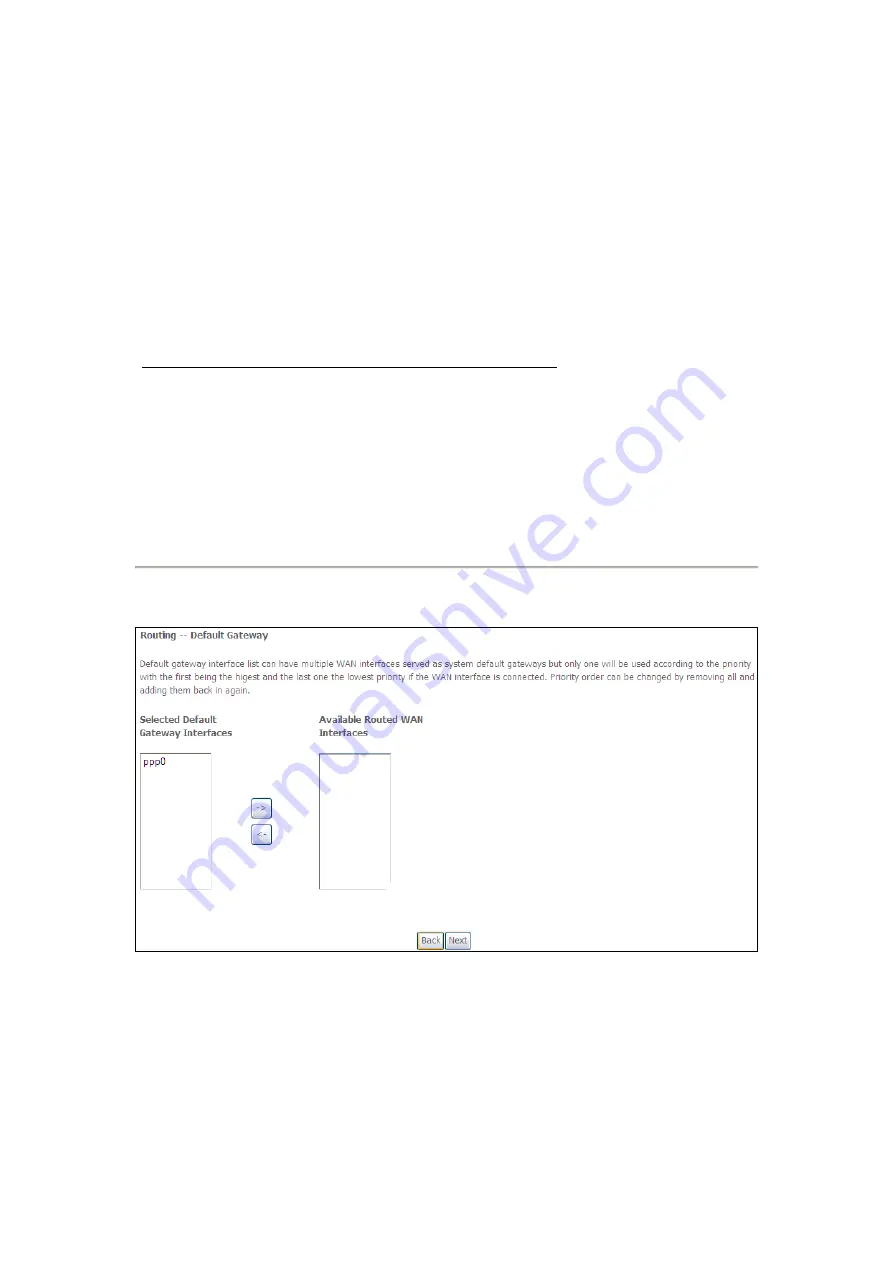
STEP 3:
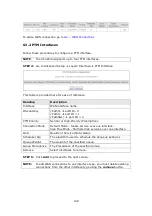
Choose an interface to be the default gateway.
Click
Next
to continue or click
Back
to return to the previous step.
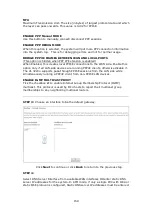
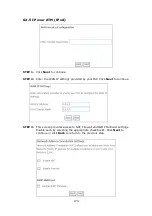
STEP 4:
Select DNS Server Interface from available WAN interfaces OR enter static DNS
server IP addresses for the system. In ATM mode, if only a single PVC with IPoA or
static IPoE protocol is configured, Static DNS server IP addresses must be entered.
Summary of Contents for VI-3223u
Page 1: ...VI 3223u Multi DSL WLAN IAD User Manual Version B1 0 July 19 2013 261099 020...
Page 7: ...6 1 2 Application The following diagram depicts a typical application of the VI 3223u...
Page 16: ...15 STEP 3 After successfully logging in for the first time you will reach this screen...
Page 26: ...25...
Page 32: ...31 Chapter 5 Advanced Setup The following screen shows the advanced menu options...
Page 67: ...66 5 11 UPnP Select the checkbox provided and click Apply Save to enable UPnP protocol...
Page 72: ...71 5 15 1 Storage Device Info Display after storage device attached for your reference...
Page 74: ...73 Automatically Add Clients With Following DHCP Vendor IDs...
Page 98: ...97 Click Apply Save to set new advanced wireless options...
Page 103: ...102 7 1 SIP Basic Setting 7 1 1 Global Parameters A common parameter setting...
Page 104: ...103 7 1 2 Service Provider This screen contains basic SIP configuration settings...
Page 106: ...105 7 2 SIP Advanced This screen contains the advanced SIP configuration settings...
Page 107: ...106 7 2 1 Global Parameters A common parameter setting...
Page 172: ...171 Click Next to continue or click Back to return to the previous step...


