background image

4

'"

$

&

.,

)

%

0

'2

'"

$

&

.,

)

%

0

'2

5.1 Add Photos 

In the “Browse for Images” window, select the storage directory and the target folder for 

storage, and then the photos will be shown on the “Browse for Images” window. Select the 

desired photo, and a blue box will be shown around the photo. In addition, the selected photo 

will be displayed on the “Preview” window; select 

 button to add the 

photo to the “New Collection Panel” window. 

Note

(1) Before adding photos, the “Photos on Device” window displays items for selection. When 

no selection is made, the added photo will be automatically cut into the size fitting for digital 

photo frame’s screen. When selecting the option of “Whole Photo”, the added photo will be 

completely displayed in all images, and the unoccupied place will be in black. 

(2) Press “CTRL” button, and left click the mouse to choose more than one photos. 

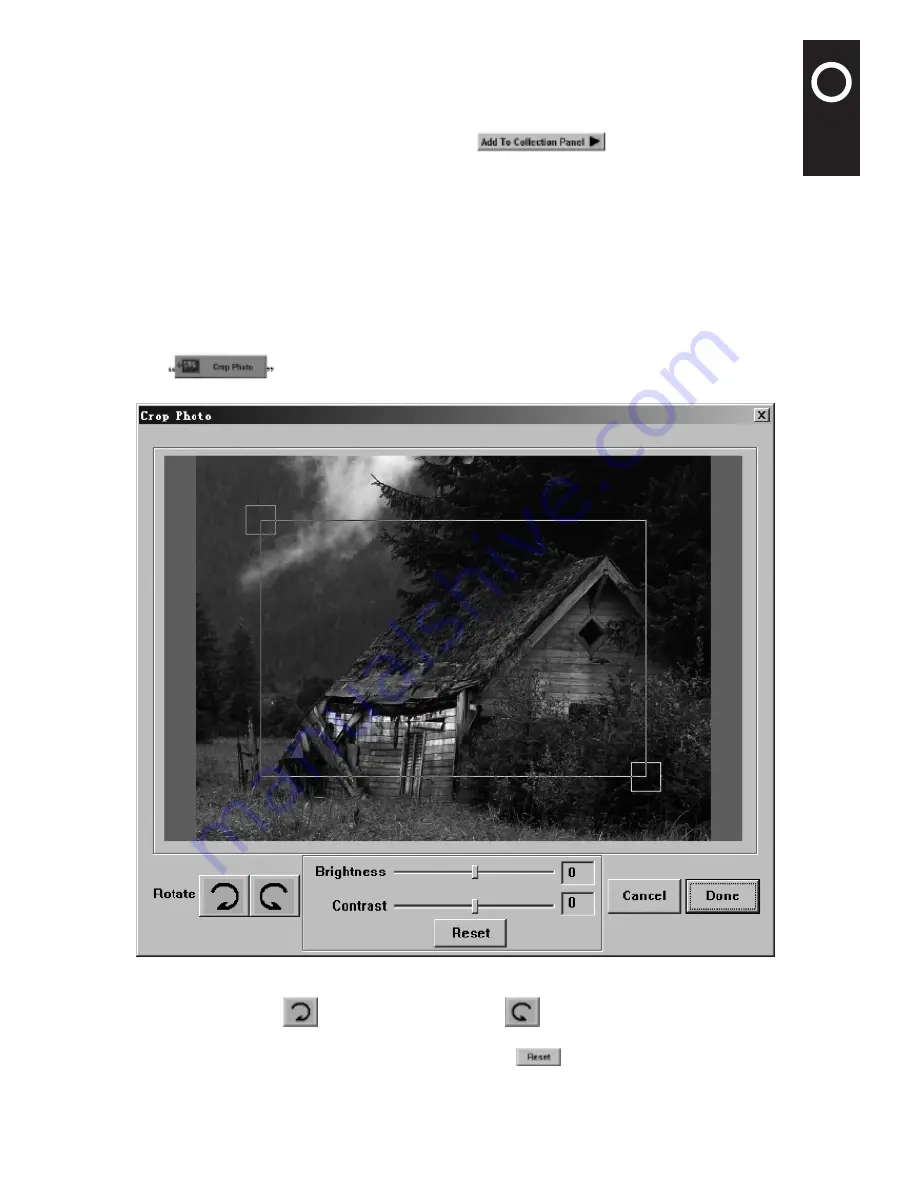
5.2 Crop Photos 

Click 

  button to open the “Crop Photo” window (Figure 2) where you can crop 

the selected photos. 


Figure 2

•  Click the clockwise 

 button and anticlockwise 

 button to rotate the photos;

•  Drag the brightness sliding block to adjust the photo’s brightness, drag the contrast  

sliding block to adjust the photo’s contrast, and click


button to resume the original 

brightness and contrast of the photos. 

•  In the Photo Viewer, the rectangle selection box will be shown in the “Crop Photo” window. 

Summary of Contents for pf 10.002 HEART

Page 1: ...05 DIAMOND Design and specifications subject to change without further notice www compositor com User s Guide Benutzerhandbuch Mode d emploi Handleiding Guida dell utente Gui del usuario Moldura Digit...

Page 2: ...han two photos in the device press Auto Play button to enter the auto play mode When performing auto play press Auto Play again to stop Previous Delete One Backward by hand After the digital photo fra...

Page 3: ...n a shortcut icon will be shown on the screen 5 Software Interface and Photo View After the software is installed correctly and the digital photo frame is connected to the computer through USB cable t...

Page 4: ...the size fitting for digital photo frame s screen When selecting the option of Whole Photo the added photo will be completely displayed in all images and the unoccupied place will be in black 2 Press...

Page 5: ...opping photos and add the cropped photos to the New Collection Panel window Then press button to exist 5 3 Management of New Collection Panel Window The added photos are managed via the New Collection...

Page 6: ...button to download photos to the digital photo frame The Download Program window will display the download progress As shown in Figure 5 after downloading the window will disappear Figure 5 5 5 Photo...

Page 7: ...r corner to exit the Photo Viewer And then pull out USB cable 6 Battery Charge Connect the digital photo frame to the computer by inserting the USB cable to the USB port for charging When the battery...

Page 8: ...cards LCD screen is fragile please keep away from any impact moisture and heat Only use a soft dry cotton to clean the screen Guarantee This Compositor Digital Photo Frame is guaranteed against defec...

Page 9: ...en genie en Fangen Sie Ihre sch nsten Erinnerungen ein Geniet van het leven beleef die mooie momenten opnieuw Godi la vita rivivi i tuoi momenti meravigliosi Disfruta de la vida captura tus momentos m...

Reviews: